


Returns Ready Layouts That Meet Carrier Rules
Returns are part of modern retail. They do not have to be messy.
A good returnable paper mailer gives the customer a simple way to open, reseal, and send an item back without hunting for tape, damaging the bag, or covering half the parcel in labels. For the retailer, it means cleaner reverse logistics, easier checking, and fewer refund delays caused by badly sealed or poorly labelled returns.
This guide is about returns-ready paper mailing bags and the layout choices that make them work. Not first-pass labelling. Not carrier banding. Just tear strips, second seals, label zones, and practical design details that help returns move more smoothly.

What Makes A Paper Mailing Bag Suitable For Returns?
A paper mailing bag is returns ready when it supports both journeys: the outbound order and the customer’s return.
That means the bag should:
- Open cleanly without destroying the whole pack.
- Have a second seal the customer can use easily.
- Leave enough clear space for a return label.
- Keep old labels from causing confusion.
- Protect the product on the return journey.
- Give simple instructions without cluttering the design.
- Be easy for your team to process when it comes back.
Returnable paper mailers are not only useful for high-return sectors. Any brand that sells clothing, accessories, homeware, stationery, gifts, or size-sensitive products can benefit from a smoother returns process.
Even lower-volume brands can feel the difference. One awkward return may not sound dramatic, but it can still slow a refund, frustrate a customer, and create extra work for your team.
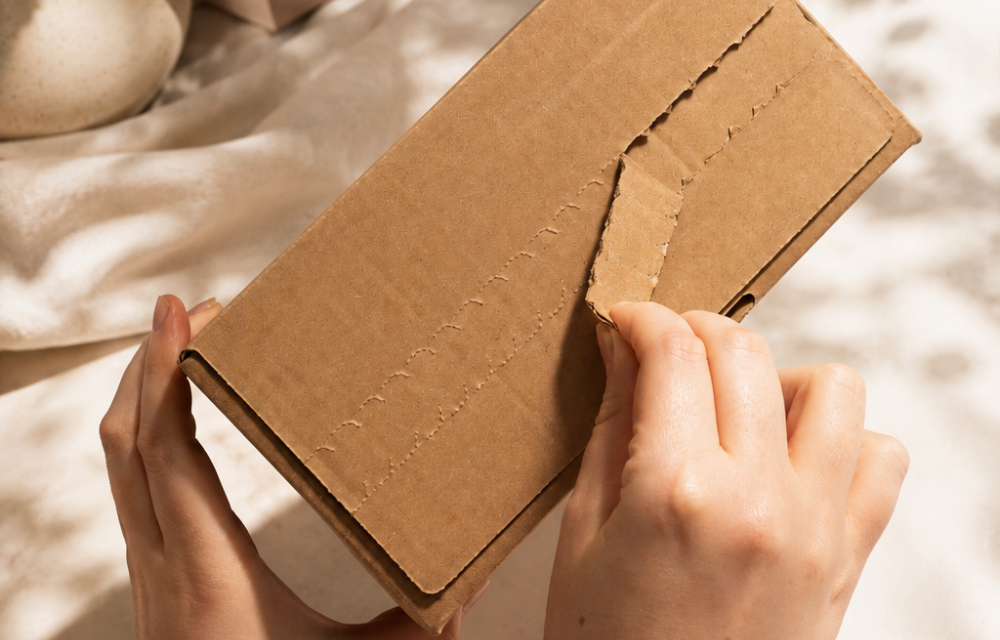
Tear Strips: Easy Opening Without Wrecking The Bag
Tear strip mailer bags are designed to help customers open the parcel cleanly. Instead of cutting the bag with scissors or ripping through the top edge, the customer pulls the strip and opens the pack in a controlled way.
Used well, a tear strip can:
- Improve the unboxing experience.
- Reduce the chance of product damage during opening.
- Keep the rest of the bag usable for a return.
- Show the customer where to open the parcel.
- Reduce messy ripped edges.
The position matters. If the tear strip cuts through the area needed for resealing, or damages the clean surface needed for the return label, it can create problems later.
For returns-ready layouts, the opening strip should sit away from the second seal and away from the main label zone. A lovely clean tear is only useful if the bag still has a second life afterwards.
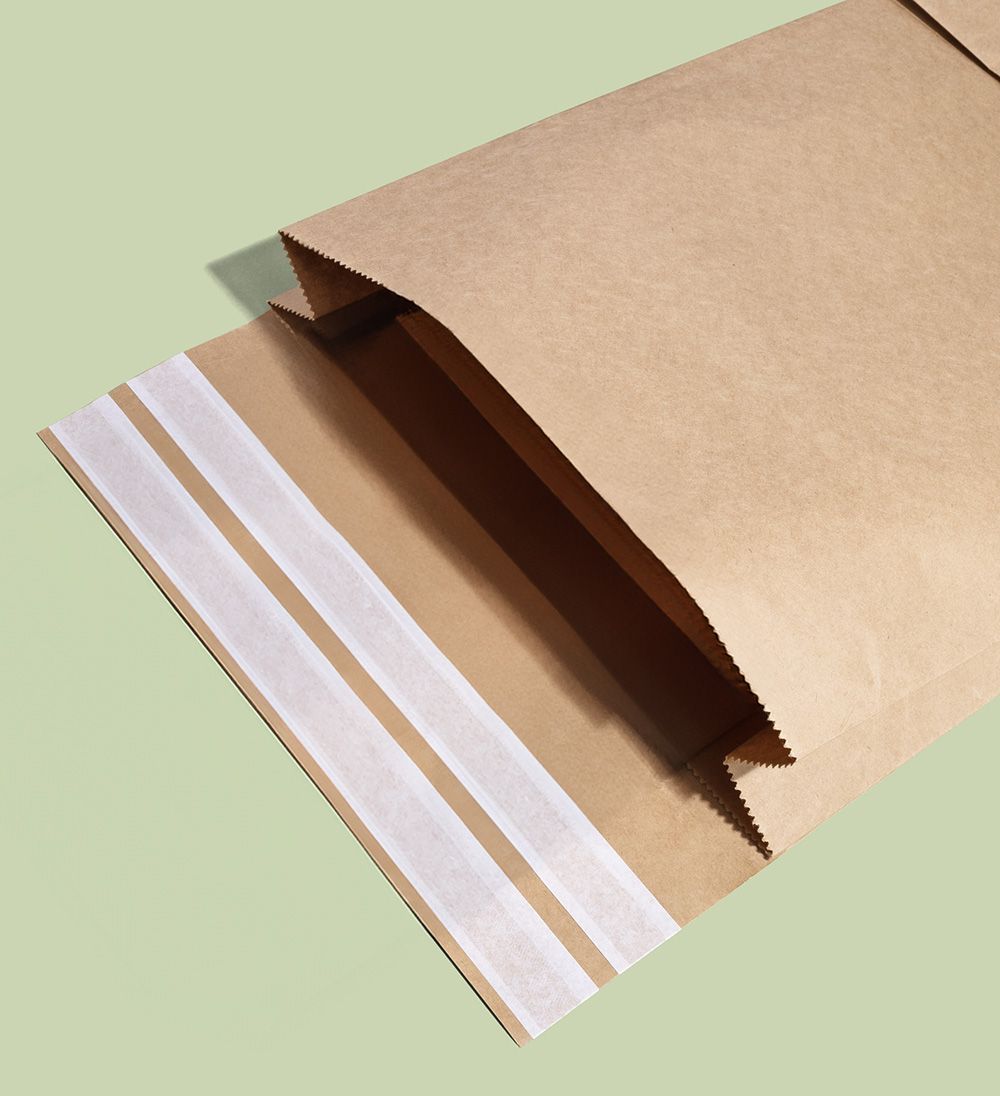
Second Seals: Helpful, But Not Foolproof
Double seal paper mailing bags give the customer a second adhesive strip for returns. The first seal is used when you send the order out. The second seal is saved for the customer if they need to send it back.
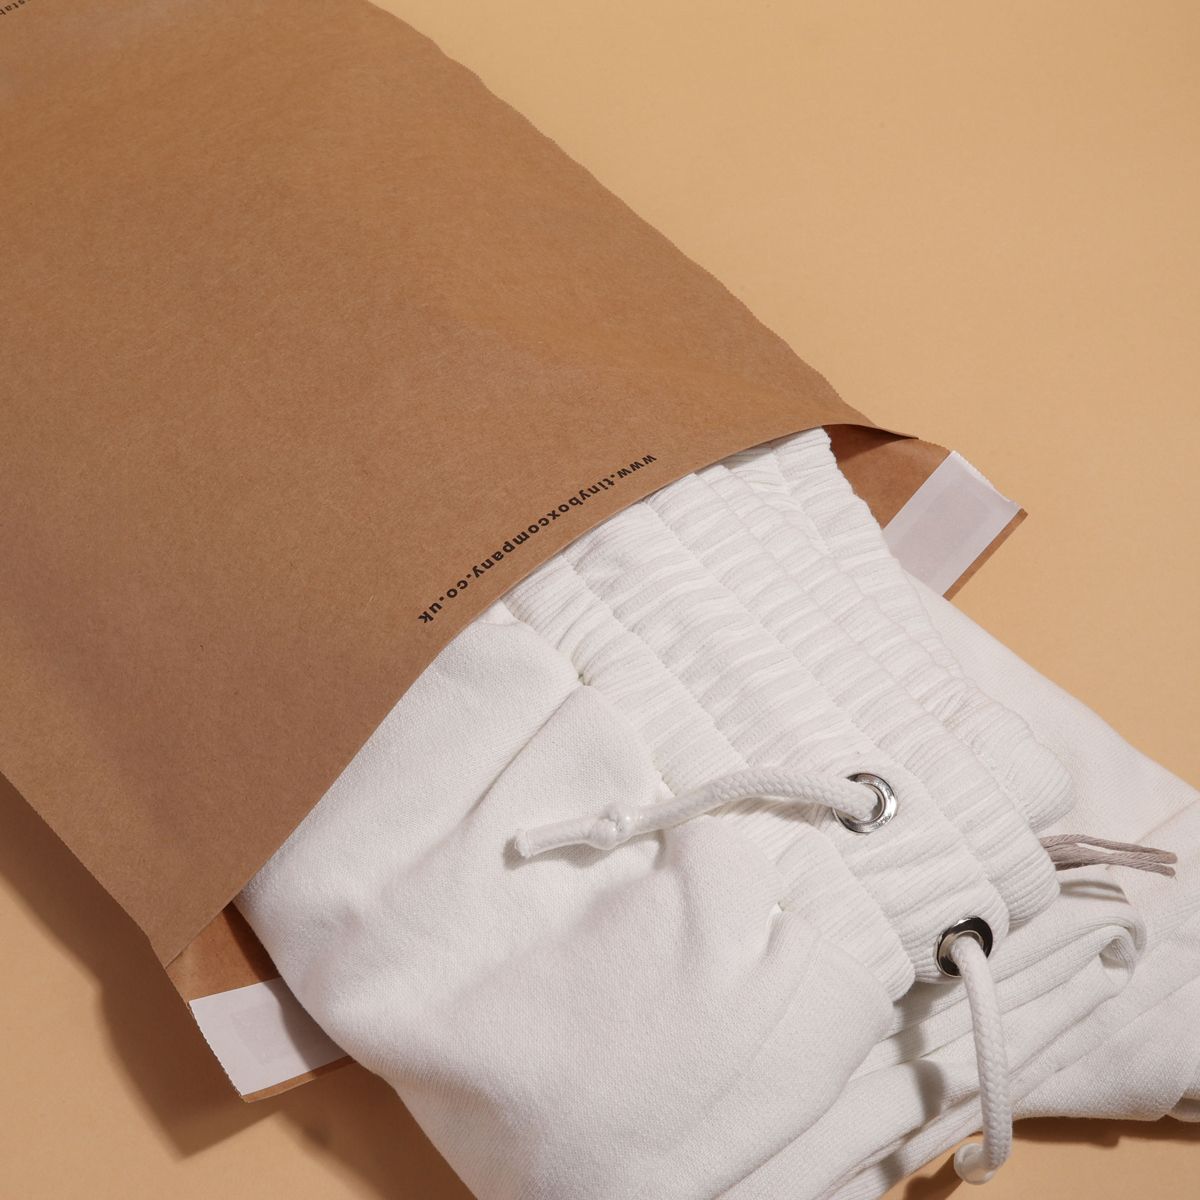
This can make returns much easier, especially for paper mailing bags for clothes, where customers may be trying on different sizes and sending one item back.
A second seal helps because it:
- Removes the need for extra tape.
- Makes the return look tidier.
- Reduces the chance of the bag opening in transit.
- Gives the customer a clear return method.
- Helps your team receive a cleaner pack.
But a second seal does not make returns foolproof. The customer still needs to open the bag correctly, place the item back inside neatly, remove or cover old labels, and use the right return label.
That is why layout and instructions matter. A second seal is the feature. A clear workflow is the win.
Protect A Clean Label Zone
Label space is one of the most important parts of carrier compliant returns packaging.
Carriers need the label to be readable and scannable. Evri says the label should sit flat, be clearly visible, and not bend around corners. Post Office guidance also says return or pre-paid label barcodes should be visible, old labels and barcodes should be removed or covered, and labels should not be folded over edges.
For paper mailer bags, this means planning two label moments:
| Label Moment | What The Bag Needs |
|---|---|
| Outbound label | A flat, clean area where the despatch label can sit without creases, seams, or folds. |
| Return label | A second usable area, or clear instruction for covering the outbound label fully. |
The return label should not have to sit across a crumpled flap, torn edge, gusset fold, or old barcode. If the customer has to guess where to put it, the layout is doing too little work.
Where Should The Return Label Sit?
The simplest answer is: on the largest, flattest, cleanest area of the sealed return pack.
For many paper mailer bags, that means the front face. If the outbound label already sits there, the return process should make it clear whether the customer should place the return label directly over the outbound label or use a separate marked zone.
A good return label zone should be:
- Flat.
- Easy to find.
- Away from the tear strip.
- Away from the second seal.
- Away from seams and folded corners.
- Large enough for the carrier label.
- Clear of heavy branding or important instructions.
Printed paper mailing bags can help here. A subtle “Place return label here” panel or icon can make the customer journey simpler without shouting over your brand design.
Keep Instructions Clear, But Not Cluttered
Returns instructions should be easy to follow at the exact moment the customer needs them.
They do not need to cover the whole bag.
Good instruction placement includes:
- A small line near the tear strip showing where to open.
- A short note near the second seal explaining how to reseal.
- A clear return label zone.
- A printed reminder to cover or remove the original label, if your process requires it.
- A QR code or insert for the full returns process, if needed.
Avoid putting key instructions where the outbound label will cover them. Also avoid placing them on areas likely to be torn off during opening.
Custom paper mailing bags can be useful for this because the layout can be designed around your actual returns process. Tiny instruction, huge relief. Very on-brand.
Bag Opening Should Not Destroy The Return Journey
If the customer has to rip through the bag to get the product out, the return journey is already wobbling.
A returns-ready bag should open in a way that preserves:
- The second seal.
- Enough bag depth to hold the product again.
- A flat face for the return label.
- The customer instructions.
- The product protection.
- The overall pack shape.
This is especially important for paper mailing bags for clothes. Clothing returns are often opened quickly, tried on, folded back up, and sent back in the same packaging. If the opening method destroys the top edge or removes the reseal strip, the customer may reach for household tape, and the returned pack may arrive looking like it lost a small argument with a cupboard drawer.
Which Products Benefit Most From Returnable Paper Mailers?
Returnable paper mailers are useful when customers may need to inspect, try, compare, or exchange the item.
They work especially well for:
- Clothing.
- Soft accessories.
- Footwear accessories.
- Home textiles.
- Lightweight gifts.
- Stationery sets.
- Beauty accessories.
- Subscription products.
- Size-sensitive items.
- Products often bought in multiple options.
Paper mailer bags are less suitable when the item needs rigid corner protection, crush resistance, or a fixed internal structure. In those cases, a box or board-backed format may be more suitable for both outbound and return journeys.
Returns-Ready Layout Examples
| Layout Type | Best For | Watch-Out |
|---|---|---|
| Tear strip + second seal | Clothing, accessories, and soft goods. | Tear strip must not damage the return seal. |
| Second seal only | Brands that want simple resealing without a full opening feature. | Customer may still rip the bag badly if opening is unclear. |
| Printed return label zone | Brands with regular returns. | Keep the zone clear of seams, folds, and heavy artwork. |
| QR-led return instructions | Brands using online return portals. | QR code must not be covered by the outbound label. |
| Plain returnable mailer | Smaller brands testing returns flow. | Include an insert or clear email instructions. |
The best layout is the one your customer can understand in ten seconds.
Are Returns-Friendly Features Worth The Cost?
They can be, especially when returns already take up team time.
Returns-friendly features may add some cost to the bag, but they can reduce hidden costs elsewhere: support emails, damaged returns, delayed refunds, extra tape, repacking time, and customer frustration.
They are worth considering when:
- You sell clothing or size-sensitive products.
- Customers often order multiple sizes or colours.
- You want packaging to feel more considered.
- Your team spends too long sorting messy returns.
- Refund delays are creating customer service pressure.
- You want to avoid adding unnecessary extra return packaging.
The goal is not to make returns exciting. Nobody throws a party for a return label. The goal is to make returns calm, clear, and easy to process.
Test The Return Journey, Not Just The Outbound Pack
Many brands test how the parcel leaves the building. Fewer test how it comes back.
For returns mailing bags UK retailers can rely on, you need to test both directions.
Run this simple test:
| Step | What To Do | What To Check |
|---|---|---|
| 1 | Pack the item as a normal outbound order. | Does the first seal close cleanly? |
| 2 | Apply the outbound label. | Is it flat, visible, and easy to scan? |
| 3 | Open the bag using the tear strip. | Does the opening stay controlled? |
| 4 | Remove and refold the product. | Does the item fit back in without forcing? |
| 5 | Reseal using the second seal. | Does it hold securely without extra tape? |
| 6 | Apply the return label. | Does it sit flat and cover old barcodes if needed? |
| 7 | Handle the pack like a returned parcel. | Does it stay sealed, readable, and tidy? |
| 8 | Process it internally. | Can your team identify, open, and inspect it quickly? |
This test should be done with real products, not just an empty bag. Use the largest size, thickest fabric, and most awkward fold in the range. That is where weak layouts usually show themselves.
Reverse-Logistics Readiness Checklist
Use this checklist before choosing returnable paper mailers in volume.
| Check | Pass Question |
|---|---|
| First seal | Does the outbound seal close cleanly and securely? |
| Tear strip | Can the customer open the bag without damaging the return seal? |
| Second seal | Is the second seal easy to find and use? |
| Return label zone | Is there a flat, clean space for the return label? |
| Barcode clarity | Can old barcodes be removed, covered, or avoided? |
| Instructions | Are opening and resealing instructions clear but not cluttered? |
| Product fit | Does the item fit back inside after the customer has opened it? |
| Bag strength | Does the bag survive both journeys without strain? |
| Internal handling | Can your team process the return quickly? |
| Customer clarity | Would a first-time customer know what to do? |
Choose A Layout That Makes Returns Feel Simple
Returns-ready paper mailing bags are not just bags with extra strips. They are a small workflow printed, folded, and sealed into the pack.
The best layout helps the customer open the bag neatly, reseal it without panic tape, place the return label clearly, and send it back in a way your team can process quickly. Tear strips, second seals, and label zones all help, but only when they are placed in the right order and tested with real products.
For your next step, read our guide to labelling that scans first time.
Explore our paper mailing bags with returns-ready features and test them against your outbound and return workflow before ordering in volume.
FAQs
What Makes A Paper Mailing Bag Suitable For Customer Returns?
A paper mailing bag is suitable for returns when it opens cleanly, reseals securely, leaves space for a clear return label, and protects the product on the return journey.
Do I Need A Second Seal Strip For A Smoother Returns Process?
A second seal strip is not always essential, but it usually makes returns easier. It helps customers reseal the bag without extra tape and can make returned packs tidier.
Where Should The Return Label Sit On A Resealable Mailer?
The return label should sit on the largest, flattest, cleanest surface of the sealed return pack. It should not fold over edges or sit across seams, torn areas, or bulky folds.
Can Tear Strips Damage The Area Needed For Relabelling?
Yes, if they are placed badly. A tear strip should not cut through the second seal, return label zone, or the main flat face needed for relabelling.
Which Products Benefit Most From Returnable Paper Mailers?
Clothing, soft accessories, home textiles, lightweight gifts, and size-sensitive items often benefit most because customers may need to try, compare, or exchange them.
How Do I Test Whether A Mailer Works For The Outbound And Return Journey?
Pack the order, label it, open it using the tear strip, place the item back inside, reseal it with the second seal, apply the return label, and check whether the pack stays tidy, secure, and scannable.
Are Returns-Ready Bags Worth It For Lower-Volume Brands?
They can be. Even lower-volume brands can benefit if returns create customer service work, messy packaging, delayed refunds, or a poor customer experience.