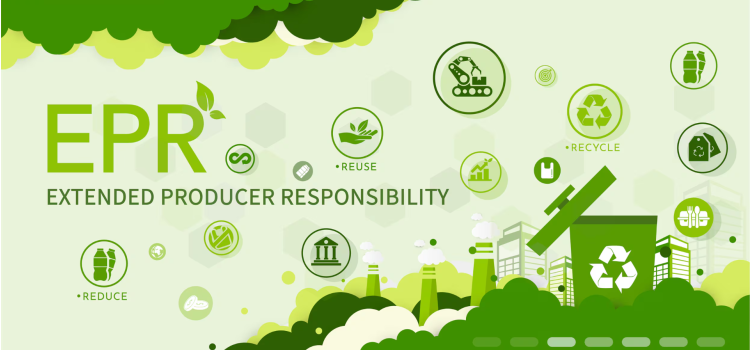
EPR Legislation In The UK: What It Means For Your Packaging
EPR Legislation In The UK: What It Means For Your Packaging
Packaging has always had a job to do. It protects your product, carries your brand, creates that all-important first impression, and, when done beautifully, turns an order into an experience.
Now, it also comes with a little more admin.
Extended Producer Responsibility, usually shortened to EPR, is changing how UK businesses think about packaging. The aim is simple enough: businesses that place packaging on the UK market may need to take more responsibility for what happens to that packaging after it has been used.
The details, however, can feel less simple. Thresholds, packaging classes, reporting periods, nation data, RAM ratings, PRNs. There’s a lot of terminology for something that often starts with a box, a bag, or a mailer.
This guide breaks down what EPR does, who it may affect, what information you may need to collect, and how to start preparing your packaging records with confidence.
Please note: This article provides general information only and is not legal, tax or regulatory advice. Businesses should consult the official GOV.UK EPR guidance or a qualified compliance adviser regarding their own obligations. EPR rules can change, so always check the latest official guidance or speak to a qualified compliance scheme if you’re unsure.
Need packaging that feels considered from the first touch?
Shop Gift Boxes →
What Is EPR Packaging Legislation?
EPR stands for Extended Producer Responsibility.
In plain English, it means that businesses responsible for packaging may need to help cover the cost of dealing with packaging waste. This includes reporting packaging data and, for some larger organisations, paying fees based on the packaging they place on the UK market.
According to GOV.UK’s EPR guidance, the way UK organisations responsible for packaging carry out their recycling responsibilities has changed. If your business is affected, you may need to report packaging data and pay fees based on that data.
The legislation is intended to encourage packaging that is easier to recycle, alongside improved reporting and greater transparency.
In other words, your packaging still needs to look beautiful. It just needs to bring its paperwork with it.
Why Does EPR Matter For Businesses?
EPR matters because packaging is no longer just a purchasing decision. For affected businesses, it can become a reporting, compliance, and cost-planning decision too.
Depending on your business size and packaging activity, EPR may affect:
What packaging data you need to collect.
How often you need to report packaging data.
Whether you need to register with the relevant environmental regulator.
Whether you need to pay fees.
Whether you need to assess how recyclable your packaging is.
How you brief suppliers, manufacturers, and fulfilment partners.
GOV.UK states that affected organisations may need to collect and report data, pay waste disposal fees, pay scheme administrator costs, pay charges to the environmental regulator, obtain PRNs or PERNs, and report nation data, depending on their producer status and activities.
For many brands, this means keeping clearer records of the packaging they use, including material type, weight, packaging class, and how the packaging is supplied.
This does not mean packaging has to become plain, cold, or purely functional. Many businesses are now aiming to balance brand experience, product protection, customer presentation, and responsible material choices.
That’s the sweet spot.
Does EPR Apply To My Business?
EPR may apply if your organisation imports or supplies packaging in the UK and meets certain turnover and tonnage thresholds.
According to GOV.UK guidance on who is affected, you may need to collect and report packaging data for a given year if all of the following apply:
You’re an individual business, subsidiary, or group.
You have an annual turnover of £1 million or more.
You were responsible for importing or supplying more than 25 tonnes of packaging to the UK market in the previous calendar year.
You carry out one or more packaging activities covered by the regulations.
Packaging activities can include:
Supplying packaged goods to the UK market under your own brand.
Placing goods into packaging.
Importing products in packaging.
Supplying empty packaging.
Hiring or loaning reusable packaging.
Owning an online marketplace where non-UK businesses sell goods into the UK.
This means EPR can apply to a wide range of businesses, from product brands and retailers to importers, packaging suppliers, and marketplace operators.
If you’re a smaller business below the turnover or packaging weight thresholds, you may not need to act under EPR. However, it’s still worth understanding the rules, especially if your business is growing, your order volumes are increasing, or you’re starting to sell through new channels.
Small Producers And Large Producers: What Is The Difference?
EPR separates affected organisations into small producers and large producers. This matters because your producer status affects what you may need to collect, report, register for, and pay.
Small Producers:
A small producer is generally an organisation that meets one of the following conditions:
Annual turnover of more than £1 million and up to £2 million, and supplies more than 25 tonnes of packaging in the UK.
Annual turnover of more than £1 million, and supplies more than 25 tonnes but no more than 50 tonnes of packaging in the UK.
GOV.UK’s small producer guidance explains that small producers may need to register with the regulator, pay a fee, and collect and report packaging data.
Small producers usually report data yearly. GOV.UK states that small producers must report data about packaging supplied in the previous calendar year by 1st April of the following year. For example, packaging data for January to December 2025 must be reported by 1st April 2026.
Large Producers:
A large producer is generally an organisation that has:
Annual turnover of £2 million or more.
Responsibility for supplying or importing more than 50 tonnes of packaging in the UK.
Large producers have wider reporting responsibilities. GOV.UK’s reporting periods and deadlines guidance states that large producers must collect and submit packaging data every 6 months.
Large producers may also need to pay waste disposal fees, scheme administrator costs, regulator charges, and meet recycling obligations. GOV.UK’s recycling obligations and waste disposal fees guidance explains that large organisations must fund an equivalent amount of recycling by buying PRNs or PERNs, and that waste disposal fees apply to household packaging, commonly binned packaging, and glass household drinks containers.
Small Producer Vs Large Producer At A Glance
Producer Type
Typical Threshold
Reporting Frequency
Potential Responsibilities
Small Producer
More than £1 million turnover and more than 25 tonnes of packaging, without meeting the large producer threshold.
Usually yearly.
Register, pay a fee, collect and report packaging data.
Large Producer
£2 million or more turnover and more than 50 tonnes of packaging supplied or imported in the UK.
Every 6 months.
Collect and report packaging data, register, pay relevant fees, meet recycling obligations, and assess recyclability where required.
Use this as a guide only. Always check the latest official GOV.UK guidance for your own organisation.
Reviewing your packaging range?
Explore Postal Boxes →
What Counts As Packaging Under EPR?
Packaging is any material used to contain, protect, handle, deliver, or present goods.
That can include obvious items like boxes, bags, mailers, tissue paper, tape, product cartons, sleeves, labels, and inserts. It can also include packaging that is designed to be filled at the point of sale, such as a takeaway cup.
GOV.UK’s packaging data guidance also notes that packaging can make goods look appealing for sale and may display a company’s logo or brand.
This is an important point for brand-led businesses. Your branded box, luxury bag, or printed mailer is not just decoration. It’s part of your customer experience, and it may also form part of your packaging reporting.
Key Packaging Terms Explained
EPR uses specific packaging classes. These are worth getting familiar with, because they help determine how packaging is reported.
Primary Packaging: Primary packaging is the packaging that contains a single sales unit for the final user. For example, a jewellery box, candle box, bottle box, or product carton.
Secondary Packaging: Secondary packaging groups several sales units together. For example, a box that holds multiple individual product boxes.
Shipment Packaging: Shipment packaging is used to send one or more items to a customer. For example, a postal box, mailing bag, or protective outer packaging used for delivery.
Tertiary Packaging: Tertiary packaging is usually used for transport and handling between businesses. For example, pallet wrap, pallets, or bulk transit packaging.
Household Packaging: Household packaging is packaging that is likely to be disposed of by a household or in a public bin. GOV.UK’s household and non-household packaging guidance states that primary and shipment packaging must be classed as household unless it meets specific conditions.
Non-Household Packaging: Non-household packaging is packaging that is not expected to end up in household or public bins. GOV.UK guidance states that secondary and tertiary packaging must be classed as non-household.
Primary and shipment packaging can only be classed as non-household in specific circumstances. If you report primary or shipment packaging as non-household, you must be able to show sufficient evidence and keep that evidence for at least 7 years.
What Data Might You Need To Collect?
The exact data you need depends on whether you’re a small or large producer, and what packaging activities you carry out.
GOV.UK’s packaging data guidance states that affected organisations must collect and report data about packaging supplied within or to the UK market. The guidance also states that data and supporting evidence must be kept for at least 7 years.
In general, affected organisations may need to collect information about:
Packaging activity, meaning how the packaging was supplied.
Packaging type, such as household or non-household.
Packaging class, such as primary, secondary, shipment, or tertiary.
Packaging material.
Packaging weight.
Quantity of packaging supplied.
Nation data, if relevant.
Recyclability assessment data, if relevant.
Materials may include paper and board, fibre-based composite materials, plastic, steel, aluminium, glass, wood, and other material categories.
For practical purposes, this means businesses should start building a clear packaging record. A spreadsheet is often a sensible starting point.
You may want to record:
Product or packaging SKU.
Packaging item name.
Supplier.
Material.
Weight in kilograms.
Packaging class.
Whether it’s used for retail, gifting, shipping, wholesale, or internal transport.
Whether it’s branded or plain.
Whether it’s supplied to a customer, retailer, distributor, or end user.
Evidence for non-household classification, where applicable.
The earlier you build the habit, the less painful reporting becomes. Future-you will be very grateful.
Example Packaging Record
Packaging Item
Material
Packaging Class
Weight
Used For
Postal box
Paper / board
Shipment
Record in kg
Sending ecommerce orders to customers.
Product gift box
Paper / board
Primary
Record in kg
Containing and presenting one sales unit.
Tissue paper
Paper
Primary or shipment, depending on use
Record in kg
Product presentation, protection, or reveal.
Outer transit carton
Corrugated board
Tertiary
Record in kg
Bulk transport between businesses.
This is not a reporting template, but it shows the sort of information worth keeping close. Your actual reporting requirements will depend on your organisation and the packaging activities you carry out.
What Is Nation Data?
Nation data is information about where packaging is supplied in the UK and where it’s discarded.
GOV.UK explains that affected organisations must submit nation data if they carry out certain activities, including supplying filled or empty packaging directly to customers in the UK where they are the end user, supplying empty packaging to organisations that are not legally obligated or are small organisations, hiring or loaning reusable packaging, owning certain online marketplaces, or importing packaged goods for their own use and discarding the packaging.
You can read the full criteria in the official GOV.UK packaging data guidance.
What Is RAM And Why Does Recyclability Matter?
RAM stands for Recyclability Assessment Methodology.
It’s the system used to assess the recyclability of certain packaging. GOV.UK’s RAM guidance states that only large producers must collect and report recyclability assessment data. It applies to household packaging, packaging that commonly ends up in public bins, and household drinks containers made of glass.
Under the Recyclability Assessment Methodology, relevant packaging is assessed against criteria that determine a Red, Amber or Green rating. That rating affects the disposal fee charged for that packaging. This is known as fee modulation.
In simple terms, packaging that is assessed as being more recyclable is intended to attract lower disposal fee modulation than packaging that’s harder to recycle.
This is why material choices matter. Paper and board packaging, plastic windows, laminations, mixed materials, coatings, ribbons, magnets, foils, and inserts can all affect how a packaging item is assessed.
That does not mean every beautiful finish has to disappear. It means businesses need to understand what their packaging is made from and make more informed choices.
For example:
Can the amount of packaging be reduced without damaging the unboxing experience?
Can you choose a widely recyclable board?
Can you avoid unnecessary mixed materials?
Can you keep premium details, but use them with more intention?
Can you ask your packaging supplier for material details and weights?
Good packaging should still feel elevated. The difference is that it should also be easier to explain.
What Actions Should Businesses Take?
If you think EPR may apply to your business, start with these steps:
1. Check Whether You Meet The Thresholds.
Look at your annual turnover and the total weight of packaging you supplied or imported in the relevant previous calendar year.
Remember, if your business is part of a group, you may need to consider group-level turnover and packaging weight, not just one individual company. GOV.UK’s guidance explains how parent companies, groups, and subsidiaries should approach EPR reporting.
2. Identify Your Packaging Activities.
Work out how your business handles packaging. Do you sell products under your own brand? Import goods in packaging? Fill packaging? Supply empty packaging? Run an online marketplace?
Your activity affects what you may be responsible for. The official GOV.UK packaging activities section is a useful place to check this.
3. Build A Packaging Data Record.
Create a central record of the packaging your business uses or supplies. Include material, weight, class, quantity, and supplier information.
If you do not know the packaging weight or material composition, ask your supplier. This is especially important if you use multiple components, such as boxes, tissue, stickers, inserts, bags, ribbons, and mailing cartons.
For more detail on what to collect, use GOV.UK’s packaging data collection guidance.
4. Decide Whether Packaging Is Household Or Non-Household.
For large producers, household and non-household classification matters. Most primary and shipment packaging is classed as household unless it meets specific conditions.
If you classify primary or shipment packaging as non-household, you must be able to evidence why. GOV.UK’s household and non-household packaging guidance explains what counts and what evidence may be needed.
5. Check Your Reporting Deadlines.
Large producers generally report packaging data every 6 months. Small producers report yearly.
Current reporting periods and deadlines are explained in GOV.UK’s packaging data deadlines guidance. Because deadlines can change, it’s worth checking the latest version before each reporting period.
6. Register If You Need To.
If your organisation is obligated, you may need to create an account through the Report Packaging Data service and register with the relevant environmental regulator.
GOV.UK’s registration guidance explains that obligated organisations must register with the environmental regulator and pay a registration fee.
7. Consider Whether You Need A Compliance Scheme.
A compliance scheme is a third party that can help with EPR requirements. It may be able to register your organisation, submit packaging data, and help with PRNs or PERNs.
GOV.UK’s EPR guidance collection includes a section on compliance schemes and public registers. Always check that any scheme you use appears on the official register.
8. Review Your Packaging Choices.
EPR is a good moment to look at your packaging with fresh eyes.
Ask:
Is every component needed?
Does each layer add protection, presentation, or brand value?
Are materials easy to identify?
Could you reduce packaging weight?
Could you switch to a more widely recyclable option?
Could branded packaging help your product feel more premium without adding unnecessary layers?
Packaging should never be an afterthought. Under EPR, it pays to make it considered from the start.
Want to make every layer work harder?
Explore Printed Packaging →
How Tiny Box Company Can Help You Make More Considered Packaging Choices
At Tiny Box Company, we believe packaging is part of the brand experience. It’s the first thing your customer sees, touches, opens, and remembers.
But beautiful packaging should also be practical, carefully chosen, and easier to understand.
When you’re reviewing packaging for EPR, it helps to think about three things:
Material: Know what your packaging is made from. Look for clear material information and avoid making sustainability claims unless you can support them.
Weight: Packaging weight matters for reporting. If you’re comparing options, lighter packaging may help reduce the total packaging weight your business places on the market.
Purpose: Every packaging layer should earn its place. A postal box protects. Tissue creates a reveal. Ribbon adds a finishing moment. A branded sticker seals the experience.
The goal is not to strip everything back until it feels forgettable. The goal is to choose with intention.
A polished packaging experience can still support responsible packaging choices. It just needs to be designed with both the customer and the compliance spreadsheet in mind.
Where To Find Further EPR Guidance
For the most accurate and current information, use official sources first.
Useful places to start include:
GOV.UK: Extended Producer Responsibility For Packaging
GOV.UK: Who Is Affected And What To Do
GOV.UK: What Small Producers Must Do
GOV.UK: Packaging Data To Collect
GOV.UK: Reporting Periods And Submission Deadlines
GOV.UK: Household And Non-Household Packaging
GOV.UK: Recyclability Assessment Methodology
GOV.UK: Report Packaging Data
PackUK, the scheme administrator for the UK’s packaging EPR programme
The Producer Responsibility Obligations (Packaging And Packaging Waste) Regulations 2024
Because EPR guidance is updated regularly, it’s worth checking GOV.UK before each reporting period.
Final Thought
EPR may add another layer to packaging planning, but it does not take away the value of a beautiful unboxing experience.
Your packaging can still feel premium, considered, and completely on-brand. The key is knowing what you use, why you use it, and how it performs after your customer has opened it.
Because the best packaging does more than protect a product. It protects the first impression too.
Ready to make packaging feel more considered?
Speak To Our Team →
FAQs
What Does EPR Stand For?
EPR stands for Extended Producer Responsibility. For packaging, it means certain businesses that supply or import packaging may need to report packaging data and, depending on their size and responsibilities, pay fees connected to the cost of managing packaging waste. You can read the official overview on GOV.UK.
Does EPR Apply To Small Businesses?
It depends on your turnover, packaging tonnage, and packaging activities. GOV.UK states that organisations may need to collect and report packaging data if they have annual turnover of £1 million or more, were responsible for importing or supplying more than 25 tonnes of packaging to the UK market in the previous calendar year, and carry out covered packaging activities. If your business is growing quickly, it’s sensible to track packaging use early, even if you’re not currently obligated.
What Is The Difference Between A Small Producer And A Large Producer?
A small producer is generally an organisation with turnover above £1 million that supplies more than 25 tonnes of packaging, but does not meet the large producer threshold. A large producer generally has turnover of £2 million or more and supplies or imports more than 50 tonnes of packaging. Large producers have wider responsibilities, including 6-monthly reporting and, in many cases, waste disposal fees and recycling obligations. You can check the latest details in GOV.UK’s producer guidance.
Do Small Producers Have To Report Packaging Data?
Yes, if they are obligated. GOV.UK’s small producer guidance states that small producers may need to register with the regulator, pay a fee, and collect and report packaging data.
What Packaging Do I Need To Report?
This depends on your business and producer status. You may need to report packaging activity, packaging type, packaging class, material, weight, and quantity. Large producers may also need to report household and non-household packaging, nation data, and recyclability assessment information where relevant. Use GOV.UK’s packaging data guidance for the official detail.
What Is Household Packaging?
Household packaging is packaging that is likely to end up in a household bin or public bin. Most primary and shipment packaging is treated as household packaging unless specific conditions apply.
What Is Non-Household Packaging?
Non-household packaging is packaging that is not expected to be disposed of by households or in public bins. Secondary and tertiary packaging are generally treated as non-household. Primary and shipment packaging can only be classed as non-household in specific circumstances, and you must keep evidence. GOV.UK’s household and non-household guidance explains this in more detail.
What Is RAM?
RAM stands for Recyclability Assessment Methodology. It’s used to assess the recyclability of certain packaging and gives packaging a red, amber, or green rating. This rating can affect disposal fees for large producers. Read the official RAM guidance on GOV.UK.
Do I Need To Use A Compliance Scheme?
You do not always have to use one, but many businesses choose to because EPR reporting can be complex. A compliance scheme can help with registration, data reporting, and PRNs or PERNs. Always check that any scheme you use appears on the official public register listed through the GOV.UK EPR guidance collection.
Can Better Packaging Choices Reduce EPR Costs?
Potentially, yes. EPR is designed to encourage packaging that is easier to recycle and more carefully designed. For large producers, recyclability ratings can affect disposal fees. Even for businesses not yet obligated, reviewing packaging weight, materials, and structure is a sensible step.
Is EPR The Same As The Plastic Packaging Tax?
No. EPR and Plastic Packaging Tax are separate. EPR focuses on responsibility for packaging waste and reporting. Plastic Packaging Tax applies to plastic packaging components that contain less than the required percentage of recycled plastic, subject to the relevant legislation and exemptions.
Where Can I Get Official Help?
Start with GOV.UK’s EPR packaging guidance, PackUK, your relevant environmental regulator, or a registered compliance scheme. If you’re unsure whether your business is obligated, speak to a qualified adviser.
/* EPR blog only: prevents link/button/table/FAQ styles leaking across the website */
.epr-blog a:not(.pill-outline){
color: #30acd9 !important;
font-weight: 700 !important;
text-decoration: underline !important;
text-underline-offset: 3px;
}
/* Pill outline button */
.epr-blog .pill-outline,
.epr-blog a.pill-outline{
display: inline-flex;
align-items: center;
justify-content: center;
gap: 10px;
padding: 12px 26px;
border: 2px solid #111;
border-radius: 9999px;
background: transparent;
color: #111 !important;
text-decoration: none !important;
font-family: inherit;
font-weight: 700;
font-size: 12px;
line-height: 1;
text-transform: uppercase;
letter-spacing: 0.08em;
cursor: pointer;
user-select: none;
transition: background-color 160ms ease, color 160ms ease, transform 120ms ease;
}
.epr-blog .pill-outline__text{
color: inherit;
font-weight: 700;
text-decoration: none !important;
}
.epr-blog .pill-outline__arrow{
color: inherit;
text-decoration: none !important;
font-size: 14px;
line-height: 1;
transform: translateY(-0.5px);
}
.epr-blog .pill-outline:hover{
background: #111;
color: #fff !important;
text-decoration: none !important;
}
.epr-blog .pill-outline:hover .pill-outline__text,
.epr-blog .pill-outline:hover .pill-outline__arrow{
color: #fff !important;
text-decoration: none !important;
}
.epr-blog .pill-outline:active{
transform: translateY(1px);
}
.epr-blog .pill-outline:focus-visible{
outline: 2px solid #e9b448;
outline-offset: 3px;
}
/* Tables */
.epr-blog .table-wrap{
width: 100%;
overflow-x: auto;
border: 1px solid rgb(234, 232, 230);
border-radius: 18px;
background: #fff;
margin: 14px 0 26px 0;
}
.epr-blog .tb-table{
width: 100%;
border-collapse: collapse;
min-width: 780px;
font-family: Arial, sans-serif;
}
.epr-blog .tb-table thead th{
text-align: left;
font-weight: 700;
font-size: 14px;
padding: 14px 14px;
border-bottom: 1px solid rgb(234, 232, 230);
background: #fafafa;
white-space: nowrap;
}
.epr-blog .tb-table td{
font-size: 14px;
line-height: 1.5;
padding: 14px 14px;
border-bottom: 1px solid rgb(234, 232, 230);
vertical-align: top;
}
.epr-blog .tb-table tbody tr:last-child td{
border-bottom: none;
}
/* FAQ */
.epr-blog .faq{
width: 90%;
max-width: 900px;
margin: 0 auto 32px auto;
font-family: Arial, sans-serif;
}
.epr-blog .faq-title{
text-align: center;
margin: 0 0 14px 0;
font-size: 24px;
line-height: 1.3;
}
.epr-blog .faq-item{
border: 1px solid rgb(234, 232, 230);
border-radius: 25px;
background: #fff;
overflow: hidden;
margin: 10px 0;
}
.epr-blog .faq-item summary{
position: relative;
list-style: none;
cursor: pointer;
padding: 16px 56px 16px 18px;
font-weight: 700;
font-size: 16px;
line-height: 1.4;
outline: none;
user-select: none;
}
.epr-blog .faq-item summary::-webkit-details-marker{ display: none; }
.epr-blog .faq-item summary::after{
content: "▸";
position: absolute;
right: 18px;
top: 50%;
transform: translateY(-50%);
transition: transform 160ms ease;
font-size: 18px;
line-height: 1;
opacity: 0.8;
}
.epr-blog .faq-item[open] summary::after{
transform: translateY(-50%) rotate(90deg);
}
.epr-blog .faq-content{
padding: 12px 18px 18px 18px;
margin-top: 6px;
font-size: 15px;
line-height: 1.6;
color: #333;
border-top: 1px solid rgb(234, 232, 230);
background-color: #fff;
}
.epr-blog .faq-item summary:hover{ background: #fafafa; }
.epr-blog .faq-item summary:focus-visible{
outline: 2px solid #e9b448;
outline-offset: 2px;
border-radius: 18px;
}
@media (max-width: 600px){
.epr-blog .faq-title{ font-size: 22px; }
.epr-blog .faq-item summary{ font-size: 15px; padding: 14px 48px 14px 16px; }
.epr-blog .faq-content{ font-size: 14px; padding: 14px 16px 16px 16px; margin-top: 4px; }
.epr-blog .tb-table{ min-width: 720px; }
}
Choosing The Right Magnet And Ribbon Closures For Jewellery BoxesChoosing The Right Magnet And Ribbon Closures For Jewellery Boxes
For small jewellery boxes, the closure does more than keep the lid shut. It sets the pace of the unboxing, protects the product during handling, and tells your customer whether the gift inside is premium, polished, and considered.
That is a lot of pressure for a magnet and a ribbon. Tiny parts, big performance review.
For UK Corporate Brand & Gifting Managers, the challenge is choosing magnet and ribbon fasteners for small boxes that feel secure without being stiff, elegant without being fragile, and brand-aligned without causing budget panic. The right closure should open smoothly, close cleanly, and survive packing, transit, display, gifting, and the enthusiastic hands of the final recipient.
Need Jewellery Gift Boxes to get started?
Explore The Range
→
What Are Magnet And Ribbon Closures For Small Boxes?
Magnet and ribbon closures for small boxes are fastening systems that use embedded magnets, ribbon tabs, ribbon ties, or a combination of both to keep presentation boxes closed while making them easy to open.
To choose the right closure:
Match the magnet strength to the box size, lid weight, and product value.
Select ribbon width based on box scale, brand style, and user grip.
Position attachment points so the box opens cleanly without overpull.
Test the closure with the finished insert, product, and outer packaging.
Check sustainability claims, branding options, and fulfilment efficiency before rollout.
Why Closures Matter In Jewellery Packaging Design
Jewellery packaging design is built on small signals. A lid that snaps shut neatly feels reassuring. A ribbon tab that lifts smoothly feels thoughtful. A box that needs tugging, twisting, or wrestling feels like the brand forgot the last five seconds of the experience.
For presentation jewellery boxes, closure performance affects:
Closure Detail
Why It Matters
Magnet strength
Controls how securely the lid closes and how easily it opens.
Ribbon width
Affects grip, visual balance, and perceived quality.
Attachment point
Determines whether the pull feels smooth or strained.
Lid alignment
Protects the premium feel and avoids awkward closing.
Material choice
Influences durability, recyclability, and brand perception.
Branding finish
Connects the packaging with the campaign, event, or gifting moment.
Our magnetic boxes include snap-shut closures and ribbon tabs, with ranges designed for gift cards through to larger hamper boxes.
Magnet Closures: Secure, But Not Stubborn
Small box magnet closures should feel satisfying, not aggressive. The aim is a clean close and a gentle release. If the magnet pull is too weak, the lid feels flimsy. If it is too strong, the recipient may overpull the lid, crease the board, damage the ribbon tab, or disturb the jewellery inside.
Pull force is affected by magnet size, magnet grade, contact area, distance, alignment, and any material between the magnets. Magnet suppliers note that air gaps and separation distance can significantly reduce magnetic holding force, which is why the full box construction must be tested, not just the magnet on its own.
For small jewellery boxes, the closure should be specified around the real pack:
The weight of the lid.
The rigidity of the board.
The depth of the insert.
The position of the jewellery.
The outer postal or gift packaging.
The expected opening motion.
A magnet may behave beautifully on a sample bench, then feel different once a ribbon, insert, tissue layer, or print finish is added. Always test the whole pack. The box is the orchestra, not just the triangle.
Ribbon Closures For Gift Boxes: Grip, Style, And Control
Ribbon closures for gift boxes can be practical, decorative, or both. In small boxes, ribbon is often used as a pull tab, loop, tie, belly band, bow, or lift aid. The best version depends on how the customer should interact with the box.
A ribbon tab is ideal when you want a clean magnetic closure with an easy opening point. A ribbon tie suits softer, more ceremonial gifting, but adds more time in packing. A belly band can carry campaign branding, while a small ribbon loop can help open compact boxes without adding visual clutter.
Ribbon width matters because small boxes have less surface area. Too narrow, and the ribbon can feel fiddly. Too wide, and it overpowers the box. Ribbon suppliers generally advise choosing ribbon width according to the item size and the intended finish, because incorrect width can make a design look either underdressed or overcrowded.
Practical Ribbon Width Guide For Small Jewellery Boxes
Box Type
Suggested Ribbon Approach
Why It Works
Ring box
Narrow tab or slim loop.
Keeps the opening point discreet and elegant.
Earring box
Slim ribbon tab or small bow.
Adds softness without hiding the product.
Bracelet box
Medium ribbon tab or tie.
Gives enough grip for a longer lid.
Pendant box
Slim to medium tab.
Supports a smooth reveal without visual bulk.
Corporate gift box
Branded ribbon, tab, or belly band.
Connects the pack to campaign identity.
Premium limited edition
Wider ribbon tie or layered closure.
Creates a slower, more ceremonial unboxing.
For most small jewellery boxes, the ribbon should be easy to pinch between finger and thumb, proportionate to the lid, and securely anchored so it does not pull away during opening.
Attachment Points: Where Good Closures Become Great Closures
Attachment points are the quiet heroes of closure design. A magnet can be the right strength, and a ribbon can be the right width, but if either is positioned poorly, the box will still feel wrong.
For magnetic ribbon fasteners for packaging, consider:
Pull direction: The ribbon should encourage the customer to open the lid in the intended direction.
Stress point: The ribbon anchor should not sit where repeated pulling weakens the board.
Lid balance: The magnet should close the lid evenly, without one side lifting.
User access: The tab should be visible and easy to grip, without spoiling the front elevation.
Insert clearance: The closure should not press into the jewellery, insert, tissue, or care card.
Transit behaviour: The closure should stay shut inside postal packaging without needing excessive force.
Overpull happens when the customer has to apply too much force to open the box. This can bend the lid, loosen the ribbon, or make the unboxing feel clumsy. The fix is not always a weaker magnet. Sometimes it is better magnet placement, a clearer ribbon tab, or a smoother opening angle.
Magnet Closure Vs Ribbon Closure: Which Should You Choose?
Requirement
Magnet Closure
Ribbon Closure
Combined Magnet And Ribbon
Clean premium finish
Excellent.
Good.
Excellent.
Easy opening
Good if pull is correct.
Excellent when used as tab or tie.
Excellent.
Secure closure
Excellent.
Moderate to good.
Excellent.
Brand theatre
Subtle.
Strong.
Strong.
Packing speed
Fast.
Slower if tied manually.
Fast if ribbon is a fixed tab.
Small box suitability
Strong.
Strong when proportioned well.
Strongest for premium gifting.
For corporate gifting, the combined approach is often the most effective: a magnet for clean closure, and a ribbon tab for controlled opening. Our magnetic gift box range includes options with ribbon tabs, and the broader magnetic gift box collection includes boxes suitable for corporate events, product launches, and branded gifting.
Customisation Options For Corporate Brand Teams
Corporate gifting is rarely “just add logo and hope.” The closure needs to sit within the whole branding and packaging system: colours, inserts, print finishes, campaign messaging, fulfilment route, and recipient experience.
Useful customisation options include:
Custom Element
Use Case
Foil logo
Premium jewellery, awards, VIP gifting, and festive campaigns.
Full-colour print
Product launches, influencer mailers, and campaign graphics.
Brand-matched ribbon
Strong visual consistency across multi-item gifting.
Printed belly band
Adds message, name, event, or campaign detail.
Custom insert
Holds jewellery, card, gift note, or small product set securely.
Colour-matched box
Aligns packaging with seasonal or brand palette.
Sustainable Packaging Options: Specify, Don’t Sprinkle
Sustainable packaging options matter, especially for corporate brands with procurement policies, ESG reporting, and internal sign-off routes. But the wording has to be precise.
The UK Green Claims Code says environmental claims should be truthful, clear, and substantiated, so avoid broad statements such as “fully sustainable” unless you have strong evidence for the full pack and its lifecycle.
Better questions to ask suppliers include:
What recycled content is used, and can it be evidenced?
Is the board FSC-certified, where relevant?
Is the ribbon recyclable, reusable, recycled, or made from another specified material?
Can the magnet be separated from the box for disposal?
Are coatings, laminates, foils, and adhesives compatible with your disposal claims?
Can the supplier provide documentation for procurement or compliance teams?
FSC UK explains that forest-fibre packaging can be renewable, recyclable, or biodegradable only when responsibly sourced and sensitively processed, and that FSC-certified packaging can help demonstrate responsible sourcing through certified materials and FSC labels.
Budget And Operational Considerations
Premium packaging solutions need to impress recipients, but they also need to behave in the real world. That means cost, stockholding, assembly time, damage rates, delivery deadlines, and storage space all matter.
When reviewing gift packaging wholesale options or corporate packaging runs, build the budget around total use, not just unit price.
Consider:
Cost Area
Why It Matters
Box unit cost
The visible packaging cost.
Closure complexity
More manual tying or assembly can add labour time.
Storage volume
Rigid boxes and flat-packed boxes affect warehousing differently.
Damage risk
Weak closures can increase replacements and complaints.
Custom print setup
May affect budget and lead time.
Fulfilment speed
Fixed tabs are usually faster than hand-tied ribbon.
Campaign flexibility
Neutral bases with branded ribbons can work across multiple events.
A lower-cost box that slows packing or causes closure issues may not be the cheaper option once the campaign is live. Small details, big spreadsheet energy.
Best Practices For Small Box Magnet Closures
Use this checklist before approving production:
Test the opening force: The recipient should not need to tug hard.
Check one-handed handling: Small boxes are often opened while holding a card, bag, or phone.
Test with jewellery inside: The insert and product can affect lid closure.
Check repeat opening: The closure should still feel neat after several uses.
Review board stress: Look for creasing, lifting, or delamination around the magnet.
Assess transit: The box should stay closed inside its outer packaging.
Approve under real lighting: Foil, ribbon, and finish can change under event or retail lighting.
Best Practices For Ribbon Closures
Ribbon should feel beautiful, but it also has to work. Before ordering, check:
Width: It should suit the box scale and allow comfortable grip.
Texture: Satin, grosgrain, cotton, or recycled-look ribbons all signal different brand moods.
Colour: Match brand guidelines, but test contrast against the box.
Fray resistance: Cut edges should stay clean through packing and handling.
Attachment security: Tabs should not loosen with normal opening.
Packing speed: Fixed ribbon tabs are faster than hand-tied bows.
Recipient clarity: The ribbon should make the opening point obvious.
Common Mistakes To Avoid
Mistake
Why It Causes Problems
Better Approach
Oversized magnet
Causes overpull and can strain the board.
Test pull force with the finished box.
Tiny ribbon tab
Looks neat but is hard to grip.
Choose a tab width that suits real fingers.
Ribbon too wide
Overpowers small box proportions.
Scale ribbon to the lid and product value.
Poor magnet alignment
Lid may sit unevenly or pop open.
Check placement on pre-production samples.
Ignoring insert depth
Jewellery or insert may interrupt closure.
Test with the final insert and product.
Vague eco claims
Creates procurement and compliance risk.
Use specific, evidenced material claims.
Overly complex closure
Slows fulfilment and increases labour cost.
Match closure style to campaign volume.
Closure Recommendations
For small jewellery boxes, the best closure is the one your customer barely has to think about. It closes cleanly, opens smoothly, protects the product, and makes the gift feel beautifully put together.
Use magnets for security, ribbon for guidance and theatre, and careful attachment points to avoid overpull. Then test the full pack, including insert, jewellery, tissue, outer packaging, and fulfilment process. That is how you get packaging that feels premium on the outside and practical behind the scenes.
Explore Tiny Box Company’s jewellery gift boxes for presentation-ready options, and look out for our article on Postal Friendly Jewellery Presentation.
Read The Blog
→
Need Jewellery Gift Boxes to get started?
Explore The Range
→
FAQs
What Are The Benefits Of Using Magnet Closures For Small Boxes In Jewellery Packaging?
Magnet closures give small jewellery boxes a clean, premium close without visible clasps or bulky fittings. They help the lid sit neatly and make the unboxing feel more polished when the pull strength is correctly specified.
How Do I Choose The Right Size Of Magnet Closures For Small Boxes?
Choose magnet size based on box dimensions, lid weight, board thickness, insert depth, and the desired opening feel. Always test the magnet in the finished box, because material layers and air gaps can change the pull.
What Types Of Ribbon Closures Are Suitable For Small Jewellery Boxes?
Suitable ribbon closures include pull tabs, loops, ties, bows, and belly bands. For high-volume corporate gifting, fixed ribbon tabs usually offer the best balance of appearance and packing efficiency.
What Factors Should Be Considered When Selecting Ribbon Widths For Small Boxes?
Consider the box size, ribbon function, brand look, grip, and how the ribbon sits against any logo or print. A small ring or earring box usually needs a slimmer ribbon than a bracelet or multi-item gift box.
How Can Magnet And Ribbon Closures Enhance The Unboxing Experience For Customers?
Magnets create the satisfying close, while ribbon gives the recipient a clear and elegant opening point. Together, they make the box feel intentional, easy to use, and more memorable.
What Customisation Options Are Available For Magnet And Ribbon Closures In Packaging?
Customisation can include branded ribbon, colour-matched ribbon, foil logos, full-colour print, belly bands, custom inserts, and seasonal finishes. The best choice depends on campaign scale, lead time, and brand guidelines.
How Do Sustainability Considerations Impact The Choice Of Closures For Small Boxes?
Sustainability considerations affect board choice, ribbon material, magnet removal, coatings, print finishes, and recycling claims. Procurement teams should ask for evidence behind any recycled, recyclable, FSC-certified, or plastic-free claims.
What Are The Best Practices For Attaching Magnet And Ribbon Closures To Ensure Security?
Place magnets where they close evenly and avoid stressing the board. Attach ribbon where it supports the natural opening direction, gives enough grip, and does not pull against a weak point.
How Can I Balance Brand Aesthetics With Operational Efficiency When Selecting Closures?
Use premium finishes where they create visible value, but avoid closure styles that slow fulfilment unnecessarily. For larger corporate campaigns, a magnetic box with a fixed ribbon tab often delivers a strong brand moment with efficient assembly.
What Budget Considerations Should I Keep In Mind When Sourcing Premium Packaging Solutions?
Look beyond unit cost. Include print setup, ribbon application, assembly time, storage, fulfilment, damage rates, and whether the same box can be reused across multiple campaigns.
/* Pill outline button */
.pill-outline{
display: inline-flex;
align-items: center;
justify-content: center;
gap: 10px;
padding: 12px 26px;
border: 2px solid #111;
border-radius: 9999px;
background: transparent;
color: #111;
text-decoration: none;
font-family: inherit;
font-weight: 700;
font-size: 12px;
line-height: 1;
text-transform: uppercase;
letter-spacing: 0.08em;
cursor: pointer;
user-select: none;
transition: background-color 160ms ease, color 160ms ease, transform 120ms ease;
}
.pill-outline__arrow{
font-size: 14px;
line-height: 1;
transform: translateY(-0.5px);
}
.pill-outline:hover{
background: #111;
color: #fff;
}
.pill-outline:active{
transform: translateY(1px);
}
.pill-outline:focus-visible{
outline: 2px solid #e9b448;
outline-offset: 3px;
}
/* Third heading */
.third-heading{
font-size: 18px;
line-height: 1.35;
margin: 18px 0 8px 0;
font-weight: 700;
}
/* Tables */
.table-wrap{
width: 100%;
overflow-x: auto;
border: 1px solid rgb(234, 232, 230);
border-radius: 18px;
background: #fff;
margin: 14px 0 26px 0;
}
.tb-table{
width: 100%;
border-collapse: collapse;
min-width: 780px;
font-family: Arial, sans-serif;
}
.tb-table thead th{
text-align: left;
font-weight: 700;
font-size: 14px;
padding: 14px 14px;
border-bottom: 1px solid rgb(234, 232, 230);
background: #fafafa;
white-space: nowrap;
}
.tb-table td{
font-size: 14px;
line-height: 1.5;
padding: 14px 14px;
border-bottom: 1px solid rgb(234, 232, 230);
vertical-align: top;
}
.tb-table tbody tr:last-child td{
border-bottom: none;
}
/* FAQ */
.faq{
width: 90%;
max-width: 900px;
margin: 0 auto 32px auto;
font-family: Arial, sans-serif;
}
.faq-title{
text-align: center;
margin: 0 0 14px 0;
font-size: 24px;
line-height: 1.3;
}
.faq-item{
border: 1px solid rgb(234, 232, 230);
border-radius: 25px;
background: #fff;
overflow: hidden;
margin: 10px 0;
}
.faq-item summary{
position: relative;
list-style: none;
cursor: pointer;
padding: 16px 56px 16px 18px;
font-weight: 700;
font-size: 16px;
line-height: 1.4;
outline: none;
user-select: none;
}
.faq-item summary::-webkit-details-marker{
display: none;
}
.faq-item summary::after{
content: "▸";
position: absolute;
right: 18px;
top: 50%;
transform: translateY(-50%);
transition: transform 160ms ease;
font-size: 18px;
line-height: 1;
opacity: 0.8;
}
.faq-item[open] summary::after{
transform: translateY(-50%) rotate(90deg);
}
.faq-content{
padding: 12px 18px 18px 18px;
margin-top: 6px;
font-size: 15px;
line-height: 1.6;
color: #333;
border-top: 1px solid rgb(234, 232, 230);
background-color: #fff;
}
.faq-item summary:hover{
background: #fafafa;
}
.faq-item summary:focus-visible{
outline: 2px solid #e9b448;
outline-offset: 2px;
border-radius: 18px;
}
@media (max-width: 600px){
.faq-title{
font-size: 22px;
}
.faq-item summary{
font-size: 15px;
padding: 14px 48px 14px 16px;
}
.faq-content{
font-size: 14px;
padding: 14px 16px 16px 16px;
margin-top: 4px;
}
.tb-table{
min-width: 720px;
}
}
Discover Anti-Tarnish Solutions To Protect Your JewelleryDiscover Anti-Tarnish Solutions To Protect Your Jewellery
A beautiful jewellery gift should arrive looking bright, polished, and ready for its little “oh wow” moment. Not cloudy, dull, or doing that mysterious silver thing where it looks like it has been stored in a pirate cave.
The good news? Tarnish is normal, especially with silver, but it can be slowed down with the right storage, the right packaging, and a few tiny additions that work quietly behind the scenes. This guide explains effective anti tarnish solutions, including paper tabs, treated papers, protective coatings, and simple UK-friendly storage tips.
Need Jewellery Gift Boxes to get you started?
Explore The Range
→
What Are Anti-Tarnish Solutions?
Anti-tarnish solutions are products and storage methods that slow the chemical reactions that make silver and other metals darken, dull, or discolour. They include anti-tarnish paper tabs, treated paper, anti-tarnish cloth, storage pouches, airtight containers, silica gel, and suitable protective coatings.
To help prevent tarnish on silver:
Store jewellery clean and dry.
Keep pieces away from humidity, perfume, lotions, and household chemicals.
Add anti-tarnish paper tabs or strips inside the box or pouch.
Use a dry, closed storage space rather than a bathroom shelf.
Choose packaging that protects the jewellery without overpromising miracle results.
Why Silver Tarnishes In The First Place
Tarnish is not dirt, and silver does not rust like iron. Silver tarnish is usually a surface reaction caused by sulphur compounds in the air, with humidity helping the reaction along. The Canadian Conservation Institute notes that sulphur compounds cause silver to tarnish, and that many pollutants can come from outdoor air or from materials inside buildings.
Humidity matters because most metals corrode more quickly in moist conditions. Conservation guidance for metal storage recommends clean, well-organised storage with controlled relative humidity and clean air for better long-term protection.
For UK gift buyers, this is the practical bit: bathrooms, steamy bedrooms, damp windowsills, and kitchens are not ideal jewellery homes. They might be convenient, but silver prefers a quieter, drier life.
The Best Anti Tarnish Products That Actually Help
There is no single magic product that keeps jewellery perfect forever. The best anti tarnish products work as part of a simple system: clean jewellery, dry storage, limited air exposure, and an anti-tarnish material inside the box or pouch.
Solution
Best For
How It Helps
Watch-Out
Anti-tarnish paper tabs or strips
Gift boxes, jewellery pouches, and storage drawers.
Help absorb tarnish-causing gases before they reach the metal.
Replace as advised by the supplier.
Treated anti-tarnish paper
Wrapping silver gifts or lining storage.
Creates a protective storage environment.
Keep it dry and avoid using unknown papers.
Anti-tarnish cloth
Jewellery rolls, drawers, and keepsake storage.
Helps reduce tarnish during longer storage.
Not all cloth is the same, check product details.
Silica gel
Damp homes and travel storage.
Helps reduce moisture inside closed packaging.
Keep away from children and pets.
Airtight pouch or box
Silver pieces not worn often.
Reduces exposure to air and humidity.
Jewellery should be clean and dry first.
Protective coatings
Some finished jewellery pieces.
Creates a barrier between metal and air.
Best applied or specified by the jewellery maker.
How Do Anti-Tarnish Paper Tabs Work?
Anti-tarnish paper tabs are small treated pieces of paper placed inside a jewellery box, pouch, or storage compartment. They work by helping to capture tarnish-causing gases in the enclosed space before those gases react with the metal.
They are especially useful for silver rings, earrings, bracelets, charms, and pendants being given as gifts. Slip one into the box or pouch, close the packaging, and you have added a little protection without changing the look of the present.
Think of them as tiny backstage crew. Not glamorous, but very helpful.
What About Anti-Tarnish Coatings?
Some jewellery is finished with a protective coating to slow tarnishing. Coatings can be useful, but they are not always right for every piece. They may change the feel, sheen, repairability, or care instructions of the jewellery.
If you are buying jewellery as a gift, check the seller’s care card or product description. If the piece is handmade, plated, oxidised, patinated, stone-set, or pearl-set, avoid applying any coating at home unless the maker recommends it. Pearls, soft stones, and delicate finishes can be fussy little treasures.
For gift buyers, the easier route is usually packaging-led prevention: dry storage, anti-tarnish tabs, a suitable pouch, and a care card.
How To Prevent Tarnish On Silver In UK Humidity
If you are wondering how to prevent tarnish on silver, start with where it lives. UK homes can have plenty of moisture in the air, especially in winter, older properties, bathrooms, kitchens, and rooms where washing dries indoors.
Use this simple storage plan:
Clean before storing: Gently wipe jewellery with a suitable soft cloth before putting it away.
Dry completely: Never store jewellery damp after washing hands, showering, swimming, or cleaning.
Avoid the bathroom: Steam and silver are not best friends.
Store pieces separately: This reduces scratches, tangles, and metal-on-metal rubbing.
Add an anti-tarnish tab: Pop one into the jewellery box, pouch, or drawer.
Use a closed container: Reduce exposure to air, dust, and humidity.
Keep chemicals away: Perfume, hairspray, lotions, cleaning products, and chlorine can all cause issues.
Frequent heavy polishing is not ideal because it can remove small amounts of surface material over time. The Canadian Conservation Institute notes that much silver tarnish damage comes from the abrasion and polishing needed to remove it, which is why prevention is worth the effort.
Gift Presentation Ideas That Keep Jewellery Protected
Anti-tarnish care does not have to make your gift look clinical. Done well, it makes the whole unboxing experience feel more thoughtful.
Gift Type
Packaging Idea
Anti-Tarnish Addition
Silver earrings
Small jewellery box with insert.
Add one anti-tarnish tab beneath the insert or inside the box.
Bracelet
Slim bracelet box with tissue wrap.
Add tab inside the box and include a small care card.
Necklace
Pendant box with chain support.
Add anti-tarnish paper and store chain neatly to avoid tangling.
Keepsake ring
Ring box inside a gift bag.
Add anti-tarnish tab and remind the recipient to store it dry.
Jewellery and chocolate gift
Separate jewellery box and food-safe packaging.
Keep jewellery care materials away from direct food contact.
Packaging Sustainability Without The Fluff
It’s completely reasonable to want eco friendly packaging materials, biodegradable packaging materials, compostable materials, and good presentation at a sensible price. The trick is to check the details.
The UK Green Claims Code says environmental claims should help people make informed choices and should not mislead. So, instead of relying on vague wording, look for specific claims such as:
Recycled content, with the percentage shown where possible.
FSC-certified paper or board, where certification applies.
Recyclable materials, with clear disposal guidance.
Compostable materials, only where the product is genuinely certified or specified.
Plastic-free options, where the full item supports that claim.
Common Mistakes That Make Tarnish Worse
Mistake
Why It Can Cause Problems
Better Choice
Storing jewellery in the bathroom
Steam and humidity can speed tarnish.
Use a dry bedroom drawer or closed box.
Leaving silver loose on a tray
More air, dust, and product exposure.
Store in a pouch, box, or divided tray.
Spraying perfume after putting jewellery on
Chemicals can mark or dull the surface.
Apply perfume first, let it dry, then add jewellery.
Using random paper or cardboard
Some materials may release compounds that affect metals.
Use suitable jewellery packaging and care materials.
Storing pieces together
Scratches, tangles, and rubbing.
Separate each piece.
Relying only on polishing
Repeated polishing can abrade the surface.
Prevent tarnish with better storage.
A Simple Anti-Tarnish Gift Routine
Choose a jewellery box that fits the piece neatly.
Add a soft insert or pouch to prevent movement.
Place an anti-tarnish tab inside the box.
Add a care card with one line: “Store clean and dry, away from perfume, lotions, and humidity.”
Finish with tissue, ribbon, or a gift bag for the unboxing moment.
It takes minutes, but it makes the gift feel more considered. Very Pinterest gift board, without needing a craft cupboard the size of a wardrobe.
Are Anti-Tarnish Solutions Affordable?
Yes, they can be. Anti-tarnish tabs, suitable pouches, and well-fitting jewellery boxes are usually small additions compared with the cost of the gift itself. The main saving is avoiding disappointment: a silver necklace that opens bright and gift-ready feels far better than one that needs cleaning before it can be worn.
For personal gift buyers, the best approach is not to buy every care product under the sun. Start with a good box, a dry storage habit, and one anti-tarnish tab or strip. That is enough for most everyday jewellery gifts.
The Best Anti-Tarnish Routine Is Simple
Choose a good jewellery box, keep the piece dry, add an anti-tarnish tab, and store it away from steam, sprays, and damp air. No drama, or complicated cupboard of mystery products. Just bright jewellery, thoughtful packaging, and a gift that opens beautifully.
Explore Tiny Box Company’s jewellery packaging for boxes, bags, and finishing touches that help your gifts look polished from the first peek. For the next layer of packaging detail, read Magnet And Ribbon Closures Sized For Small Boxes.
Read The Blog
→
FAQs
What Are The Most Effective Anti-Tarnish Solutions For Silver Jewellery?
The most effective anti-tarnish solutions are clean, dry storage, anti-tarnish tabs or strips, suitable pouches or boxes, and reduced exposure to humidity and chemicals. For pieces stored long-term, an airtight pouch or closed jewellery box with an anti-tarnish tab can help slow tarnish.
How Do Anti-Tarnish Paper Tabs Work To Protect Jewellery?
Anti-tarnish paper tabs are treated to help absorb tarnish-causing gases inside a closed box or pouch. They do not clean jewellery that is already tarnished, but they can help slow future tarnishing when used with dry storage.
What Types Of Coatings Can Help Prevent Tarnish On Silver?
Some silver jewellery may have a protective coating or lacquer to slow tarnish. These should usually be applied or specified by the maker, because coatings can affect appearance, repair, and care instructions.
What Storage Tips Help Combat Humidity And Tarnishing In The UK?
Store jewellery away from bathrooms, kitchens, windowsills, and damp drawers. Keep it clean and dry, place pieces separately, and use anti-tarnish tabs inside closed packaging.
How Can I Enhance The Unboxing Experience While Keeping Jewellery Tarnish-Free?
Choose a well-fitting jewellery box, add a soft insert or pouch, tuck in an anti-tarnish tab, and include a small care card. It keeps the gift looking polished while making the recipient feel properly looked after.
What Are The Best Packaging Options For Preserving Silver Gifts?
The best packaging options are boxes or pouches that limit movement, reduce exposure, and keep jewellery dry. A small jewellery gift box with a proper insert and anti-tarnish tab is a strong choice for rings, earrings, bracelets, and necklaces.
Are There Sustainable Anti-Tarnish Solutions For Jewellery Packaging?
Yes, but check the details. You can pair anti-tarnish tabs with recycled, recyclable, FSC-certified, plastic-free, or compostable packaging options where those claims are supported by the supplier.
How Can I Choose Affordable Anti-Tarnish Products For Jewellery Gifts?
Start with one or two practical items: anti-tarnish tabs and a suitable jewellery box or pouch. You do not need a complicated care kit for most gifts.
What Common Mistakes Should I Avoid When Storing Silver Jewellery?
Avoid storing silver in the bathroom, leaving it loose on open trays, putting it away damp, or exposing it to perfume and cleaning products. Also avoid heavy polishing as your main care method, because prevention is gentler.
How Does Humidity In The UK Affect Silver Jewellery?
Humidity can help tarnish and corrosion reactions happen faster, especially when combined with airborne pollutants or chemicals. Keeping jewellery dry and enclosed is one of the simplest ways to reduce the risk.
/* Pill outline button */
.pill-outline{
display: inline-flex;
align-items: center;
justify-content: center;
gap: 10px;
padding: 12px 26px;
border: 2px solid #111;
border-radius: 9999px;
background: transparent;
color: #111;
text-decoration: none;
font-family: inherit;
font-weight: 700;
font-size: 12px;
line-height: 1;
text-transform: uppercase;
letter-spacing: 0.08em;
cursor: pointer;
user-select: none;
transition: background-color 160ms ease, color 160ms ease, transform 120ms ease;
}
.pill-outline__arrow{
font-size: 14px;
line-height: 1;
transform: translateY(-0.5px);
}
.pill-outline:hover{
background: #111;
color: #fff;
}
.pill-outline:active{
transform: translateY(1px);
}
.pill-outline:focus-visible{
outline: 2px solid #e9b448;
outline-offset: 3px;
}
/* Third heading */
.third-heading{
font-size: 18px;
line-height: 1.35;
margin: 18px 0 8px 0;
font-weight: 700;
}
/* Tables */
.table-wrap{
width: 100%;
overflow-x: auto;
border: 1px solid rgb(234, 232, 230);
border-radius: 18px;
background: #fff;
margin: 14px 0 26px 0;
}
.tb-table{
width: 100%;
border-collapse: collapse;
min-width: 780px;
font-family: Arial, sans-serif;
}
.tb-table thead th{
text-align: left;
font-weight: 700;
font-size: 14px;
padding: 14px 14px;
border-bottom: 1px solid rgb(234, 232, 230);
background: #fafafa;
white-space: nowrap;
}
.tb-table td{
font-size: 14px;
line-height: 1.5;
padding: 14px 14px;
border-bottom: 1px solid rgb(234, 232, 230);
vertical-align: top;
}
.tb-table tbody tr:last-child td{
border-bottom: none;
}
/* FAQ */
.faq{
width: 90%;
max-width: 900px;
margin: 0 auto 32px auto;
font-family: Arial, sans-serif;
}
.faq-title{
text-align: center;
margin: 0 0 14px 0;
font-size: 24px;
line-height: 1.3;
}
.faq-item{
border: 1px solid rgb(234, 232, 230);
border-radius: 25px;
background: #fff;
overflow: hidden;
margin: 10px 0;
}
.faq-item summary{
position: relative;
list-style: none;
cursor: pointer;
padding: 16px 56px 16px 18px;
font-weight: 700;
font-size: 16px;
line-height: 1.4;
outline: none;
user-select: none;
}
.faq-item summary::-webkit-details-marker{
display: none;
}
.faq-item summary::after{
content: "▸";
position: absolute;
right: 18px;
top: 50%;
transform: translateY(-50%);
transition: transform 160ms ease;
font-size: 18px;
line-height: 1;
opacity: 0.8;
}
.faq-item[open] summary::after{
transform: translateY(-50%) rotate(90deg);
}
.faq-content{
padding: 12px 18px 18px 18px;
margin-top: 6px;
font-size: 15px;
line-height: 1.6;
color: #333;
border-top: 1px solid rgb(234, 232, 230);
background-color: #fff;
}
.faq-item summary:hover{
background: #fafafa;
}
.faq-item summary:focus-visible{
outline: 2px solid #e9b448;
outline-offset: 2px;
border-radius: 18px;
}
@media (max-width: 600px){
.faq-title{
font-size: 22px;
}
.faq-item summary{
font-size: 15px;
padding: 14px 48px 14px 16px;
}
.faq-content{
font-size: 14px;
padding: 14px 16px 16px 16px;
margin-top: 4px;
}
.tb-table{
min-width: 720px;
}
}
The Importance Of Cutouts In Jewellery Boxes For Artisan MakersThe Importance Of Cutouts In Jewellery Boxes For Artisan Makers
Handcrafted jewellery deserves packaging that behaves beautifully. Not just “looks pretty on the table at a craft fair” beautiful, although we are very much here for that. Beautiful in the practical sense too: secure, easy to open, gentle on delicate settings, and simple enough to use during a busy market morning.
That is where claw and stone protective cutouts earn their keep. In artisan jewellery boxes, the right cutout helps hold a ring, pendant, earring, or charm in place while leaving enough space for fingers to lift the piece without dragging it across the insert. Less scraping, less snagging, less holding-your-breath as a customer removes a handcrafted piece.
For independent makers, small batch retailers, and growing UK jewellery brands, cutouts for claw and stone protection can make the difference between packaging that simply contains the product and packaging that quietly says, “This has been made with care.”
Need Jewellery Gift Boxes to get you started?
Explore The Range
→
What Are Jewellery Box Cutouts?
Jewellery box cutouts are shaped spaces, slits, channels, tabs, or finger lifts built into an insert to hold jewellery securely while protecting raised settings, claws, stones, posts, and chains.
To protect delicate jewellery, a good cutout should:
Hold the item still without crushing or bending it.
Leave space around claws, stones, and raised settings.
Let customers remove the piece without scraping it.
Keep the jewellery centred for a better unboxing experience.
Match the material, size, and finish of the product being packed.
Designing Artwork For Gift Boxes: Avoiding Glue Area ClashesDesigning Artwork For Gift Boxes: Avoiding Glue Area Clashes
Avoiding glue area clashes in art is one of those packaging details that looks tiny on a dieline and enormous once the box is assembled. A logo disappearing into a fold, a product message stuck under a glue flap, or a hero graphic broken by a join can make premium packaging feel unexpectedly messy. For technology brands, where precision and polish are part of the promise, artwork needs to behave beautifully after assembly, not just on screen.
For VP-level technology brand leaders managing consumer products, event gifting, launch kits, and corporate packaging, artwork that prevents glue area overlaps is not just a design task. It is a brand control issue. The box has to protect sensitive products, support global logistics, meet sustainability expectations, and still deliver a clean, confident unboxing experience.
This guide explains how safe areas, glue paths, dielines, and panel overprints help keep graphic design packaging clean after production, so your brand lands exactly where it should: visible, polished, and unmistakably yours.
Explore gift box packaging that helps your brand look sharp from dieline to unboxing.
Shop The Range
→
What Are Glue Area Clashes In Packaging Design?
Glue area clashes happen when artwork, logos, text, patterns, QR codes, or key design details overlap with the areas of packaging that need to be glued, folded, tucked, joined, or hidden during assembly.
In plain English, it is when beautiful artwork ends up exactly where the packaging needs to stick itself together.
This can cause:
Logos being partly covered.
Text disappearing into folds.
Pattern breaks at joins.
Visible glue marks on printed areas.
Misaligned panels.
QR codes or legal copy becoming unreadable.
A premium box looking less premium once assembled.
The solution is not less creativity. It is smarter artwork placement. Good brand and packaging design works with the structure, not against it.
Why Glue Areas Matter For Technology Brands
Technology packaging carries a lot of responsibility. It has to protect a product, explain its value, create anticipation, support retail or event display, and reassure the customer that what is inside is high quality.
For technology brands, glue area clashes can affect:
Brand perception: A messy join or interrupted logo can make packaging feel less precise, which is not ideal when the product inside is positioned around innovation and quality.
Unboxing experience: Premium packaging should feel controlled from the first look to the final reveal. Misplaced artwork can interrupt that experience.
Operational efficiency: If artwork does not suit the dieline, production teams may need late-stage fixes, reproofing, or repacking, all of which add friction.
Global consistency: For consumer products, launch kits, and corporate events across multiple markets, consistency matters. Every box should tell the same brand story.
Sustainability goals: Avoiding artwork errors can reduce wasted samples, reprints, rejected packaging, and unnecessary material use.
Good packaging design is not just what the customer sees. It is everything that had to go right before they saw it.
Safe Areas: The First Line Of Defence
Safe areas are zones on a packaging dieline where important artwork should sit to avoid being cut, folded, glued, or hidden during production.
They help protect:
Logos.
Product names.
Legal copy.
QR codes.
Icons.
Instructional text.
Campaign messages.
Key visual elements.
For technology packaging, safe areas are especially important because boxes often carry technical information, product specifications, regulatory marks, serial details, and multi-language content. If any of that falls too close to a fold or glue path, readability can suffer.
A strong safe area strategy helps packaging look intentional after assembly. Not “nearly right”. Right.
Artwork Area
What It Does
What To Keep There
Safe area
Keeps key artwork away from cuts, folds, glue flaps, and hidden joins.
Logos, product names, legal copy, QR codes, icons, and campaign messages.
Glue path
Shows where adhesive, overlap, or hidden assembly areas will sit.
Keep important artwork away from this area. Use low-detail backgrounds where needed.
Bleed area
Extends artwork beyond the cut line so printed edges finish cleanly.
Background colour, patterns, or image extensions, not key copy or logos.
Panel boundary
Shows where each flat panel will fold into the assembled box.
Use to plan branding, opening sequence, and panel overprints.
Glue Paths: Know Where The Box Needs To Work
Glue paths are the areas where adhesive is applied to hold the packaging structure together. These areas need to stay practical, clean, and production-ready.
When artwork overlaps glue paths, several issues can appear:
Adhesive may not bond properly.
Ink or coating may affect glue performance.
Printed detail may be hidden.
Glue marks may show through.
The join may look untidy.
Assembly may become less reliable.
This is why packaging design agency teams, artworkers, production partners, and brand teams need to review glue paths before artwork is finalised.
A dieline is not just a template. It is the packaging’s choreography. Every panel, fold, cut, and glue point has a role. Nobody wants the logo dancing into the adhesive.
Dielines: The Map Behind The Magic
Dielines show the flat structure of a packaging item before it is cut, folded, glued, and assembled. They usually include cut lines, fold lines, bleed areas, safe areas, glue flaps, and panel boundaries.
For avoiding glue area clashes in art, dielines are essential because they show where artwork can safely sit and where it should not.
A good dieline review should ask:
Where are the glue areas?
Which panels will be visible after assembly?
Which panels will be hidden or overlapped?
Where are the folds and joins?
Where does the customer first see the brand?
Where will the box be opened?
Which areas need legal, product, or event information?
Does the artwork still make sense once folded?
For technology brands working across retail, e-commerce, and corporate events, the dieline should be checked against the full use case, not just the product shot.
Panel Overprints: Keeping Visual Integrity After Assembly
Panel overprints are design techniques used to help graphics continue across folds, joins, or panels in a controlled way. They can support a cleaner finish when artwork wraps around a box or when colour needs to appear consistent across visible surfaces.
Panel overprints can help:
Reduce visible breaks in patterns.
Keep colour transitions smoother.
Support full-wrap designs.
Maintain graphic continuity.
Improve the assembled look.
Hide minor alignment tolerances.
Support premium brand presentation.
They are particularly useful for cool packaging designs that rely on wraparound artwork, bold colour fields, technical patterns, gradients, or immersive brand storytelling.
For more on managing print across larger surfaces, read Full Wrap Print On Custom Boxes Without Banding.
Read The Blog
→
The aim is not to pretend production tolerances do not exist. It is to design elegantly around them.
The Impact On Premium Unboxing Experiences
A premium unboxing experience depends on flow. The customer should move through the packaging in a way that feels deliberate: outer box, opening point, reveal, product, inserts, accessories, and any follow-up content.
Glue area clashes can disrupt that flow by making the packaging feel less refined. A visible join through a hero image, a hidden tagline, or a misaligned campaign graphic can pull attention away from the product.
Thoughtful artwork placement supports:
A cleaner first impression.
Better reveal sequencing.
Stronger brand storytelling.
More confident product presentation.
Higher perceived product value.
Stronger customer engagement.
Better shareability across social and event channels.
For technology brands, the packaging should feel as considered as the product interface. Different medium, same expectation: clean, intuitive, and beautifully engineered.
Dual Packaging Strategies: Consumer Products And Corporate Events
Many technology brands need packaging that works across two worlds: consumer retail and corporate events. Each has different pressures.
Consumer Product Packaging
Consumer packaging often needs to support retail display, e-commerce delivery, protection, product education, compliance information, and premium unboxing.
Artwork must be clear, structured, and production-safe. Glue areas should never interfere with product claims, regulatory marks, serial information, or customer-facing copy.
Corporate Event Packaging
Corporate event packaging may include launch kits, press packs, investor gifts, employee onboarding, conference merchandise, or VIP product previews.
These packs often need more storytelling, more personalisation, and more visual impact. That makes glue area control even more important because campaign artwork is usually doing more of the emotional heavy lifting.
One Brand, Different Packaging Jobs
A dual packaging strategy should keep core brand assets consistent while adapting layout and artwork placement to the structure. The logo, colour system, tone, and visual hierarchy should remain recognisable, even when the pack format changes.
That is where creative solutions for artwork placement come in: not forcing one design onto every box, but translating the brand cleanly across formats.
How Packaging Design Supports Brand Perception
Packaging design has a direct impact on how customers judge quality. Before they turn on the device, open the accessory, scan the code, or experience the software, they experience the box.
Clean artwork tells customers:
The brand is detail-focused.
The product is premium.
The experience has been designed carefully.
The company values presentation.
The packaging is part of the product story.
Messy artwork tells a different story, even if the product inside is excellent.
For a technology brand, this matters because packaging is part of the customer engagement model. It can support excitement, reassurance, confidence, and loyalty. If your product is designed to increase customer connection, the packaging should start that relationship with precision.
Sustainability And Glue Area Planning
Sustainability in packaging is not only about material choice. It is also about reducing avoidable waste, improving production accuracy, and designing packaging that performs without unnecessary rework.
Thoughtful glue area planning can support sustainability by helping reduce:
Failed samples.
Rejected print runs.
Reworked artwork.
Over-engineered packaging.
Additional labels used to cover mistakes.
Material waste from misaligned production.
Extra components used to compensate for poor design.
For sustainable UK packaging strategies, claims should still be specific. Use language such as recyclable board, recycled content with a stated percentage, FSC-certified options, or plastic-free where the full construction supports it.
If your business maps packaging decisions to SDGs goals or CSR reporting, cleaner artwork processes can contribute to waste reduction and stronger documentation. It is not the whole sustainability story, but it is a smart chapter.
Operational Efficiency: Why Design Decisions Affect Production
A packaging concept can look outstanding in a presentation deck and still create problems in production if glue paths, folds, safe areas, and assembly steps have not been considered.
Operational efficiency depends on artwork that works with:
Production tolerances.
Assembly order.
Glue application.
Folding direction.
Material behaviour.
Packing speed.
Quality checks.
Transport and storage.
Global supply chain requirements.
For high-volume product packaging or event rollouts, small artwork issues can become expensive at scale. A 2mm clash on one sample may seem minor. On 50,000 boxes, it becomes a very well-travelled mistake.
A good design packaging group or packaging partner should flag these issues early, before the artwork reaches final approval.
Risk Area
Possible Issue
Why It Matters
Branding
Logo, tagline, or hero artwork is hidden by a fold, join, or glue flap.
Can make premium packaging feel less precise and less considered.
Production
Ink, coating, or artwork placement interferes with glue performance.
May cause assembly issues, rework, rejected samples, or delayed approval.
Compliance
Legal copy, QR codes, or product information sits too close to folds or hidden panels.
Can reduce readability and create extra proofing pressure.
Customer experience
The opening sequence feels messy or visually interrupted.
Can weaken unboxing, perceived quality, and brand confidence.
Best Practices For Avoiding Glue Area Clashes
Use these best practices when designing artwork that prevents glue area overlaps.
1. Start With The Correct Dieline
Always design from the approved dieline for the exact box style and size. Do not adapt artwork from a similar structure and hope the glue areas match. Hope is not a production method.
2. Mark Glue Areas Clearly
Glue paths should be visible in the artwork file as non-printing guides. Everyone reviewing the file should understand where adhesive, overlap, and hidden areas sit.
3. Keep Key Artwork In Safe Areas
Place logos, text, QR codes, icons, and product messages away from folds, cuts, glue flaps, and panel overlaps.
4. Check The Assembled View
Review the flat artwork and a 3D mock-up. Some problems only appear when the box is folded into shape.
5. Use Panel Overprints Thoughtfully
For wraparound designs, extend colours or patterns carefully across panels so small production shifts do not create obvious visual breaks.
6. Avoid Fine Detail Near Joins
Tiny text, delicate lines, QR codes, and precise patterns should not sit close to glued edges or folds.
7. Test With Real Samples
Digital mock-ups are useful, but physical samples show how the material, glue, folds, and artwork actually behave.
8. Align Design And Production Teams Early
Brand, artwork, production, procurement, and fulfilment teams should review packaging before final sign-off. Everyone sees different risks.
Creative Solutions For Artwork Placement
Avoiding glue areas does not mean compromising the design. It often creates better design because it forces clearer hierarchy and smarter use of space.
Creative options include:
Move key branding to primary panels: Keep hero branding on the front, lid, or main reveal panel rather than near joins.
Use pattern in glue-risk areas: Abstract textures, gradients, or low-detail backgrounds can tolerate overlaps better than text or logos.
Create intentional wrap moments: If artwork wraps around a corner, design the transition so it feels deliberate.
Use inserts for detailed information: If the outer box is structurally busy, move technical copy, onboarding steps, or campaign messages onto inserts.
Use sleeves or belly bands: A sleeve can carry campaign artwork without interfering with the box’s glue construction.
Design the reveal panel separately: For unboxing-led technology products, the inside lid or first reveal panel may be the best place for brand storytelling.
This is where premium packaging gets interesting: fewer clashes, more theatre.
Common Misconceptions About Glue Area Clashes
“The Printer Will Fix It.”
Production partners can flag risks, but they cannot always redesign artwork without affecting brand approval, timing, or cost. Build the artwork correctly from the start.
“It Looks Fine On The Flat Proof.”
Flat proofs are only part of the story. Boxes are folded, glued, pressed, packed, and opened. Always review the assembled version.
“A Small Overlap Will Not Matter.”
Sometimes it will not. Sometimes it will cover the first letter of your brand name. Test before assuming.
“Glue Areas Are Only A Production Issue.”
Glue areas affect brand visibility, unboxing, sustainability, customer experience, and operational efficiency. They are a strategic design detail.
“More Artwork Means More Premium.”
Not always. Premium design often comes from restraint, hierarchy, and detail control. Give the artwork room to breathe and the glue room to do its job.
Packaging For Merchandising And Events
Merchandising packaging often needs to work harder than standard product packaging. It may be displayed at events, handed to press, photographed by influencers, opened on camera, or reused internally.
That means artwork must be robust across more touchpoints.
For event and merchandising packaging, check:
Will the logo be visible in photos?
Does the box look clean from multiple angles?
Are campaign messages away from glue areas?
Does the opening reveal support the event story?
Can packs be assembled quickly on tight timelines?
Will the artwork survive courier and event handling?
Are inserts needed for products, chargers, cards, or accessories?
Can the design scale across different box sizes?
A client engagement strategy can start with a beautifully printed box. It can also stumble with a badly placed glue flap. Tiny hinge, big drama.
How To Review Artwork Before Approval
Before approving packaging artwork, run a structured review.
Artwork Review Checklist
Is the correct dieline being used?
Are glue areas clearly marked as non-printing guides?
Are logos fully inside safe areas?
Is key copy away from folds and overlaps?
Are QR codes clear, flat, and scannable?
Are legal and compliance details readable after assembly?
Does the artwork still work in 3D?
Are panel overprints used where helpful?
Are colour transitions aligned across visible panels?
Is the opening sequence visually clear?
Has a physical sample been reviewed?
Have sustainability claims been checked and supported?
Has fulfilment reviewed the packed format?
Is the design scalable across related packaging formats?
If the answer is “not sure” to any of these, pause before production. A small check now can save a very large sigh later.
How Glue Area Planning Improves Customer Engagement
Customer engagement is shaped by detail. A customer may not consciously notice that your artwork avoided every glue path, but they will notice that the packaging feels clean, coherent, and premium.
Glue-aware artwork can help:
Increase customer confidence.
Improve unboxing satisfaction.
Support repeat purchase.
Encourage social sharing.
Strengthen perceived product value.
Make product launches feel more polished.
Reinforce brand memory.
This is especially important for technology brands, where packaging often introduces the product ecosystem. The box can guide setup, reveal accessories, explain value, and frame the product as part of a larger experience.
Good packaging does not just contain the product. It starts the relationship.
Working With A Packaging Design Agency Or Supplier
Whether you work with an internal team, a packaging design agency, a graphic design packaging specialist, or a production supplier, the workflow should make glue areas visible early.
Ask your partner:
Can they provide approved dielines before artwork begins?
Are glue paths and safe areas clearly marked?
Can they create 3D mock-ups?
Can they produce physical samples?
Do they review artwork for production clashes?
Can they advise on materials and sustainability claims?
Can they support consumer and event packaging formats?
Can they meet sampling and production deadlines?
Can they scale across markets or campaign sizes?
The right partner will not simply say “send us the artwork”. They will help make sure the artwork survives the box.
Ready To Keep Your Branding Clean After Assembly?
Ready to design packaging that looks as sharp assembled as it does on screen? Explore gift box packaging and create premium boxes that protect the product, elevate the unboxing, and keep every brand detail exactly where it belongs.
Shop The Range
→
FAQs
What Are Glue Area Clashes In Packaging Design?
Glue area clashes happen when artwork, text, logos, or key graphics overlap with areas that need to be glued, folded, joined, or hidden during assembly. This can cause branding to be covered, distorted, misaligned, or weakened visually once the box is produced.
How Can Safe Areas And Glue Paths Improve Packaging Aesthetics?
Safe areas keep important artwork away from cuts, folds, and glue sections. Glue paths show where adhesive and overlaps will sit, helping designers avoid placing key brand details where they may be hidden or disrupted.
What Is The Importance Of Panel Overprints In Packaging?
Panel overprints help maintain visual continuity across folded or joined packaging panels. They are especially useful for wraparound artwork, colour fields, patterns, and premium designs where small alignment shifts could otherwise become obvious.
How Do Dual Packaging Strategies Affect Consumer Products And Corporate Events?
Consumer packaging usually needs to balance retail display, product protection, compliance, and unboxing. Corporate event packaging often carries more storytelling and campaign detail. Both need brand consistency, but artwork placement should be adapted to each format and use case.
What Role Does Thoughtful Design Play In Enhancing Unboxing Experiences?
Thoughtful design controls the order in which customers see branding, product information, inserts, and the product itself. When artwork avoids glue areas and supports the box structure, the unboxing feels cleaner, smoother, and more premium.
How Can Packaging Design Support Sustainability Goals?
Good packaging design can reduce wasted samples, rejected print runs, unnecessary rework, and extra materials used to cover mistakes. Sustainability claims should still be specific, supported, and linked to materials or certifications where relevant.
What Are The Best Practices For Avoiding Glue Area Clashes In Artwork?
Start with the approved dieline, mark glue areas clearly, keep key artwork inside safe zones, review the assembled view, avoid fine detail near joins, and test physical samples before production.
How Does Packaging Design Impact Brand Perception And Consumer Engagement?
Packaging is often the first physical brand touchpoint. Clean artwork, precise layout, and a premium unboxing experience can improve perceived quality, support customer confidence, and encourage repeat engagement.
What Are The Key Considerations For Technology Brands In Packaging Design?
Technology brands should consider product protection, regulatory information, global consistency, premium unboxing, sustainability requirements, event use cases, and how artwork will appear after assembly.
How Can Operational Efficiency Be Maintained While Ensuring Premium Packaging Design?
Operational efficiency improves when dielines, glue paths, safe areas, artwork files, and physical samples are reviewed early. This reduces production delays, rework, rejected packaging, and fulfilment issues.
/* Pill outline button */
.pill-outline{
display: inline-flex;
align-items: center;
justify-content: center;
gap: 10px;
padding: 12px 26px;
border: 2px solid #111;
border-radius: 9999px;
background: transparent;
color: #111;
text-decoration: none;
font-family: inherit;
font-weight: 700;
font-size: 12px;
line-height: 1;
text-transform: uppercase;
letter-spacing: 0.08em;
cursor: pointer;
user-select: none;
transition: background-color 160ms ease, color 160ms ease, transform 120ms ease;
}
.pill-outline__arrow{
font-size: 14px;
line-height: 1;
transform: translateY(-0.5px);
}
.pill-outline:hover{
background: #111;
color: #fff;
}
.pill-outline:active{
transform: translateY(1px);
}
.pill-outline:focus-visible{
outline: 2px solid #e9b448;
outline-offset: 3px;
}
/* Third heading */
.third-heading{
font-size: 18px;
line-height: 1.35;
margin: 18px 0 8px 0;
font-weight: 700;
}
/* Tables */
.table-wrap{
width: 100%;
overflow-x: auto;
border: 1px solid rgb(234, 232, 230);
border-radius: 18px;
background: #fff;
margin: 14px 0 26px 0;
}
.tb-table{
width: 100%;
border-collapse: collapse;
min-width: 780px;
font-family: Arial, sans-serif;
}
.tb-table thead th{
text-align: left;
font-weight: 700;
font-size: 14px;
padding: 14px 14px;
border-bottom: 1px solid rgb(234, 232, 230);
background: #fafafa;
white-space: nowrap;
}
.tb-table td{
font-size: 14px;
line-height: 1.5;
padding: 14px 14px;
border-bottom: 1px solid rgb(234, 232, 230);
vertical-align: top;
}
.tb-table tbody tr:last-child td{
border-bottom: none;
}
/* FAQ */
.faq{
width: 90%;
max-width: 900px;
margin: 0 auto 32px auto;
font-family: Arial, sans-serif;
}
.faq-title{
text-align: center;
margin: 0 0 14px 0;
font-size: 24px;
line-height: 1.3;
}
.faq-item{
border: 1px solid rgb(234, 232, 230);
border-radius: 25px;
background: #fff;
overflow: hidden;
margin: 10px 0;
}
.faq-item summary{
position: relative;
list-style: none;
cursor: pointer;
padding: 16px 56px 16px 18px;
font-weight: 700;
font-size: 16px;
line-height: 1.4;
outline: none;
user-select: none;
}
.faq-item summary::-webkit-details-marker{
display: none;
}
.faq-item summary::after{
content: "▸";
position: absolute;
right: 18px;
top: 50%;
transform: translateY(-50%);
transition: transform 160ms ease;
font-size: 18px;
line-height: 1;
opacity: 0.8;
}
.faq-item[open] summary::after{
transform: translateY(-50%) rotate(90deg);
}
.faq-content{
padding: 12px 18px 18px 18px;
margin-top: 6px;
font-size: 15px;
line-height: 1.6;
color: #333;
border-top: 1px solid rgb(234, 232, 230);
background-color: #fff;
}
.faq-item summary:hover{
background: #fafafa;
}
.faq-item summary:focus-visible{
outline: 2px solid #e9b448;
outline-offset: 2px;
border-radius: 18px;
}
@media (max-width: 600px){
.faq-title{
font-size: 22px;
}
.faq-item summary{
font-size: 15px;
padding: 14px 48px 14px 16px;
}
.faq-content{
font-size: 14px;
padding: 14px 16px 16px 16px;
margin-top: 4px;
}
.tb-table{
min-width: 720px;
}
}