


EPR Legislation In The UK: What It Means For Your Packaging
EPR Legislation In The UK: What It Means For Your Packaging
Packaging has always had a job to do. It protects your product, carries your brand, creates that all-important first impression, and, when done beautifully, turns an order into an experience.
Now, it also comes with a little more admin.
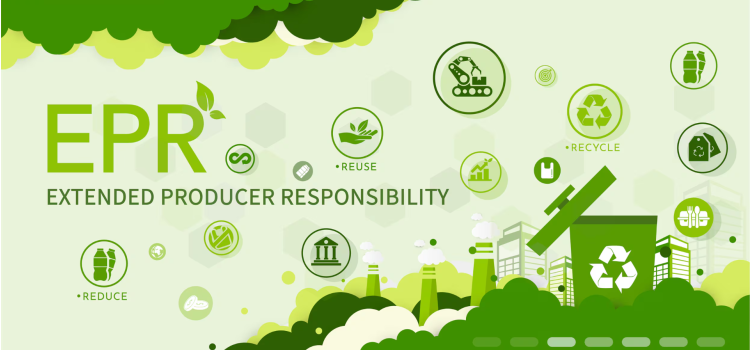
Extended Producer Responsibility, usually shortened to EPR, is changing how UK businesses think about packaging. The aim is simple enough: businesses that place packaging on the UK market may need to take more responsibility for what happens to that packaging after it has been used.
The details, however, can feel less simple. Thresholds, packaging classes, reporting periods, nation data, RAM ratings, PRNs. There’s a lot of terminology for something that often starts with a box, a bag, or a mailer.
This guide breaks down what EPR does, who it may affect, what information you may need to collect, and how to start preparing your packaging records with confidence.
Please note: This article provides general information only and is not legal, tax or regulatory advice. Businesses should consult the official GOV.UK EPR guidance or a qualified compliance adviser regarding their own obligations. EPR rules can change, so always check the latest official guidance or speak to a qualified compliance scheme if you’re unsure.
Need packaging that feels considered from the first touch?
Shop Gift Boxes →
What Is EPR Packaging Legislation?
EPR stands for Extended Producer Responsibility.
In plain English, it means that businesses responsible for packaging may need to help cover the cost of dealing with packaging waste. This includes reporting packaging data and, for some larger organisations, paying fees based on the packaging they place on the UK market.
According to GOV.UK’s EPR guidance, the way UK organisations responsible for packaging carry out their recycling responsibilities has changed. If your business is affected, you may need to report packaging data and pay fees based on that data.
The legislation is intended to encourage packaging that is easier to recycle, alongside improved reporting and greater transparency.
In other words, your packaging still needs to look beautiful. It just needs to bring its paperwork with it.
Why Does EPR Matter For Businesses?
EPR matters because packaging is no longer just a purchasing decision. For affected businesses, it can become a reporting, compliance, and cost-planning decision too.
Depending on your business size and packaging activity, EPR may affect:
What packaging data you need to collect.
How often you need to report packaging data.
Whether you need to register with the relevant environmental regulator.
Whether you need to pay fees.
Whether you need to assess how recyclable your packaging is.
How you brief suppliers, manufacturers, and fulfilment partners.
GOV.UK states that affected organisations may need to collect and report data, pay waste disposal fees, pay scheme administrator costs, pay charges to the environmental regulator, obtain PRNs or PERNs, and report nation data, depending on their producer status and activities.
For many brands, this means keeping clearer records of the packaging they use, including material type, weight, packaging class, and how the packaging is supplied.
This does not mean packaging has to become plain, cold, or purely functional. Many businesses are now aiming to balance brand experience, product protection, customer presentation, and responsible material choices.
That’s the sweet spot.
Does EPR Apply To My Business?
EPR may apply if your organisation imports or supplies packaging in the UK and meets certain turnover and tonnage thresholds.
According to GOV.UK guidance on who is affected, you may need to collect and report packaging data for a given year if all of the following apply:
You’re an individual business, subsidiary, or group.
You have an annual turnover of £1 million or more.
You were responsible for importing or supplying more than 25 tonnes of packaging to the UK market in the previous calendar year.
You carry out one or more packaging activities covered by the regulations.
Packaging activities can include:
Supplying packaged goods to the UK market under your own brand.
Placing goods into packaging.
Importing products in packaging.
Supplying empty packaging.
Hiring or loaning reusable packaging.
Owning an online marketplace where non-UK businesses sell goods into the UK.
This means EPR can apply to a wide range of businesses, from product brands and retailers to importers, packaging suppliers, and marketplace operators.
If you’re a smaller business below the turnover or packaging weight thresholds, you may not need to act under EPR. However, it’s still worth understanding the rules, especially if your business is growing, your order volumes are increasing, or you’re starting to sell through new channels.
Small Producers And Large Producers: What Is The Difference?
EPR separates affected organisations into small producers and large producers. This matters because your producer status affects what you may need to collect, report, register for, and pay.
Small Producers:
A small producer is generally an organisation that meets one of the following conditions:
Annual turnover of more than £1 million and up to £2 million, and supplies more than 25 tonnes of packaging in the UK.
Annual turnover of more than £1 million, and supplies more than 25 tonnes but no more than 50 tonnes of packaging in the UK.
GOV.UK’s small producer guidance explains that small producers may need to register with the regulator, pay a fee, and collect and report packaging data.
Small producers usually report data yearly. GOV.UK states that small producers must report data about packaging supplied in the previous calendar year by 1st April of the following year. For example, packaging data for January to December 2025 must be reported by 1st April 2026.
Large Producers:
A large producer is generally an organisation that has:
Annual turnover of £2 million or more.
Responsibility for supplying or importing more than 50 tonnes of packaging in the UK.
Large producers have wider reporting responsibilities. GOV.UK’s reporting periods and deadlines guidance states that large producers must collect and submit packaging data every 6 months.
Large producers may also need to pay waste disposal fees, scheme administrator costs, regulator charges, and meet recycling obligations. GOV.UK’s recycling obligations and waste disposal fees guidance explains that large organisations must fund an equivalent amount of recycling by buying PRNs or PERNs, and that waste disposal fees apply to household packaging, commonly binned packaging, and glass household drinks containers.
Small Producer Vs Large Producer At A Glance
Producer Type
Typical Threshold
Reporting Frequency
Potential Responsibilities
Small Producer
More than £1 million turnover and more than 25 tonnes of packaging, without meeting the large producer threshold.
Usually yearly.
Register, pay a fee, collect and report packaging data.
Large Producer
£2 million or more turnover and more than 50 tonnes of packaging supplied or imported in the UK.
Every 6 months.
Collect and report packaging data, register, pay relevant fees, meet recycling obligations, and assess recyclability where required.
Use this as a guide only. Always check the latest official GOV.UK guidance for your own organisation.
Reviewing your packaging range?
Explore Postal Boxes →
What Counts As Packaging Under EPR?
Packaging is any material used to contain, protect, handle, deliver, or present goods.
That can include obvious items like boxes, bags, mailers, tissue paper, tape, product cartons, sleeves, labels, and inserts. It can also include packaging that is designed to be filled at the point of sale, such as a takeaway cup.
GOV.UK’s packaging data guidance also notes that packaging can make goods look appealing for sale and may display a company’s logo or brand.
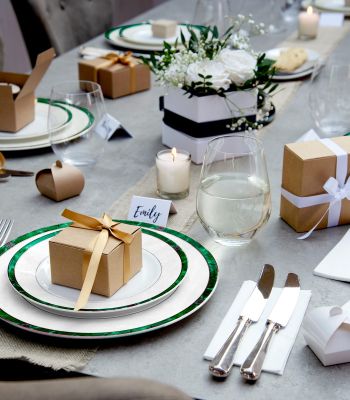
This is an important point for brand-led businesses. Your branded box, luxury bag, or printed mailer is not just decoration. It’s part of your customer experience, and it may also form part of your packaging reporting.
Key Packaging Terms Explained
EPR uses specific packaging classes. These are worth getting familiar with, because they help determine how packaging is reported.
Primary Packaging: Primary packaging is the packaging that contains a single sales unit for the final user. For example, a jewellery box, candle box, bottle box, or product carton.
Secondary Packaging: Secondary packaging groups several sales units together. For example, a box that holds multiple individual product boxes.
Shipment Packaging: Shipment packaging is used to send one or more items to a customer. For example, a postal box, mailing bag, or protective outer packaging used for delivery.
Tertiary Packaging: Tertiary packaging is usually used for transport and handling between businesses. For example, pallet wrap, pallets, or bulk transit packaging.
Household Packaging: Household packaging is packaging that is likely to be disposed of by a household or in a public bin. GOV.UK’s household and non-household packaging guidance states that primary and shipment packaging must be classed as household unless it meets specific conditions.
Non-Household Packaging: Non-household packaging is packaging that is not expected to end up in household or public bins. GOV.UK guidance states that secondary and tertiary packaging must be classed as non-household.
Primary and shipment packaging can only be classed as non-household in specific circumstances. If you report primary or shipment packaging as non-household, you must be able to show sufficient evidence and keep that evidence for at least 7 years.
What Data Might You Need To Collect?
The exact data you need depends on whether you’re a small or large producer, and what packaging activities you carry out.
GOV.UK’s packaging data guidance states that affected organisations must collect and report data about packaging supplied within or to the UK market. The guidance also states that data and supporting evidence must be kept for at least 7 years.
In general, affected organisations may need to collect information about:
Packaging activity, meaning how the packaging was supplied.
Packaging type, such as household or non-household.
Packaging class, such as primary, secondary, shipment, or tertiary.
Packaging material.
Packaging weight.
Quantity of packaging supplied.
Nation data, if relevant.
Recyclability assessment data, if relevant.
Materials may include paper and board, fibre-based composite materials, plastic, steel, aluminium, glass, wood, and other material categories.
For practical purposes, this means businesses should start building a clear packaging record. A spreadsheet is often a sensible starting point.
You may want to record:
Product or packaging SKU.
Packaging item name.
Supplier.
Material.
Weight in kilograms.
Packaging class.
Whether it’s used for retail, gifting, shipping, wholesale, or internal transport.
Whether it’s branded or plain.
Whether it’s supplied to a customer, retailer, distributor, or end user.
Evidence for non-household classification, where applicable.
The earlier you build the habit, the less painful reporting becomes. Future-you will be very grateful.
Example Packaging Record
Packaging Item
Material
Packaging Class
Weight
Used For
Postal box
Paper / board
Shipment
Record in kg
Sending ecommerce orders to customers.
Product gift box
Paper / board
Primary
Record in kg
Containing and presenting one sales unit.
Tissue paper
Paper
Primary or shipment, depending on use
Record in kg
Product presentation, protection, or reveal.
Outer transit carton
Corrugated board
Tertiary
Record in kg
Bulk transport between businesses.
This is not a reporting template, but it shows the sort of information worth keeping close. Your actual reporting requirements will depend on your organisation and the packaging activities you carry out.
What Is Nation Data?
Nation data is information about where packaging is supplied in the UK and where it’s discarded.
GOV.UK explains that affected organisations must submit nation data if they carry out certain activities, including supplying filled or empty packaging directly to customers in the UK where they are the end user, supplying empty packaging to organisations that are not legally obligated or are small organisations, hiring or loaning reusable packaging, owning certain online marketplaces, or importing packaged goods for their own use and discarding the packaging.
You can read the full criteria in the official GOV.UK packaging data guidance.
What Is RAM And Why Does Recyclability Matter?
RAM stands for Recyclability Assessment Methodology.
It’s the system used to assess the recyclability of certain packaging. GOV.UK’s RAM guidance states that only large producers must collect and report recyclability assessment data. It applies to household packaging, packaging that commonly ends up in public bins, and household drinks containers made of glass.
Under the Recyclability Assessment Methodology, relevant packaging is assessed against criteria that determine a Red, Amber or Green rating. That rating affects the disposal fee charged for that packaging. This is known as fee modulation.
In simple terms, packaging that is assessed as being more recyclable is intended to attract lower disposal fee modulation than packaging that’s harder to recycle.
This is why material choices matter. Paper and board packaging, plastic windows, laminations, mixed materials, coatings, ribbons, magnets, foils, and inserts can all affect how a packaging item is assessed.
That does not mean every beautiful finish has to disappear. It means businesses need to understand what their packaging is made from and make more informed choices.
For example:
Can the amount of packaging be reduced without damaging the unboxing experience?
Can you choose a widely recyclable board?
Can you avoid unnecessary mixed materials?
Can you keep premium details, but use them with more intention?
Can you ask your packaging supplier for material details and weights?
Good packaging should still feel elevated. The difference is that it should also be easier to explain.
What Actions Should Businesses Take?
If you think EPR may apply to your business, start with these steps:
1. Check Whether You Meet The Thresholds.
Look at your annual turnover and the total weight of packaging you supplied or imported in the relevant previous calendar year.
Remember, if your business is part of a group, you may need to consider group-level turnover and packaging weight, not just one individual company. GOV.UK’s guidance explains how parent companies, groups, and subsidiaries should approach EPR reporting.
2. Identify Your Packaging Activities.
Work out how your business handles packaging. Do you sell products under your own brand? Import goods in packaging? Fill packaging? Supply empty packaging? Run an online marketplace?
Your activity affects what you may be responsible for. The official GOV.UK packaging activities section is a useful place to check this.
3. Build A Packaging Data Record.
Create a central record of the packaging your business uses or supplies. Include material, weight, class, quantity, and supplier information.
If you do not know the packaging weight or material composition, ask your supplier. This is especially important if you use multiple components, such as boxes, tissue, stickers, inserts, bags, ribbons, and mailing cartons.
For more detail on what to collect, use GOV.UK’s packaging data collection guidance.
4. Decide Whether Packaging Is Household Or Non-Household.
For large producers, household and non-household classification matters. Most primary and shipment packaging is classed as household unless it meets specific conditions.
If you classify primary or shipment packaging as non-household, you must be able to evidence why. GOV.UK’s household and non-household packaging guidance explains what counts and what evidence may be needed.
5. Check Your Reporting Deadlines.
Large producers generally report packaging data every 6 months. Small producers report yearly.
Current reporting periods and deadlines are explained in GOV.UK’s packaging data deadlines guidance. Because deadlines can change, it’s worth checking the latest version before each reporting period.
6. Register If You Need To.
If your organisation is obligated, you may need to create an account through the Report Packaging Data service and register with the relevant environmental regulator.
GOV.UK’s registration guidance explains that obligated organisations must register with the environmental regulator and pay a registration fee.
7. Consider Whether You Need A Compliance Scheme.
A compliance scheme is a third party that can help with EPR requirements. It may be able to register your organisation, submit packaging data, and help with PRNs or PERNs.
GOV.UK’s EPR guidance collection includes a section on compliance schemes and public registers. Always check that any scheme you use appears on the official register.
8. Review Your Packaging Choices.
EPR is a good moment to look at your packaging with fresh eyes.
Ask:
Is every component needed?
Does each layer add protection, presentation, or brand value?
Are materials easy to identify?
Could you reduce packaging weight?
Could you switch to a more widely recyclable option?
Could branded packaging help your product feel more premium without adding unnecessary layers?
Packaging should never be an afterthought. Under EPR, it pays to make it considered from the start.
Want to make every layer work harder?
Explore Printed Packaging →
How Tiny Box Company Can Help You Make More Considered Packaging Choices
At Tiny Box Company, we believe packaging is part of the brand experience. It’s the first thing your customer sees, touches, opens, and remembers.
But beautiful packaging should also be practical, carefully chosen, and easier to understand.
When you’re reviewing packaging for EPR, it helps to think about three things:
Material: Know what your packaging is made from. Look for clear material information and avoid making sustainability claims unless you can support them.
Weight: Packaging weight matters for reporting. If you’re comparing options, lighter packaging may help reduce the total packaging weight your business places on the market.
Purpose: Every packaging layer should earn its place. A postal box protects. Tissue creates a reveal. Ribbon adds a finishing moment. A branded sticker seals the experience.
The goal is not to strip everything back until it feels forgettable. The goal is to choose with intention.
A polished packaging experience can still support responsible packaging choices. It just needs to be designed with both the customer and the compliance spreadsheet in mind.
Where To Find Further EPR Guidance
For the most accurate and current information, use official sources first.
Useful places to start include:
GOV.UK: Extended Producer Responsibility For Packaging
GOV.UK: Who Is Affected And What To Do
GOV.UK: What Small Producers Must Do
GOV.UK: Packaging Data To Collect
GOV.UK: Reporting Periods And Submission Deadlines
GOV.UK: Household And Non-Household Packaging
GOV.UK: Recyclability Assessment Methodology
GOV.UK: Report Packaging Data
PackUK, the scheme administrator for the UK’s packaging EPR programme
The Producer Responsibility Obligations (Packaging And Packaging Waste) Regulations 2024
Because EPR guidance is updated regularly, it’s worth checking GOV.UK before each reporting period.
Final Thought
EPR may add another layer to packaging planning, but it does not take away the value of a beautiful unboxing experience.
Your packaging can still feel premium, considered, and completely on-brand. The key is knowing what you use, why you use it, and how it performs after your customer has opened it.
Because the best packaging does more than protect a product. It protects the first impression too.
Ready to make packaging feel more considered?
Speak To Our Team →
FAQs
What Does EPR Stand For?
EPR stands for Extended Producer Responsibility. For packaging, it means certain businesses that supply or import packaging may need to report packaging data and, depending on their size and responsibilities, pay fees connected to the cost of managing packaging waste. You can read the official overview on GOV.UK.
Does EPR Apply To Small Businesses?
It depends on your turnover, packaging tonnage, and packaging activities. GOV.UK states that organisations may need to collect and report packaging data if they have annual turnover of £1 million or more, were responsible for importing or supplying more than 25 tonnes of packaging to the UK market in the previous calendar year, and carry out covered packaging activities. If your business is growing quickly, it’s sensible to track packaging use early, even if you’re not currently obligated.
What Is The Difference Between A Small Producer And A Large Producer?
A small producer is generally an organisation with turnover above £1 million that supplies more than 25 tonnes of packaging, but does not meet the large producer threshold. A large producer generally has turnover of £2 million or more and supplies or imports more than 50 tonnes of packaging. Large producers have wider responsibilities, including 6-monthly reporting and, in many cases, waste disposal fees and recycling obligations. You can check the latest details in GOV.UK’s producer guidance.
Do Small Producers Have To Report Packaging Data?
Yes, if they are obligated. GOV.UK’s small producer guidance states that small producers may need to register with the regulator, pay a fee, and collect and report packaging data.
What Packaging Do I Need To Report?
This depends on your business and producer status. You may need to report packaging activity, packaging type, packaging class, material, weight, and quantity. Large producers may also need to report household and non-household packaging, nation data, and recyclability assessment information where relevant. Use GOV.UK’s packaging data guidance for the official detail.
What Is Household Packaging?
Household packaging is packaging that is likely to end up in a household bin or public bin. Most primary and shipment packaging is treated as household packaging unless specific conditions apply.
What Is Non-Household Packaging?
Non-household packaging is packaging that is not expected to be disposed of by households or in public bins. Secondary and tertiary packaging are generally treated as non-household. Primary and shipment packaging can only be classed as non-household in specific circumstances, and you must keep evidence. GOV.UK’s household and non-household guidance explains this in more detail.
What Is RAM?
RAM stands for Recyclability Assessment Methodology. It’s used to assess the recyclability of certain packaging and gives packaging a red, amber, or green rating. This rating can affect disposal fees for large producers. Read the official RAM guidance on GOV.UK.
Do I Need To Use A Compliance Scheme?
You do not always have to use one, but many businesses choose to because EPR reporting can be complex. A compliance scheme can help with registration, data reporting, and PRNs or PERNs. Always check that any scheme you use appears on the official public register listed through the GOV.UK EPR guidance collection.
Can Better Packaging Choices Reduce EPR Costs?
Potentially, yes. EPR is designed to encourage packaging that is easier to recycle and more carefully designed. For large producers, recyclability ratings can affect disposal fees. Even for businesses not yet obligated, reviewing packaging weight, materials, and structure is a sensible step.
Is EPR The Same As The Plastic Packaging Tax?
No. EPR and Plastic Packaging Tax are separate. EPR focuses on responsibility for packaging waste and reporting. Plastic Packaging Tax applies to plastic packaging components that contain less than the required percentage of recycled plastic, subject to the relevant legislation and exemptions.
Where Can I Get Official Help?
Start with GOV.UK’s EPR packaging guidance, PackUK, your relevant environmental regulator, or a registered compliance scheme. If you’re unsure whether your business is obligated, speak to a qualified adviser.
/* EPR blog only: prevents link/button/table/FAQ styles leaking across the website */
.epr-blog a:not(.pill-outline){
color: #30acd9 !important;
font-weight: 700 !important;
text-decoration: underline !important;
text-underline-offset: 3px;
}
/* Pill outline button */
.epr-blog .pill-outline,
.epr-blog a.pill-outline{
display: inline-flex;
align-items: center;
justify-content: center;
gap: 10px;
padding: 12px 26px;
border: 2px solid #111;
border-radius: 9999px;
background: transparent;
color: #111 !important;
text-decoration: none !important;
font-family: inherit;
font-weight: 700;
font-size: 12px;
line-height: 1;
text-transform: uppercase;
letter-spacing: 0.08em;
cursor: pointer;
user-select: none;
transition: background-color 160ms ease, color 160ms ease, transform 120ms ease;
}
.epr-blog .pill-outline__text{
color: inherit;
font-weight: 700;
text-decoration: none !important;
}
.epr-blog .pill-outline__arrow{
color: inherit;
text-decoration: none !important;
font-size: 14px;
line-height: 1;
transform: translateY(-0.5px);
}
.epr-blog .pill-outline:hover{
background: #111;
color: #fff !important;
text-decoration: none !important;
}
.epr-blog .pill-outline:hover .pill-outline__text,
.epr-blog .pill-outline:hover .pill-outline__arrow{
color: #fff !important;
text-decoration: none !important;
}
.epr-blog .pill-outline:active{
transform: translateY(1px);
}
.epr-blog .pill-outline:focus-visible{
outline: 2px solid #e9b448;
outline-offset: 3px;
}
/* Tables */
.epr-blog .table-wrap{
width: 100%;
overflow-x: auto;
border: 1px solid rgb(234, 232, 230);
border-radius: 18px;
background: #fff;
margin: 14px 0 26px 0;
}
.epr-blog .tb-table{
width: 100%;
border-collapse: collapse;
min-width: 780px;
font-family: Arial, sans-serif;
}
.epr-blog .tb-table thead th{
text-align: left;
font-weight: 700;
font-size: 14px;
padding: 14px 14px;
border-bottom: 1px solid rgb(234, 232, 230);
background: #fafafa;
white-space: nowrap;
}
.epr-blog .tb-table td{
font-size: 14px;
line-height: 1.5;
padding: 14px 14px;
border-bottom: 1px solid rgb(234, 232, 230);
vertical-align: top;
}
.epr-blog .tb-table tbody tr:last-child td{
border-bottom: none;
}
/* FAQ */
.epr-blog .faq{
width: 90%;
max-width: 900px;
margin: 0 auto 32px auto;
font-family: Arial, sans-serif;
}
.epr-blog .faq-title{
text-align: center;
margin: 0 0 14px 0;
font-size: 24px;
line-height: 1.3;
}
.epr-blog .faq-item{
border: 1px solid rgb(234, 232, 230);
border-radius: 25px;
background: #fff;
overflow: hidden;
margin: 10px 0;
}
.epr-blog .faq-item summary{
position: relative;
list-style: none;
cursor: pointer;
padding: 16px 56px 16px 18px;
font-weight: 700;
font-size: 16px;
line-height: 1.4;
outline: none;
user-select: none;
}
.epr-blog .faq-item summary::-webkit-details-marker{ display: none; }
.epr-blog .faq-item summary::after{
content: "▸";
position: absolute;
right: 18px;
top: 50%;
transform: translateY(-50%);
transition: transform 160ms ease;
font-size: 18px;
line-height: 1;
opacity: 0.8;
}
.epr-blog .faq-item[open] summary::after{
transform: translateY(-50%) rotate(90deg);
}
.epr-blog .faq-content{
padding: 12px 18px 18px 18px;
margin-top: 6px;
font-size: 15px;
line-height: 1.6;
color: #333;
border-top: 1px solid rgb(234, 232, 230);
background-color: #fff;
}
.epr-blog .faq-item summary:hover{ background: #fafafa; }
.epr-blog .faq-item summary:focus-visible{
outline: 2px solid #e9b448;
outline-offset: 2px;
border-radius: 18px;
}
@media (max-width: 600px){
.epr-blog .faq-title{ font-size: 22px; }
.epr-blog .faq-item summary{ font-size: 15px; padding: 14px 48px 14px 16px; }
.epr-blog .faq-content{ font-size: 14px; padding: 14px 16px 16px 16px; margin-top: 4px; }
.epr-blog .tb-table{ min-width: 720px; }
}

Essential Guide to Stickers for Kraft and Laminate Surfaces
Essential Guide To Stickers For Kraft And Laminate Surfaces
A sticker may be one of the smallest parts of your packaging, but when it lifts, tears, wrinkles, or refuses to stay put, it becomes very noticeable indeed.
Choosing the right stickers for kraft and laminate surfaces means looking beyond colour, shape, and artwork. The surface texture, adhesive, application pressure, storage conditions, packing speed, and opening experience all affect how well the sticker performs.
For e-commerce operations managers, the goal is simple: labels that apply quickly, stay secure through fulfilment and delivery, and open cleanly when they reach the customer.
Achieving that goal takes testing, not guesswork.
Get started with packaging accessories.
Explore The Range →
What Are Stickers For Kraft And Laminate Surfaces?
Stickers for kraft and laminate surfaces are adhesive labels selected and tested to perform reliably on either textured, absorbent kraft packaging or smoother, less absorbent laminated packaging.
Kraft and laminate behave differently. Kraft may be fibrous, textured, or dusty, while laminate is often smoother and less porous. An adhesive that performs well on one surface may not deliver the same result on the other.
The best stickers for packaging are therefore chosen using the actual packaging material, under realistic packing and storage conditions.
Why Surface Type Changes Sticker Performance
Adhesion depends on how effectively the sticker makes contact with the packaging surface.
A smooth surface usually gives the adhesive a more even contact area. A textured surface contains small peaks and gaps, meaning the adhesive may only touch part of the material.
This can affect:
Initial grip.
Edge lifting.
Long-term adhesion.
Application speed.
Removal behaviour.
Resistance to handling.
Performance in changing temperatures.
The quality of the finished presentation.
Packaging may look flat from a distance, but an adhesive notices every fibre, finish, and fold.
How Stickers Behave On Kraft Packaging
Kraft packaging is popular for its natural appearance and versatility, but its surface can present specific adhesive challenges.
Depending on the material, kraft may be:
Textured.
Fibrous.
Uncoated.
Slightly dusty.
Absorbent.
Uneven around folds or joins.
Durable stickers for kraft surfaces generally need enough initial grip to make contact across the texture. The sticker should also be applied with consistent pressure so the adhesive reaches as much of the surface as possible.
Potential problems include:
Corners lifting after application.
Labels releasing during storage or delivery.
Poor adhesion over folds.
Visible bubbles or uneven edges.
Inconsistent results between batches of packaging.
A kraft sticker adhesive should always be tested on the exact box, bag, wrap, or card being used. Testing on a generic sheet of kraft paper may not reflect the coating, texture, or storage conditions of the final pack.
How Stickers Behave On Laminated Packaging
Laminated packaging usually has a smoother, sealed surface. This can support clean application, but it does not guarantee reliable adhesion.
Different laminates may vary in:
Surface energy.
Gloss level.
Texture.
Coating.
Resistance to moisture.
Slip or release properties.
Compatibility with particular adhesives.
Laminate-compatible stickers should lie flat without sliding, wrinkling, or lifting at the edges.
Potential problems include:
Weak initial tack.
Stickers moving during application.
Adhesive failing to bond with the coating.
Residue remaining after opening.
Surface damage when the sticker is removed.
Labels lifting in colder storage conditions.
A smooth surface can look easy. The adhesive may have other opinions.
Kraft And Laminate Sticker Adhesive Comparison
There is no universal adhesive that will perform perfectly across every packaging finish.
When comparing adhesive labels for kraft and laminate, review the following factors.
Initial Tack
Initial tack is the adhesive’s first grip when the sticker is applied.
In high-volume fulfilment, the sticker needs to hold quickly enough that packers are not pressing, rubbing, or reapplying each label. Weak initial tack can slow the line and create inconsistent presentation.
Final Adhesion
Some adhesives build strength after application. A sticker that feels secure immediately may behave differently after several hours, while another may require time to reach its intended bond.
Testing should therefore include both immediate and delayed checks.
Permanent Or Removable Performance
A permanent adhesive is designed to remain secure, while a removable adhesive is intended to release more easily.
The right option depends on the sticker’s job.
A label used for shipping information may need different performance from a branded seal designed to support a clean opening.
Surface Compatibility
A strong adhesive is not automatically the best adhesive.
An unsuitable adhesive may:
Damage the packaging.
Tear the kraft surface.
Leave residue on laminate.
Make the pack difficult to open.
Affect recyclability or material separation.
Create unnecessary frustration for the customer.
The best choice provides enough grip for the journey without overpowering the packaging.
How To Run A Quick Tack Test
Quick tack tests for stickers help teams compare adhesive performance before committing to a larger order.
Use this practical process.
Test the real packaging. Use the exact kraft or laminated material planned for production.
Condition the samples. Allow stickers and packaging to reach the same working environment before testing.
Apply consistently. Use the same position, pressure, and application method for each sample.
Check immediate grip. Look for sliding, curling, bubbles, or edge lifting.
Check after a set period. Review the sticker again after the adhesive has had time to build its bond.
Handle the pack normally. Stack, move, open, and repack it as the fulfilment team would.
Test the opening. Confirm whether the sticker releases, tears, or damages the surface as intended.
Record the result. Photograph each test and note the material, adhesive, conditions, and outcome.
A quick test does not replace formal supplier testing, but it can reveal obvious problems early.
What To Include In A Sticker Tack Test
A useful test should assess more than whether the sticker is still attached.
Record:
Packaging material and finish.
Sticker material.
Adhesive type or supplier reference.
Application temperature.
Storage temperature.
Application pressure.
Immediate edge adhesion.
Adhesion after several hours.
Adhesion after handling.
Performance around folds or curves.
Opening behaviour.
Residue.
Surface damage.
Overall presentation.
Where seasonal conditions matter, include samples exposed to the relevant storage and delivery environment.
Packaging that performs beautifully in a warm office may behave differently in a cold warehouse or delivery van.
Best Practices For Applying Stickers To Kraft And Laminate
Even the right adhesive can fail when application is inconsistent.
For a seamless finish:
Apply stickers to clean, dry packaging.
Avoid dusty or damaged areas.
Keep the label within a flat application zone.
Do not place important edges directly over folds.
Apply even pressure across the full sticker.
Avoid touching the adhesive with fingers.
Allow suitable bonding time before packing or transport.
Keep stickers and packaging within the supplier’s recommended storage conditions.
Train packing teams to use the same position and method.
Use guides or fixtures where placement accuracy matters.
For high-volume sticker solutions, small inconsistencies can quickly become large ones. A placement guide that saves two seconds and prevents rework is often worth far more than it looks.
Designing For A Clean Opening
A sticker can secure a pack without turning the unboxing into a wrestling match.
Clean open sticker techniques depend on the packaging construction, sticker position, material strength, and adhesive performance.
Consider:
Whether the sticker should peel away or tear.
Whether opening should leave the box intact.
Whether residue is acceptable.
Whether the sticker forms part of a tamper-evident closure.
Where the customer will naturally place their fingers.
Whether the surface may tear during removal.
Whether opening the pack could damage the printed design.
A closure sticker should make the opening route obvious. Customers should not need to search for scissors, attack the corners, or accidentally tear through the brand message.
Test the sticker on a fully assembled and filled pack. Empty packaging may flex differently and give a misleading result.
Matching Sticker Choice To Its Purpose
Not every e-commerce packaging sticker has the same job.
Brand Stickers
Brand stickers support recognition and presentation. They may appear on tissue, boxes, cards, or bags.
Priorities may include:
Print quality.
Colour consistency.
Neat placement.
Clean edges.
Compatibility with the packaging finish.
Closure Stickers
Closure stickers help hold packaging shut.
Priorities may include:
Reliable grip.
Resistance to handling.
Clean opening.
Appropriate tamper evidence.
Minimal residue.
Information Labels
Information labels may display product, handling, or fulfilment details.
Priorities may include:
Legibility.
Barcode or QR code quality.
Reliable application.
Consistent positioning.
Compatibility with automated processes.
Promotional Stickers
Promotional stickers may highlight a campaign, offer, launch, or seasonal message.
Priorities may include:
Fast artwork changes.
Shorter production runs.
Easy inventory separation.
Strong visual impact.
Compatibility with existing packaging.
Selecting the sticker by purpose helps prevent over-specifying one requirement while overlooking another.
If you are looking at printing on your labels, you might also want to check out our article on Print that stays readable on small labels.
Read The Blog →
Improving High-Volume Fulfilment Efficiency
In a busy fulfilment environment, sticker performance affects speed as well as presentation.
Poorly selected stickers can lead to:
Packers reapplying labels.
Backing sheets tearing awkwardly.
Adhesive transferring to gloves or hands.
Labels curling before application.
Packs being removed from the line for rework.
Different operators placing stickers inconsistently.
Seasonal staff needing additional training.
Complaints about opened or untidy packaging.
Efficient packing processes depend on repeatable materials and repeatable actions.
When evaluating stickers, include the packing team in the test. They can identify practical issues that may not appear during a desk-based review.
Ask them:
Is the backing easy to remove?
Can the sticker be positioned first time?
Does it curl or fold?
Is the label easy to pick up?
Does application require additional pressure?
Can placement remain consistent at speed?
Does the finished pack stack and travel well?
The best procurement decision is not always the cheapest sticker per thousand. It is the option that performs reliably across purchasing, storage, packing, delivery, and opening.
Supporting Seasonal Demand
Seasonal peaks can expose small weaknesses in packaging processes.
A sticker solution that works during normal volumes may become difficult to manage when:
More packers join the line.
Multiple designs are active.
Packaging is stored for longer.
Materials arrive from several production batches.
Fulfilment speeds increase.
Stock is moved between locations.
Temperature and humidity conditions change.
Before a peak period:
Confirm available stock and lead times.
Test every active packaging surface.
Approve backup materials.
Create clear SKU references.
Separate similar sticker designs.
Document application positions.
Brief temporary and permanent packing teams.
Keep approved samples beside the packing line.
Agree a process for reporting failures.
High-volume sticker solutions should reduce decisions on the line, not create more of them.
How Stickers Enhance The Unboxing Experience
Premium unboxing experience stickers combine practical closure with considered branding.
The right sticker can:
Create a clear opening point.
Keep tissue or wraps neatly secured.
Add a campaign message.
Introduce a brand colour.
Make standard packaging feel more tailored.
Connect the outside of the pack with the contents inside.
Reassure the customer that the order has been carefully finished.
The sticker should support the packaging rather than dominate it. A well-placed seal can create a moment of anticipation. An oversized, over-sticky label can create a moment of annoyance.
One is rather better for repeat orders.
Explore printed stickers to create a coordinated finish across boxes, bags, tissue, and inserts.
Explore Printed Stickers →
Sustainability And Adhesive Claims
Sustainable adhesive solutions should be evaluated using clear, specific information.
Ask suppliers for evidence covering:
Sticker face material.
Recycled content, including the percentage.
Adhesive composition where relevant.
Release liner material.
Recyclability.
Compostability claims and required conditions.
Plastic-free options.
FSC-certified paper options.
Disposal guidance.
Relevant certifications.
Compatibility with the main packaging material.
Avoid unsupported claims such as “100% sustainable”, “zero-waste”, or “planet-saving”.
A stronger statement explains what the sticker is made from, what percentage is recycled, which component is certified, and how the sticker should be disposed of.
Also consider the complete packaging system. A paper sticker may still affect recycling if its adhesive, coating, or backing material is incompatible with the intended waste stream.
Sustainability should be documented, not decorated with a green leaf and left at that.
Packaging Procurement Best Practices
Reliable sticker procurement begins with a clear specification.
Include:
Sticker dimensions.
Shape.
Face material.
Adhesive reference.
Packaging surface.
Print specification.
Roll or sheet format.
Roll direction where relevant.
Core size.
Quantity per roll or sheet.
Packing format.
Application method.
Storage requirements.
Sustainability evidence.
Approved sample reference.
Delivery schedule.
Reorder details.
When reviewing suppliers, ask:
Have you tested this adhesive on our exact packaging?
Can you provide samples?
What conditions affect performance?
How long does the adhesive take to reach its intended bond?
Is the sticker suitable for hand or automated application?
What storage conditions are required?
What are the minimum order quantities?
Can production scale for seasonal demand?
What sustainability documentation is available?
How are repeat orders controlled?
What happens if the packaging material changes?
A reliable supplier should be able to explain why an option is suitable, not simply describe it as “strong”.
Common Sticker Problems And What To Check
The Sticker Lifts At The Corners
Check:
Surface texture.
Dust or fibres.
Application pressure.
Sticker shape.
Storage temperature.
Placement over folds.
Whether the adhesive suits kraft.
The Sticker Slides On Laminate
Check:
Initial tack.
Surface coating.
Application temperature.
Whether the laminate has slip or release properties.
Whether the adhesive is compatible with the finish.
The Kraft Tears During Opening
Check:
Adhesive strength.
Sticker size.
Opening direction.
Surface strength.
Whether a removable adhesive would be more suitable.
Whether the customer needs a pull tab or clearer opening point.
Residue Remains On Laminate
Check:
Adhesive specification.
Length of application.
Storage temperature.
Removal angle.
Whether the label was intended to be removable.
Application Slows The Packing Line
Check:
Backing format.
Roll direction.
Label curl.
Sticker size.
Positioning method.
Whether the material is easy to handle while wearing gloves.
Whether the packers have an approved placement guide.
Sticker Selection Checklist
Before placing a full order, confirm that:
The exact kraft or laminate surface has been tested.
The sticker grips securely after application.
Edges remain flat after handling.
The sticker performs after a suitable bonding period.
Opening behaviour has been approved.
The packaging is not unnecessarily damaged.
Residue is within acceptable limits.
Packers can apply the sticker quickly.
Placement remains consistent at speed.
The sticker suits storage and delivery conditions.
Sustainability claims are supported by evidence.
The approved specification is recorded.
Seasonal quantities and lead times are confirmed.
A physical sample is available for future comparison.
Choose A Sticker That Works From Packing Bench To Doorstep
The best stickers for kraft and laminate surfaces are not selected from appearance alone.
They are tested on the correct packaging, applied under realistic conditions, reviewed by the people using them, and checked for both secure delivery and clean opening.
That process protects presentation, improves packing efficiency, and turns a small adhesive detail into a more reliable brand experience.
Explore Printed Stickers And Packaging Accessories →
FAQs
What Types Of Stickers Are Best For Kraft And Laminate Surfaces?
The best option depends on the exact material, finish, packaging design, and purpose of the sticker. Textured kraft may need an adhesive with stronger initial contact, while laminated surfaces require an adhesive compatible with the coating. Test samples on the real packaging before ordering.
How Do Adhesive Choices Impact Sticker Performance On Kraft And Laminate?
The adhesive affects initial grip, long-term hold, edge lifting, residue, and opening behaviour. A stronger adhesive is not always better, particularly where the customer needs to open the packaging cleanly.
What Are The Best Practices For Applying Stickers On Kraft And Laminate Materials?
Apply stickers to clean, dry, flat areas using consistent pressure. Avoid folds, dusty surfaces, and unnecessary contact with the adhesive. Allow time for the bond to develop before packing or transport.
How Can Quick Tack Tests Help In Selecting The Right Stickers?
Quick tack tests allow teams to compare immediate grip, delayed adhesion, handling performance, and clean opening. They help identify obvious compatibility problems before a larger production order is placed.
What Factors Should E-Commerce Managers Consider When Choosing Packaging Stickers?
Consider the packaging surface, sticker purpose, application method, storage conditions, fulfilment speed, opening experience, order volume, sustainability evidence, supplier reliability, and seasonal demand.
How Can The Right Stickers Enhance The Unboxing Experience?
A suitable sticker can keep packaging neat, create a clear opening point, and add a branded finishing detail. It should feel deliberate and easy to use rather than difficult to remove.
What Are The Benefits Of Sustainable Stickers For Kraft And Laminate Packaging?
Options with verified recycled content, responsible sourcing, or suitable disposal routes can support wider packaging goals. Claims should be assessed using material data, percentages, certifications, and disposal guidance.
How Do Different Adhesive Types Affect Clean Opening?
Permanent adhesives may provide a stronger bond but can tear packaging or leave residue. Removable options may open more cleanly but must still stay secure during fulfilment and delivery. Testing determines the right balance.
What Common Challenges Do E-Commerce Operations Face With Stickers?
Typical challenges include edge lifting, inconsistent application, slow backing removal, residue, stock complexity, seasonal supply pressure, and variable performance across different packaging materials.
How Can Sticker Solutions Improve Operational Efficiency?
Reliable stickers reduce rework, speed up application, improve placement consistency, and make training easier. Clear specifications and approved samples also support smoother reordering and inventory management.
/* Blog only: prevents link/button/table/FAQ styles leaking across the website */
.sticker-kraft-laminate-blog a:not(.pill-outline){
color: #30acd9 !important;
font-weight: 700 !important;
text-decoration: underline !important;
text-underline-offset: 3px;
}
/* Pill outline button */
.sticker-kraft-laminate-blog .pill-outline,
.sticker-kraft-laminate-blog a.pill-outline{
display: inline-flex;
align-items: center;
justify-content: center;
gap: 10px;
padding: 12px 26px;
border: 2px solid #111;
border-radius: 9999px;
background: transparent;
color: #111 !important;
text-decoration: none !important;
font-family: inherit;
font-weight: 700;
font-size: 12px;
line-height: 1;
text-transform: uppercase;
letter-spacing: 0.08em;
cursor: pointer;
user-select: none;
transition: background-color 160ms ease, color 160ms ease, transform 120ms ease;
}
.sticker-kraft-laminate-blog .pill-outline__text{
color: inherit;
font-weight: 700;
text-decoration: none !important;
}
.sticker-kraft-laminate-blog .pill-outline__arrow{
color: inherit;
text-decoration: none !important;
font-size: 14px;
line-height: 1;
transform: translateY(-0.5px);
}
.sticker-kraft-laminate-blog .pill-outline:hover{
background: #111;
color: #fff !important;
text-decoration: none !important;
}
.sticker-kraft-laminate-blog .pill-outline:hover .pill-outline__text,
.sticker-kraft-laminate-blog .pill-outline:hover .pill-outline__arrow{
color: #fff !important;
text-decoration: none !important;
}
.sticker-kraft-laminate-blog .pill-outline:active{
transform: translateY(1px);
}
.sticker-kraft-laminate-blog .pill-outline:focus-visible{
outline: 2px solid #e9b448;
outline-offset: 3px;
}
/* Tables */
.sticker-kraft-laminate-blog .table-wrap{
width: 100%;
overflow-x: auto;
border: 1px solid rgb(234, 232, 230);
border-radius: 18px;
background: #fff;
margin: 14px 0 26px 0;
}
.sticker-kraft-laminate-blog .tb-table{
width: 100%;
border-collapse: collapse;
min-width: 780px;
font-family: Arial, sans-serif;
}
.sticker-kraft-laminate-blog .tb-table thead th{
text-align: left;
font-weight: 700;
font-size: 14px;
padding: 14px 14px;
border-bottom: 1px solid rgb(234, 232, 230);
background: #fafafa;
white-space: nowrap;
}
.sticker-kraft-laminate-blog .tb-table td{
font-size: 14px;
line-height: 1.5;
padding: 14px 14px;
border-bottom: 1px solid rgb(234, 232, 230);
vertical-align: top;
}
.sticker-kraft-laminate-blog .tb-table tbody tr:last-child td{
border-bottom: none;
}
/* FAQ */
.sticker-kraft-laminate-blog .faq{
width: 90%;
max-width: 900px;
margin: 0 auto 32px auto;
font-family: Arial, sans-serif;
}
.sticker-kraft-laminate-blog .faq-title{
text-align: center;
margin: 0 0 14px 0;
font-size: 24px;
line-height: 1.3;
}
.sticker-kraft-laminate-blog .faq-item{
border: 1px solid rgb(234, 232, 230);
border-radius: 25px;
background: #fff;
overflow: hidden;
margin: 10px 0;
}
.sticker-kraft-laminate-blog .faq-item summary{
position: relative;
list-style: none;
cursor: pointer;
padding: 16px 56px 16px 18px;
font-weight: 700;
font-size: 16px;
line-height: 1.4;
outline: none;
user-select: none;
}
.sticker-kraft-laminate-blog .faq-item summary::-webkit-details-marker{ display: none; }
.sticker-kraft-laminate-blog .faq-item summary::after{
content: "\25B8";
position: absolute;
right: 18px;
top: 50%;
transform: translateY(-50%);
transition: transform 160ms ease;
font-size: 18px;
line-height: 1;
opacity: 0.8;
}
.sticker-kraft-laminate-blog .faq-item[open] summary::after{
transform: translateY(-50%) rotate(90deg);
}
.sticker-kraft-laminate-blog .faq-content{
padding: 12px 18px 18px 18px;
margin-top: 6px;
font-size: 15px;
line-height: 1.6;
color: #333;
border-top: 1px solid rgb(234, 232, 230);
background-color: #fff;
}
.sticker-kraft-laminate-blog .faq-item summary:hover{ background: #fafafa; }
.sticker-kraft-laminate-blog .faq-item summary:focus-visible{
outline: 2px solid #e9b448;
outline-offset: 2px;
border-radius: 18px;
}
@media (max-width: 600px){
.sticker-kraft-laminate-blog .faq-title{ font-size: 22px; }
.sticker-kraft-laminate-blog .faq-item summary{ font-size: 15px; padding: 14px 48px 14px 16px; }
.sticker-kraft-laminate-blog .faq-content{ font-size: 14px; padding: 14px 16px 16px 16px; margin-top: 4px; }
.sticker-kraft-laminate-blog .tb-table{ min-width: 720px; }
}

Enhancing Corporate Gifting With Sharp Ribbon Printing
Enhancing Corporate Gifting With Sharp Ribbon Printing
Ribbon may be a small part of your packaging, but it often carries a big share of the branding.
A clear logo, confident colour, and well-spaced message can turn a simple box into a polished corporate gift. Blurred lettering, uneven placement, or an unsuitable print process can do the opposite.
Ribbon printing that stays sharp depends on more than uploading a logo and hoping for the best. The print technique, ribbon material, width, artwork, type size, bleed, colour matching, and sampling process all play a part.
For Corporate Brand and Gifting Managers, getting these details right helps create brand consistency across product launches, events, client gifts, employee packs, and marketing campaigns. It also reduces last-minute artwork changes, rejected samples, and delivery delays.
Need packaging accessories to get you started?
Check Out Our Range →
What Is Sharp Ribbon Printing?
Sharp ribbon printing is the clear, consistent reproduction of text, logos, and decorative details on ribbon without blurred edges, lost detail, or uneven coverage.
The strongest results come from matching the artwork to the ribbon material and selecting a print process that suits the design. Type size, line thickness, colour contrast, print position, and bleed allowances should all be reviewed before production begins.
In other words, sharp print is not luck. It is good planning in a very stylish disguise.
Why Ribbon Clarity Matters For Corporate Gifting
Corporate packaging needs to look considered from every angle. Ribbon often sits across the most visible part of the pack, making it one of the first branded details a recipient notices.
High-quality ribbon printing can help you:
Reinforce brand identity before the box is opened.
Create a consistent look across multiple products or gift sizes.
Make campaign messages feel more deliberate and premium.
Add visual interest without redesigning the full packaging format.
Support unboxing experience enhancement for clients, employees, and event guests.
Turn practical packaging into something recipients may photograph, share, or keep.
A sharply printed ribbon can also connect different parts of a campaign. The same logo, colour palette, or message can appear across gift boxes, bags, inserts, and event displays without every element needing to be identical.
That is consistent branding with a bow on top. Quite literally.
Foil Screen Or Digital Ribbon Printing?
Foil screen and digital printing can both produce high-quality ribbon printing options, but they suit different designs and project requirements.
Foil Screen Printing
Foil screen printing is well suited to designs that need a bold, defined finish. It can be particularly effective for logos, short messages, repeating brand marks, and metallic details.
It may be a strong option when you need:
A premium foil appearance.
Solid, high-impact lettering.
A simple logo or repeating design.
Clear contrast between the print and ribbon colour.
A consistent finish across a planned production run.
The artwork must still be suitable for the available ribbon width. Very fine lines, tightly spaced characters, and small details may need to be simplified to retain clarity.
Digital Printing
Digital printing can offer greater flexibility for detailed or multi-colour artwork. It may suit campaigns that use more complex graphics, varied colour combinations, or shorter sampling and production requirements.
It may be useful when you need:
More detailed artwork.
Multiple printed colours.
Greater flexibility during the design stage.
Rapid sampling before a larger order.
A print approach suited to a specific campaign or seasonal design.
Digital printing is not automatically sharper than foil screen printing, and foil is not automatically more premium. The best process depends on the artwork, ribbon, colour, quantity, and intended result.
A knowledgeable supplier should explain the trade-offs clearly, rather than steering every design towards the same machine.
How To Select The Right Printing Technique
Use this simple process when comparing durable ribbon printing solutions:
Start with the desired finish. Decide whether the ribbon needs to feel bold, metallic, understated, colourful, or highly detailed.
Review the artwork. Check the logo, type, line thickness, spacing, and any small decorative elements.
Confirm the ribbon material and width. Texture, flexibility, and available print area can affect the final result.
Request a physical sample. Review clarity, colour, placement, and handling before approving production.
Test the complete pack. Tie, fold, or wrap the ribbon exactly as it will be used.
Approve against a clear specification. Record the agreed artwork, colour reference, print process, ribbon, and position.
This creates a repeatable approval process and makes future reorders much easier.
Type Size Limits In Ribbon Printing
Ribbon provides a narrow and flexible print surface. That makes legibility especially important.
A font that looks clear on a screen or large-format proof may lose definition once it is printed onto a smaller ribbon. Thin strokes can disappear, counters inside letters can close, and closely spaced characters can merge.
Exact type size limits in printing depend on:
The selected printing technique.
The ribbon material and texture.
The width of the ribbon.
The typeface.
The thickness of the lettering.
The contrast between the print and ribbon.
The amount of movement or folding during use.
Before approving artwork, check that:
The smallest text remains readable at actual size.
Letter spacing is not too tight.
Fine lines have enough weight to reproduce cleanly.
Script fonts do not contain fragile details.
The design has enough clear space around it.
Important wording will not disappear into a knot, fold, or cut edge.
Always request process-specific artwork guidance from your supplier. A responsible printer should confirm what is achievable before production, not after several thousand metres of ribbon have been printed.
How Bleed Allowances Affect Printed Ribbon
Bleed is the additional printed area that extends beyond a finished edge or intended print boundary. It helps prevent unwanted gaps when artwork is cut, repeated, or positioned during production.
Bleed allowances in ribbon printing can matter when:
A background colour reaches an edge.
A printed block must appear continuous.
The design repeats along the ribbon.
The ribbon will be cut into separate lengths.
Artwork must align with a particular finishing method.
Insufficient bleed can create visible unprinted edges. Excessive or incorrectly positioned bleed can cause artwork to feel crowded or affect the spacing between repeated elements.
The required allowance will vary by print process, ribbon format, and finishing method. Confirm the supplier’s artwork specification before preparing production files.
Building Brand Consistency Through Colour
Colour matching is central to branding and packaging. A ribbon that is almost the right colour may stand out for all the wrong reasons when placed beside a branded box, card, or label.
To create brand consistency:
Supply recognised colour references where available.
Share existing packaging samples when physical matching matters.
Review colours on the chosen ribbon material, not only on screen.
Consider how metallic, satin, textured, or translucent surfaces affect appearance.
Approve a physical sample under suitable lighting.
Keep an agreed specification for repeat orders.
Material can change how a printed colour is perceived. The same ink or foil may appear different on a pale satin ribbon, a dark ribbon, or a more textured finish.
A sample is therefore more useful than a screen preview alone. Screens glow. Ribbon does not.
Designing Ribbon For The Full Unboxing Experience
The strongest ribbon designs work as part of the entire pack rather than as an isolated decoration.
Consider how the ribbon will interact with:
The box colour and finish.
Tissue paper or shredded fill.
Printed cards and inserts.
Labels and seals.
Product placement.
The opening method.
Photography and social content.
Storage, packing, and fulfilment requirements.
A repeated logo may suit ribbon wrapped around a larger box. A short message may work better on a neatly tied bow. Event packaging may benefit from a campaign name or date, while ongoing corporate gifting may need a more timeless brand treatment.
You can explore complementary printed ribbon and packaging accessories to build a coordinated finish.
It’s also worth reviewing how the selected width affects legibility and handling. See Choose ribbon widths that suit your products when planning the wider packaging format.
Read The Blog →
Ribbon Printing And Sustainability
Sustainability in corporate branding should be supported by clear evidence, not vague language.
When comparing ribbon options, ask suppliers about:
The ribbon material.
Recycled content, including the stated percentage.
Recyclability and any conditions attached to it.
Plastic-free options.
Responsible sourcing documentation.
FSC-certified packaging components used elsewhere in the pack.
Production quantities and the risk of unnecessary surplus.
Whether samples can be consolidated to reduce repeated shipments.
How the ribbon affects the recyclability of the complete pack.
Avoid unsupported phrases such as “100% sustainable”, “zero-waste”, or “planet-saving”. A stronger claim explains what the material contains, how it has been sourced, and which certification or standard supports it.
Sustainability is not a decorative badge. It is part of the specification.
Flexible Customisation Without Operational Chaos
Flexible customisation in printing is valuable for businesses managing several campaigns, departments, territories, or gifting occasions. However, too many variations can quickly create approval and fulfilment problems.
A well-managed ribbon programme may include:
A core branded ribbon for ongoing use.
Campaign-specific colours or messages.
Defined artwork templates.
Approved ribbon widths and materials.
Agreed print positions.
Clear minimum order quantities.
Recorded lead times and reorder points.
Named approvers for artwork and colour.
This keeps the brand flexible without making every order feel like a completely new project.
Where multiple versions are required, ask whether the supplier can group production, label variations clearly, and provide separate packing documentation. These practical details support smoother procurement, storage, and distribution.
Why Rapid Sampling Matters
Rapid sampling can reduce risk before a wider corporate rollout.
A sample allows your team to assess:
Actual print clarity.
Colour accuracy.
Logo size and spacing.
Ribbon texture.
Print position.
Fold and knot behaviour.
Compatibility with the selected box.
The overall unboxing experience.
Samples can also help internal decision-makers compare options without relying on technical descriptions alone. This is particularly useful when brand, procurement, sustainability, and campaign teams all need to approve the same project.
For more complex orders, create a simple sample scorecard. Record what was approved, what changed, and which version should move into production.
Fewer crossed wires. More neatly tied ones.
Choosing A Corporate Ribbon Printing Supplier
Strategic supplier partnerships are especially valuable when projects involve fixed launch dates, multiple approvers, sustainability documentation, or detailed brand guidelines.
When evaluating a supplier, ask:
Which printing process best suits our artwork, and why?
What details may need to be simplified?
What are the process-specific type and line limits?
What bleed and safe-area rules apply?
Can you provide a physical sample?
How will colour be approved?
What sustainability evidence is available?
What are the minimum order quantities?
What are the artwork, sampling, production, and delivery lead times?
How are repeat orders controlled for consistency?
Can you support multiple locations or campaign variations?
Who manages the project from approval to delivery?
Strong supplier partnership management is not only about negotiating a price. It is about reducing uncertainty, protecting the brand, and keeping the project moving.
Pricing should be transparent enough to show what is included, particularly where sampling, artwork amendments, tooling, colour matching, delivery, or separate packing may affect the final cost.
Operational Efficiency For Larger Ribbon Projects
Corporate gifting solutions often involve more than the printed product. Packing, storage, labelling, fulfilment, and delivery can all affect whether the project succeeds.
Before placing an order, confirm:
Final quantities and permitted tolerances.
Whether ribbon is supplied on reels or in cut lengths.
How variations will be labelled.
Packing quantities per carton.
Delivery addresses and deadlines.
Artwork approval responsibilities.
Sample approval dates.
Reorder references.
Any required compliance documents.
A clear production schedule should include time for artwork review, sampling, amendments, approval, manufacturing, quality checks, and delivery.
Compressed timelines are sometimes unavoidable. Confusion is not.
Ribbon Printing Quality Checklist
Before approving production, confirm that:
The print process suits the artwork.
The ribbon width supports the chosen design.
Text is readable at actual size.
Fine lines and small details have been tested.
Bleed and safe areas follow the supplier specification.
Colours have been approved on the selected ribbon.
The repeat distance works for the final use.
The design remains visible when tied or folded.
Sustainability claims are supported by evidence.
A physical sample has been reviewed.
Quantities, lead times, and delivery requirements are confirmed.
The approved specification is saved for reorders.
Make Every Detail Part Of The Brand
The best branded ribbon does not compete with the packaging. It completes it.
By choosing the right printing process, respecting artwork limits, checking bleed, approving colours, and testing a physical sample, you can create ribbon printing that retains clarity from the first gift to the final delivery.
Tiny Box Company helps makers and global brands turn ordinary packaging into extraordinary brand moments, with stylish finishes, practical support, and options ready to scale.
Explore Printed Ribbon And Packaging Accessories →
FAQs
What Are The Benefits Of Using Foil Screen Printing For Ribbons?
Foil screen printing can create a bold, defined finish that works well for logos, short messages, and repeating designs. It can also add a premium metallic detail when the artwork and ribbon are suitable for the process.
How Does Digital Printing Compare To Foil Screen Printing For Ribbon Clarity?
Both techniques can produce clear results. Digital printing may provide greater flexibility for detailed or multi-colour artwork, while foil screen printing may suit simpler designs requiring strong, solid definition. The best result depends on the artwork, ribbon material, width, and finish.
What Are The Recommended Type Size Limits For Ribbon Printing?
There is no single limit that applies to every project. Minimum sizes depend on the printing technique, ribbon, typeface, line thickness, and colour contrast. Ask the supplier to test small text at actual size before production.
How Can Bleed Allowances Affect The Quality Of Printed Ribbons?
Correct bleed allowances help prevent unwanted gaps around artwork that reaches an edge or repeats along the ribbon. The required allowance depends on the print and finishing process, so artwork should follow the supplier’s specification.
What Techniques Can Enhance The Unboxing Experience With Branded Ribbons?
Coordinate the ribbon with the box, tissue, inserts, and opening method. Make sure the branding remains visible when the ribbon is tied, folded, or wrapped, and test the finished pack before approving the full order.
How Can Ribbon Printing Contribute To Sustainability In Corporate Gifting?
Select materials with clearly documented recycled content, recyclability, responsible sourcing, or plastic-free credentials where available. Order quantities carefully, and assess how the ribbon affects the complete pack rather than reviewing it in isolation.
What Are The Key Considerations For Customising Printed Ribbons?
Review the ribbon width, material, colour, print technique, artwork detail, message length, repeat distance, and final use. Sampling is particularly important when several customised elements must work together.
Why Is It Important To Partner With Suppliers For Corporate Ribbon Printing?
An experienced supplier can identify artwork risks, explain process limits, support sampling, and manage production requirements. This helps protect brand consistency and reduces delays during procurement and approval.
How Can Rapid Sampling Improve The Ribbon Printing Process?
Sampling gives teams a physical reference for clarity, colour, placement, and handling. It also helps identify artwork changes before the full quantity is produced.
What Are The Operational Efficiency Demands In Corporate Ribbon Printing?
Larger projects may require controlled artwork approvals, labelled variations, packing instructions, sustainability documents, and coordinated delivery dates. Agreeing these details early reduces errors and supports a smoother rollout.
/* Blog only: prevents link/button/table/FAQ styles leaking across the website */
.corporate-ribbon-printing-blog a:not(.pill-outline){
color: #30acd9 !important;
font-weight: 700 !important;
text-decoration: underline !important;
text-underline-offset: 3px;
}
/* Pill outline button */
.corporate-ribbon-printing-blog .pill-outline,
.corporate-ribbon-printing-blog a.pill-outline{
display: inline-flex;
align-items: center;
justify-content: center;
gap: 10px;
padding: 12px 26px;
border: 2px solid #111;
border-radius: 9999px;
background: transparent;
color: #111 !important;
text-decoration: none !important;
font-family: inherit;
font-weight: 700;
font-size: 12px;
line-height: 1;
text-transform: uppercase;
letter-spacing: 0.08em;
cursor: pointer;
user-select: none;
transition: background-color 160ms ease, color 160ms ease, transform 120ms ease;
}
.corporate-ribbon-printing-blog .pill-outline__text{
color: inherit;
font-weight: 700;
text-decoration: none !important;
}
.corporate-ribbon-printing-blog .pill-outline__arrow{
color: inherit;
text-decoration: none !important;
font-size: 14px;
line-height: 1;
transform: translateY(-0.5px);
}
.corporate-ribbon-printing-blog .pill-outline:hover{
background: #111;
color: #fff !important;
text-decoration: none !important;
}
.corporate-ribbon-printing-blog .pill-outline:hover .pill-outline__text,
.corporate-ribbon-printing-blog .pill-outline:hover .pill-outline__arrow{
color: #fff !important;
text-decoration: none !important;
}
.corporate-ribbon-printing-blog .pill-outline:active{
transform: translateY(1px);
}
.corporate-ribbon-printing-blog .pill-outline:focus-visible{
outline: 2px solid #e9b448;
outline-offset: 3px;
}
/* Tables */
.corporate-ribbon-printing-blog .table-wrap{
width: 100%;
overflow-x: auto;
border: 1px solid rgb(234, 232, 230);
border-radius: 18px;
background: #fff;
margin: 14px 0 26px 0;
}
.corporate-ribbon-printing-blog .tb-table{
width: 100%;
border-collapse: collapse;
min-width: 780px;
font-family: Arial, sans-serif;
}
.corporate-ribbon-printing-blog .tb-table thead th{
text-align: left;
font-weight: 700;
font-size: 14px;
padding: 14px 14px;
border-bottom: 1px solid rgb(234, 232, 230);
background: #fafafa;
white-space: nowrap;
}
.corporate-ribbon-printing-blog .tb-table td{
font-size: 14px;
line-height: 1.5;
padding: 14px 14px;
border-bottom: 1px solid rgb(234, 232, 230);
vertical-align: top;
}
.corporate-ribbon-printing-blog .tb-table tbody tr:last-child td{
border-bottom: none;
}
/* FAQ */
.corporate-ribbon-printing-blog .faq{
width: 90%;
max-width: 900px;
margin: 0 auto 32px auto;
font-family: Arial, sans-serif;
}
.corporate-ribbon-printing-blog .faq-title{
text-align: center;
margin: 0 0 14px 0;
font-size: 24px;
line-height: 1.3;
}
.corporate-ribbon-printing-blog .faq-item{
border: 1px solid rgb(234, 232, 230);
border-radius: 25px;
background: #fff;
overflow: hidden;
margin: 10px 0;
}
.corporate-ribbon-printing-blog .faq-item summary{
position: relative;
list-style: none;
cursor: pointer;
padding: 16px 56px 16px 18px;
font-weight: 700;
font-size: 16px;
line-height: 1.4;
outline: none;
user-select: none;
}
.corporate-ribbon-printing-blog .faq-item summary::-webkit-details-marker{ display: none; }
.corporate-ribbon-printing-blog .faq-item summary::after{
content: "\25B8";
position: absolute;
right: 18px;
top: 50%;
transform: translateY(-50%);
transition: transform 160ms ease;
font-size: 18px;
line-height: 1;
opacity: 0.8;
}
.corporate-ribbon-printing-blog .faq-item[open] summary::after{
transform: translateY(-50%) rotate(90deg);
}
.corporate-ribbon-printing-blog .faq-content{
padding: 12px 18px 18px 18px;
margin-top: 6px;
font-size: 15px;
line-height: 1.6;
color: #333;
border-top: 1px solid rgb(234, 232, 230);
background-color: #fff;
}
.corporate-ribbon-printing-blog .faq-item summary:hover{ background: #fafafa; }
.corporate-ribbon-printing-blog .faq-item summary:focus-visible{
outline: 2px solid #e9b448;
outline-offset: 2px;
border-radius: 18px;
}
@media (max-width: 600px){
.corporate-ribbon-printing-blog .faq-title{ font-size: 22px; }
.corporate-ribbon-printing-blog .faq-item summary{ font-size: 15px; padding: 14px 48px 14px 16px; }
.corporate-ribbon-printing-blog .faq-content{ font-size: 14px; padding: 14px 16px 16px 16px; margin-top: 4px; }
.corporate-ribbon-printing-blog .tb-table{ min-width: 720px; }
}

Choosing Between Tray Style And Lidded Hampers For Your Retail Needs
Selecting The Right Board Grades For Hamper Boxes
A hamper box can look beautifully finished and still struggle under the weight of the products inside.
Several jars may create a concentrated load. A bottle can place pressure on one part of the base. A large gift set may cause the side walls or lid to bow during stacking, packing, or delivery.
Choosing the right board grade is therefore about more than finding the thickest material available. The board must suit the contents, box design, handling conditions, and presentation expected by the customer.
For e-commerce operations managers, that decision also affects storage, packing speed, damage rates, shipping costs, supplier consistency, and seasonal scalability.
This guide explains how to choose board grades for e-commerce hamper boxes, including the practical differences between microflute and rigid board, how GSM and ECT should be interpreted, and which stiffness cues to check before approving production.
Need Hamper Gift Boxes to get you started?
Explore The Range →
How Do You Choose A Board Grade For A Hamper Box?
Choose a board grade by assessing the complete packed weight, product shape, load distribution, box dimensions, delivery method, stacking conditions, and presentation requirements. Then test the proposed board within the finished box construction rather than relying on GSM, thickness, or appearance alone.
A reliable process follows six steps:
Calculate the complete packed weight.
Identify where that weight sits within the box.
Confirm how the hamper will be handled and shipped.
Compare suitable board constructions.
Test the finished box with its products and insert.
Record the approved specification for repeat orders.
There is no single best board grade for every hamper. A compact box containing one lightweight product has very different requirements from a large gift set filled with glass jars and bottles.
Start With The Complete Packed Weight
The product weight is only part of the load.
Include:
Every product.
The hamper box.
The lid.
The insert.
Dividers.
Protective materials.
Printed cards or brochures.
Decorative elements.
Any accessories.
The outer shipping packaging where relevant.
The combined weight affects the base, side walls, handles, lid, and any area where boxes are stacked.
A board that feels stiff when empty may behave differently after the products have been added. Always test the completed hamper rather than assessing an unfilled box by hand.
Weight Distribution Matters As Much As Total Weight
Two hampers with the same total weight may place very different demands on the packaging.
A collection of small products spread evenly across the base creates a different load from one heavy bottle positioned near a corner.
Look for:
Concentrated weight beneath jars or bottles.
Unsupported areas of the base.
Tall products that can lean against the side walls.
Inserts that transfer pressure unevenly.
Heavy products positioned close to folds.
Gaps that allow products to move.
Pressure from stacked hampers above.
The insert should help distribute and control the load. It should not simply make the products look neat.
For help matching the box to the product arrangement, read Pick a hamper box size that fits the contents.
Read The Hamper Size Guide →
Microflute Vs Rigid Board
Microflute and rigid board can both be used for premium hamper packaging, but they achieve strength and presentation in different ways.
What Is Microflute Board?
Microflute is a fine corrugated board construction. It contains a fluted paper layer between flat liner materials.
The fluting can provide:
Structural efficiency.
Cushioning.
Resistance to compression.
A relatively low weight for its volume.
Suitability for folding or converted box formats.
Protection during e-commerce handling.
Microflute may be used for presentation boxes, sleeves, trays, inserts, or shipping-led hamper formats.
Its exact performance depends on the flute profile, liners, paper quality, construction, dimensions, and manufacturing process.
What Is Rigid Board?
Rigid board is a dense paperboard commonly used to create premium gift boxes.
It is often wrapped with printed or decorative paper and may be used for:
Lidded hamper boxes.
Magnetic gift boxes.
Shoulder boxes.
Keepsake packaging.
Premium gift sets.
Retail presentation.
Rigid board can create clean edges and a substantial tactile feel. Its suitability for a particular packed weight depends on the board specification, box construction, panel size, covering materials, insert, and handling conditions.
Microflute And Rigid Board Comparison
Consideration
Microflute
Rigid Board
Construction
Fluted paper between liners
Dense solid paperboard
Typical strength approach
Structural efficiency through fluting
Stiffness through dense board and box construction
Presentation
Can be printed, laminated, or covered
Often used for premium wrapped finishes
Shipping use
Can suit delivery-led formats
May require an outer shipping box
Storage
Folding or flat formats may be available
Often supplied assembled, although collapsible designs exist
Cushioning
Fluting can provide some cushioning
Usually relies more on inserts and protective components
Testing language
ECT and other corrugated tests may be relevant
Thickness, density, stiffness, and finished-box testing are more relevant
Best decision method
Test the final construction
Test the final construction
Neither material is automatically stronger or more sustainable in every application. Performance depends on the exact specification and how efficiently it is used.
What Does GSM Mean?
GSM means grams per square metre.
It describes the mass of a paper or board material over a defined area. It can help compare material specifications, but it is not a direct measure of finished-box strength.
A higher GSM may indicate that more material is present, but it does not tell you everything about:
Fibre quality.
Board density.
Flute construction.
Layer arrangement.
Moisture response.
Bending stiffness.
Edge performance.
Adhesive quality.
Fold design.
Finished-box geometry.
Two materials with the same GSM may perform differently because their fibres, layers, manufacturing methods, or structures are different.
GSM is useful information, but it should not be used as the only purchasing specification.
Why Universal GSM Ranges Can Be Misleading
The brief calls for GSM ranges, but no approved ranges are supplied. More importantly, a single range cannot guarantee suitability across every hamper application.
The required specification changes with:
Box dimensions.
Unsupported panel area.
Product weight.
Product position.
Insert construction.
Delivery method.
Stack height.
Storage conditions.
Expected reuse.
Surface finishes.
Ask suppliers to explain how their recommended GSM relates to the complete construction and intended use.
The useful question is not simply, “What GSM is this board?” It is, “Has this complete box been tested with our products and handling conditions?”
What Is ECT?
ECT means Edge Crush Test.
It is used with corrugated board to assess resistance to compression along the board’s edge. The result can help indicate how a corrugated construction may perform when loads are transferred through its vertical edges.
ECT may be relevant when considering microflute or another corrugated material, particularly where boxes will be stacked or experience compression.
ECT is not normally the main specification used to describe solid rigid board. Applying a corrugated-board rating to a rigid-board box would not provide a direct like-for-like comparison.
When reviewing an ECT rating, ask:
Which board construction was tested?
Which flute and liners were used?
Does the rating apply to the supplied material?
How does conversion affect performance?
Is the finished box expected to carry vertical stacking loads?
Has the completed package been tested with the intended products?
Does the supplier recommend a stacking limit?
A material test provides valuable information, but the finished packaging still needs application-specific assessment.
ECT Does Not Replace Finished-Box Testing
A strong ECT result does not automatically mean every box made from that board will perform perfectly.
Finished performance may also be affected by:
Box dimensions.
Creases and cut-outs.
Handles.
Windows.
Adhesive joints.
Material direction.
Moisture.
Poor assembly.
Product movement.
Concentrated loads.
Damage during storage.
Use ECT as one part of the specification rather than a promise that the hamper is ready for every fulfilment environment.
Stiffness Cues To Check In Packaging Board
Stiffness describes how strongly a material resists bending.
You do not need a laboratory to identify early warning signs during sampling, although formal tests may be required for higher-risk applications.
Useful stiffness cues include:
Base Deflection
Place the complete packed hamper on a flat surface, then lift it as it would be handled.
Check whether the base:
Remains flat.
Sags between support points.
Bows beneath heavy products.
Transfers pressure into the side walls.
Changes shape when lifted.
Side-Wall Bowing
Inspect the box after packing.
The walls should not:
Curve outwards.
Collapse inwards.
Lean away from the corners.
Distort beneath the lid.
Change when the box is moved.
Corner Stability
Corners should remain square and connected.
Look for:
Separation.
Crushed edges.
Loose adhesive areas.
Twisting.
Uneven heights.
Movement when the box is lifted.
Lid Alignment
A change in board shape can affect how the lid meets the base.
Check for:
Uneven gaps.
Lid rock.
Raised corners.
Magnetic closures that no longer align.
Pressure from the contents.
Difficulty closing the box.
Panel Recovery
Apply light, controlled pressure during sample assessment and observe whether the panel returns to its original position.
Permanent creasing or distortion may suggest the construction needs review.
Surface Telegraphing
Rigid board that is unsuitable for the design may reveal underlying stress through:
Visible lines.
Bulges.
Depressions.
Wrinkles.
Cracking around folds or corners.
A premium finish is not only about the paper on top. The board beneath it needs to stay composed.
Match The Board To The Box Dimensions
Larger panels generally have more unsupported area and may be more likely to bend under load.
When box dimensions increase, review:
Base span.
Lid span.
Wall height.
Corner construction.
Insert support.
Product distribution.
Carrying points.
Stack loading.
Board thickness.
Complete construction.
Do not scale a successful small hamper into a larger size while keeping every material specification unchanged.
Each size should be sampled and tested in its intended construction.
Choosing Board For Bottles And Jars
Bottles and jars create particular demands because they can combine concentrated weight with fragile materials.
Assess:
Combined packed weight.
Base support.
Divider strength.
Movement around bottle necks.
Pressure beneath jar bases.
Product-to-product contact.
Side impact.
The effect of leaning products.
Whether the products are shipped upright or horizontally.
A strong outer hamper cannot correct a poorly designed insert. The two should work together.
For glass products or courier distribution, use a suitable packaging test programme rather than relying only on a visual sample review.
Choosing Board For Lightweight Gift Sets
A lightweight product set may not need the highest available board specification.
Over-specifying can increase:
Material use.
Unit cost.
Storage weight.
transport weight.
Production complexity.
Difficulty in folding or assembling some formats.
The goal is to use enough material to perform reliably, not to make every hamper unnecessarily heavy.
A lighter construction may still produce a premium experience when the box geometry, insert, covering, and finish are properly resolved.
Choosing Board For Heavy Hamper Sets
Heavy hampers may require more than a different GSM.
The complete design may need:
A stronger base construction.
Additional support beneath concentrated loads.
Reinforced corners.
A suitable insert.
A different board structure.
An outer shipping box.
A revised carrying method.
A lower stacking limit.
Alternative product orientation.
Do not ask the board alone to solve a structural problem created by the whole pack.
Presentation Board And Shipping Packaging Serve Different Roles
A premium hamper box may be designed primarily for presentation rather than direct courier handling.
Where that is the case, an outer shipping box may help protect:
Corners.
Surface finishes.
Lids.
Magnetic closures.
Windows.
Decorative paper.
The product arrangement.
The best board grades for shipping are those selected as part of the full packaging system.
That may involve:
A presentation hamper.
A fitted insert.
Protective material.
An appropriately sized outer shipping box.
Do not assume that a premium-looking rigid box is intended to travel through a courier network without further protection.
Tray-Style And Lidded Hampers
Tray-style and lidded hampers place different demands on the board.
A tray may need:
Stable upright side walls.
Strong corners.
A base that remains flat.
Support for open display.
Compatibility with sleeves or wrapping.
A lidded hamper may also need:
Lid stiffness.
Controlled fit.
Resistance to stacking pressure.
Accurate hinge or magnetic alignment.
Consistent gaps around the lid.
For a deeper comparison, read Tray style versus lidded hampers for retail.
Read The Blog →
Test The Board In The Final Construction
Material samples are useful, but they do not show how the finished hamper will perform.
Your test sample should include:
Production-intent board.
Final dimensions.
Approved covering material.
Lamination or coating.
Adhesive.
Insert.
Products.
Protective materials.
Closure.
Outer shipping packaging where relevant.
A change to one of these components may alter the result.
If the supplier proposes a material substitution, request a new sample or supporting evidence before approving production.
A Practical Hamper Board Test
1. Inspect The Empty Box
Check the base, walls, corners, lid, folds, and surface finish.
2. Add The Insert
Confirm that the insert fits without spreading or distorting the box.
3. Pack The Products
Use the intended arrangement and protective materials.
4. Lift The Hamper
Handle it from the points a packer or recipient is likely to use. Look for base sag, wall movement, or corner distortion.
5. Close The Lid
Check alignment, gaps, pressure, and closure engagement.
6. Leave The Box Packed
Where appropriate, assess whether the shape changes after a representative storage period.
7. Test Stacking
Use an agreed method based on expected warehouse and transport conditions.
8. Review The Outer Shipping Pack
Confirm that the hamper remains protected and stable inside it.
9. Compare Several Units
One successful sample does not demonstrate production consistency.
10. Record The Result
Use agreed acceptance criteria rather than descriptions such as “feels strong enough”.
Board Grade Selection Checklist
Check
What To Confirm
Packed weight
Complete weight includes products, insert, and packaging
Weight distribution
Heavy items sit over suitable support
Box dimensions
Panel spans and wall heights are considered
Board construction
Microflute or rigid board suits the application
GSM
Recorded, but not used as the only strength measure
ECT
Reviewed where relevant to corrugated board
Base stiffness
No unacceptable sag during handling
Wall stiffness
Panels remain upright and aligned
Corner stability
Corners remain square and secure
Lid performance
Lid closes and stays aligned
Insert support
Insert distributes rather than concentrates load
Shipping format
Outer protection is included where required
Stacking
Expected conditions have been assessed
Production consistency
Multiple samples meet the standard
Sustainability
Claims are supported by material evidence
Supplier control
Approved specification can be repeated
Balancing Presentation And Cost
Premium presentation does not always require the heaviest board.
A better commercial decision balances:
Required strength.
Product protection.
Surface quality.
Print and finishing.
Packing speed.
Storage.
Transport.
Supplier lead time.
Minimum order quantity.
Damage and rejection risk.
Repeat-order consistency.
A cheaper board may create higher operational costs if it leads to damaged products, bowed panels, rework, or unsuitable stacking.
An unnecessarily heavy board may also add cost without improving the recipient experience.
The right specification earns its place in the box.
Calculate Total Cost Of Ownership
When comparing packaging options, include:
Unit price.
Tooling and sampling.
Inserts.
Protective materials.
Outer shipping packaging.
Storage.
Inbound transport.
Packing labour.
Damage.
Returns.
Rework.
Rejected packaging.
Seasonal availability.
Emergency replacements.
A board specification with a slightly higher purchase price may provide better value if it reduces failures elsewhere in the fulfilment process.
Any performance or cost-saving claim should be supported by the business’s own trial data or verifiable supplier evidence.
Supplier Reliability And Board Consistency
The approved material is only useful if the supplier can provide it consistently.
Ask:
Is the board grade clearly documented?
Which mill, paper, or material specification applies?
How are GSM and thickness checked?
Which ECT rating applies where relevant?
What production variation is expected?
Can the same construction be supplied for repeat orders?
How are material substitutions managed?
Are pre-production samples available?
How is finished-box performance inspected?
What lead times apply during seasonal peaks?
How are quality issues recorded and resolved?
Which certifications and sourcing documents are available?
A visually similar replacement material may not provide the same stiffness, fold performance, or surface finish.
Require approval before substitutions enter production.
Negotiating Board Specifications With Suppliers
A useful supplier conversation focuses on performance rather than requesting the thickest material at the lowest price.
Provide:
Box dimensions.
Product dimensions.
Packed weight.
Product arrangement.
Delivery method.
Stack expectations.
Storage conditions.
Presentation requirements.
Required order volume.
Seasonal forecast.
Sustainability criteria.
Then ask the supplier to explain why the proposed board suits the application.
Request alternatives where helpful, but compare them using the same packed test and quality criteria.
This creates a clearer basis for pricing and reduces the risk of buying a specification that sounds impressive but does not fit the operation.
Seasonal Fulfilment And Packaging Supply
Seasonal peaks can expose weaknesses in both packaging design and supplier planning.
Before demand increases, confirm:
Forecast volume.
Order deadlines.
Production capacity.
Material availability.
Safety stock.
Storage requirements.
Alternative approved suppliers.
Substitution controls.
Quality inspection plans.
Reorder lead times.
Do not wait for a material shortage before deciding whether an alternative board is acceptable.
Test and approve contingency specifications in advance where the risk justifies it.
Packaging Sustainability
Packaging sustainability should be supported by specific information.
Ask suppliers about:
Board and paper composition.
Recycled content percentages.
FSC-certified options.
Fibre sourcing.
Responsibly managed forests.
Plastic-free finishes where available.
Lamination and coating materials.
Adhesives.
Component separation.
Production waste controls.
Packaging reduction opportunities.
Supplier traceability.
Using responsibly sourced materials does not remove the need for suitable performance. A box that fails in fulfilment may waste the packaging, product, transport, and labour already invested in the order.
The goal is enough material to perform, supported by clear evidence.
ESG In Packaging Procurement
Environmental, social, and governance commitments may affect more than the board itself.
Procurement teams may also consider:
Supplier transparency.
Fibre sourcing.
Certification.
Labour and manufacturing standards.
Production locations.
Waste reporting.
Material efficiency.
Transport planning.
Audit documentation.
Claims governance.
Keep customer-facing claims precise.
Say:
Made with a stated percentage of recycled content.
FSC-certified options available.
Plastic-free finish options available.
Made using responsibly sourced paper, where supported.
Avoid unsupported claims such as:
100% sustainable.
Zero-waste.
Planet-saving.
Carbon-neutral, unless formally certified.
Eco-conscious packaging still needs evidence. Pretty promises are not a material specification.
Consumer Expectations And Presentation
Customers may expect packaging to protect the product, look considered, and avoid unnecessary material.
The correct board grade can support these expectations by helping the hamper:
Arrive without crushed panels.
Hold products securely.
Open cleanly.
Maintain its shape.
Avoid excessive filler.
Feel appropriate to the product value.
Support clear, accurate material claims.
Packaging influences the customer experience, but it should not make claims the supplier documentation cannot support.
Common Board Selection Mistakes
Choosing By GSM Alone
GSM measures material mass, not complete packaging performance.
Comparing ECT With Rigid Board As Though They Are Equivalent
ECT is a corrugated-board test and does not provide a direct comparison with solid rigid board.
Testing An Empty Box
The product, insert, and protective materials change how the packaging performs.
Ignoring Load Distribution
A concentrated jar or bottle load can stress the base differently from evenly distributed products.
Scaling Up Without Retesting
Larger panels may need a revised construction even when the products are similar.
Using Presentation Packaging As A Shipping Box
A premium hamper may still require an outer shipping box.
Approving One Sample
Review several units to understand production consistency.
Accepting Undocumented Material Changes
A substitute board may look similar but behave differently.
Over-Specifying Every Hamper
Unnecessary material can add cost and weight without improving performance.
Making Broad Sustainability Claims
Use certifications, percentages, and precise material descriptions.
Explore Cardboard Hamper Boxes With Lids
The right board grade should carry the products, protect the presentation, and support the packing operation without bringing unnecessary weight or cost.
Explore our range of cardboard hamper boxes with lids and compare samples using your complete product arrangement, insert, packed weight, and delivery method.
Explore The Range →
FAQs
What Is The Difference Between Microflute And Rigid Board Packaging?
Microflute contains a fine corrugated layer between liner materials, providing structural efficiency and some cushioning. Rigid board is a dense solid paperboard commonly used for premium wrapped gift boxes.
How Do GSM Ranges Affect Packaging Strength?
GSM describes the mass of paper or board per square metre. It can support material comparisons, but strength also depends on fibre quality, construction, dimensions, stiffness, folds, and the complete box design.
What Should Operations Managers Consider When Choosing Board Grades?
Consider complete packed weight, load distribution, box dimensions, inserts, handling, shipping, stacking, presentation, storage, supplier reliability, and supported sustainability requirements.
What Are The Benefits Of Sustainable Packaging Materials?
Verified recycled content, responsibly sourced fibres, and appropriate material reduction may support corporate packaging goals. The board must still perform reliably to avoid product damage and unnecessary waste.
How Does ECT Influence Hamper Packaging Choices?
ECT can help describe the edge compression resistance of corrugated board, including relevant microflute constructions. It should be considered alongside the finished box design and application-specific testing.
What Stiffness Cues Should I Check?
Check for base sag, bowed side walls, unstable corners, lid misalignment, permanent panel distortion, and changes after packing or stacking.
Why Are ECT Ratings Important?
ECT ratings provide information about how corrugated board resists edge compression. They can help suppliers and buyers assess suitability for stacking and handling, but they do not replace finished-box testing.
How Can Presentation Quality Be Balanced With Cost?
Select a board that meets the real performance requirement without unnecessary material. Compare total cost, including storage, labour, shipping, damage, returns, and rejected packaging.
Why Does Supplier Reliability Matter?
Packaging performance depends on receiving the approved material consistently. Supplier controls, lead times, substitution processes, quality checks, and documentation all affect repeat-order reliability.
How Do Consumer Expectations Affect Board Selection?
Customers expect packaging to arrive intact, feel appropriate to the product, and avoid obvious excess. Board selection influences protection, appearance, material use, and the credibility of sustainability claims.
/* Blog only: prevents link/button/table/FAQ styles leaking across the website */
.hamper-board-grades-blog a:not(.pill-outline){
color: #30acd9 !important;
font-weight: 700 !important;
text-decoration: underline !important;
text-underline-offset: 3px;
}
/* Pill outline button */
.hamper-board-grades-blog .pill-outline,
.hamper-board-grades-blog a.pill-outline{
display: inline-flex;
align-items: center;
justify-content: center;
gap: 10px;
padding: 12px 26px;
border: 2px solid #111;
border-radius: 9999px;
background: transparent;
color: #111 !important;
text-decoration: none !important;
font-family: inherit;
font-weight: 700;
font-size: 12px;
line-height: 1;
text-transform: uppercase;
letter-spacing: 0.08em;
cursor: pointer;
user-select: none;
transition: background-color 160ms ease, color 160ms ease, transform 120ms ease;
}
.hamper-board-grades-blog .pill-outline__text{
color: inherit;
font-weight: 700;
text-decoration: none !important;
}
.hamper-board-grades-blog .pill-outline__arrow{
color: inherit;
text-decoration: none !important;
font-size: 14px;
line-height: 1;
transform: translateY(-0.5px);
}
.hamper-board-grades-blog .pill-outline:hover{
background: #111;
color: #fff !important;
text-decoration: none !important;
}
.hamper-board-grades-blog .pill-outline:hover .pill-outline__text,
.hamper-board-grades-blog .pill-outline:hover .pill-outline__arrow{
color: #fff !important;
text-decoration: none !important;
}
.hamper-board-grades-blog .pill-outline:active{
transform: translateY(1px);
}
.hamper-board-grades-blog .pill-outline:focus-visible{
outline: 2px solid #e9b448;
outline-offset: 3px;
}
/* Tables */
.hamper-board-grades-blog .table-wrap{
width: 100%;
overflow-x: auto;
border: 1px solid rgb(234, 232, 230);
border-radius: 18px;
background: #fff;
margin: 14px 0 26px 0;
}
.hamper-board-grades-blog .tb-table{
width: 100%;
border-collapse: collapse;
min-width: 780px;
font-family: Arial, sans-serif;
}
.hamper-board-grades-blog .tb-table thead th{
text-align: left;
font-weight: 700;
font-size: 14px;
padding: 14px 14px;
border-bottom: 1px solid rgb(234, 232, 230);
background: #fafafa;
white-space: nowrap;
}
.hamper-board-grades-blog .tb-table td{
font-size: 14px;
line-height: 1.5;
padding: 14px 14px;
border-bottom: 1px solid rgb(234, 232, 230);
vertical-align: top;
}
.hamper-board-grades-blog .tb-table tbody tr:last-child td{
border-bottom: none;
}
/* FAQ */
.hamper-board-grades-blog .faq{
width: 90%;
max-width: 900px;
margin: 0 auto 32px auto;
font-family: Arial, sans-serif;
}
.hamper-board-grades-blog .faq-title{
text-align: center;
margin: 0 0 14px 0;
font-size: 24px;
line-height: 1.3;
}
.hamper-board-grades-blog .faq-item{
border: 1px solid rgb(234, 232, 230);
border-radius: 25px;
background: #fff;
overflow: hidden;
margin: 10px 0;
}
.hamper-board-grades-blog .faq-item summary{
position: relative;
list-style: none;
cursor: pointer;
padding: 16px 56px 16px 18px;
font-weight: 700;
font-size: 16px;
line-height: 1.4;
outline: none;
user-select: none;
}
.hamper-board-grades-blog .faq-item summary::-webkit-details-marker{ display: none; }
.hamper-board-grades-blog .faq-item summary::after{
content: "\25B8";
position: absolute;
right: 18px;
top: 50%;
transform: translateY(-50%);
transition: transform 160ms ease;
font-size: 18px;
line-height: 1;
opacity: 0.8;
}
.hamper-board-grades-blog .faq-item[open] summary::after{
transform: translateY(-50%) rotate(90deg);
}
.hamper-board-grades-blog .faq-content{
padding: 12px 18px 18px 18px;
margin-top: 6px;
font-size: 15px;
line-height: 1.6;
color: #333;
border-top: 1px solid rgb(234, 232, 230);
background-color: #fff;
}
.hamper-board-grades-blog .faq-item summary:hover{ background: #fafafa; }
.hamper-board-grades-blog .faq-item summary:focus-visible{
outline: 2px solid #e9b448;
outline-offset: 2px;
border-radius: 18px;
}
@media (max-width: 600px){
.hamper-board-grades-blog .faq-title{ font-size: 22px; }
.hamper-board-grades-blog .faq-item summary{ font-size: 15px; padding: 14px 48px 14px 16px; }
.hamper-board-grades-blog .faq-content{ font-size: 14px; padding: 14px 16px 16px 16px; margin-top: 4px; }
.hamper-board-grades-blog .tb-table{ min-width: 720px; }
}

Selecting The Perfect Hamper Box Size For Bottles, Jars, And Gift Sets.
Selecting The Perfect Hamper Box Size For Bottles, Jars, And Gift Sets
The right hamper box makes every product look as though it belongs there.
Too small, and bottles, jars, or gift items may press against one another, distort the box, or leave no room for protective packaging. Too large, and the contents can slide around while the presentation feels sparse rather than generous.
For a small e-commerce business, box size affects more than the unboxing moment. It influences stock levels, storage space, packing speed, shipping costs, product protection, and how many packaging variations the team needs to manage.
This guide explains how to choose the right hamper box size by mapping the footprint of your products to the box’s usable internal space. It includes practical approaches for bottles, jars, mixed gift sets, and growing product ranges.
Need Hamper Boxes to get you started?
Explore The Range →
How Do You Choose The Right Hamper Box Size?
Choose a hamper box by measuring the complete product arrangement, including inserts and protective materials, then comparing that footprint with the box’s internal length, width, and height. The contents should fit securely without being crushed, overcrowded, or able to move freely.
A reliable process follows five steps:
Measure every product at its widest and tallest points.
Decide how the products will be arranged.
Include the insert, dividers, and protective materials.
Compare the completed footprint with the box’s internal dimensions.
Test the packed box before ordering a larger quantity.
The best hamper box sizes for e-commerce are not simply the closest dimensions available. They are the sizes that support the product, presentation, packing process, and delivery method together.
Use Internal Dimensions, Not External Dimensions
Product fit should always be assessed against the usable internal space.
External dimensions include the board, walls, lid, folds, and construction of the box. They do not tell you exactly how much room is available for the contents.
When comparing hamper boxes, look for:
Internal length.
Internal width.
Internal depth or height.
Any reduction caused by the lid.
The thickness of internal walls.
The dimensions of the insert.
Space occupied by dividers or corner supports.
If internal measurements are not clearly listed, ask the supplier before ordering.
A few millimetres can matter when several rigid products need to sit side by side, especially once dividers and cushioning are added.
Measure The Products At Their Widest Points
Packaging should be based on the largest real dimensions of each product, not only the dimensions printed on a label or specification sheet.
Measure:
The widest point.
The deepest point.
The total height.
The lid, cap, pump, handle, or decorative feature.
Any product packaging that will remain in place.
Irregular shapes or protruding components.
For bottles, the shoulder or cap may be wider than the main body.
For jars, the lid may extend beyond the container.
For pouches and wrapped products, the filled shape may differ from the flat packaging dimensions.
Measure physical products wherever possible. Supplier measurements are useful, but a sample allows you to identify the small details that decide whether the arrangement looks considered or crowded.
Map The Complete Product Footprint
The product footprint is the total area occupied by the arranged contents when viewed from above.
Do not calculate every product separately and assume the totals will fit. Arrange the items in the way they will appear inside the hamper, then measure the complete group.
A useful sizing method is:
Required internal length = arranged product length + insert structure + protective allowance.
Required internal width = arranged product width + insert structure + protective allowance.
Required internal height = tallest packed item + base support + lid clearance.
The appropriate allowance depends on the products, box construction, insert, and delivery method. There is no universal gap that suits every hamper.
Create a physical layout using the real products, or make simple card templates to represent their footprints. This lets you test arrangements before committing to the box.
Decide On The Arrangement Before Choosing The Box
The same products can require very different box sizes depending on how they are arranged.
Possible layouts include:
A single row.
A two-by-two grid.
A central hero product with smaller items around it.
Bottles positioned upright.
Bottles placed horizontally in fitted supports.
Products grouped by height.
A layered arrangement with a raised insert.
Separate compartments for fragile items.
The arrangement should support the story of the gift.
A hero product may deserve more space and visual focus. Smaller products can be grouped around it, but they should not appear squeezed into leftover gaps.
The neatest arrangement is not always the most space-efficient one. Balance presentation with the cost and practicalities of the final box.
Choosing A Hamper Box For Bottles
Bottles need enough room for their complete diameter, cap, shoulder, and any protective support.
First decide whether the bottles will be packed upright or horizontally.
Upright Bottles
An upright presentation can make labels visible and create a strong reveal when the lid is opened.
Check:
Total bottle height.
Lid clearance.
Stability at the base.
Space for dividers.
Movement around the neck.
Whether the bottle can lean.
The effect of the bottle’s weight on the base.
A bottle should not rely on shredded paper alone to remain upright during handling.
Horizontal Bottles
Horizontal placement can suit shallow hampers or create a more secure position for longer bottles.
Check:
Complete bottle length.
The widest diameter.
Support around the neck and base.
Whether the bottle can roll.
Label visibility.
Clearance from nearby products.
The strength of the insert or divider.
For courier delivery, bottle protection needs more detailed testing than visual presentation alone. This guide focuses on selecting the general hamper size rather than designing a specialist bottle-shipping system.
Choosing A Hamper Box For Jars
Jars are often compact but heavy for their size.
When fitting jars into hamper boxes, consider:
Lid diameter.
Base diameter.
Jar height.
Glass or breakable construction.
Product weight.
Space between jars.
Divider thickness.
Whether labels need to face upwards or forwards.
The stability of the base.
Several jars placed closely together may fit the footprint but create a heavy concentrated load.
The hamper box, base, and insert should all be suitable for the combined packed weight. For more guidance, read Choose board grades that carry the weight.
Read The Blog →
Choosing A Hamper Box For Mixed Gift Sets
Mixed gift sets can include products with very different shapes, weights, and heights.
Start with the largest or most visually important item, then arrange the smaller products around it.
Consider:
Which product should be seen first.
Whether labels face the recipient.
How different heights affect the presentation.
Whether heavier items sit over a supported area.
Whether fragile items need separation.
How gaps will be filled.
Whether the arrangement remains stable when the box is lifted.
Whether the same layout can be packed consistently.
A mixed set should feel curated, not as though every product was persuaded into the nearest available space.
Photograph the approved arrangement and use it as a packing reference. This can improve consistency across staff, shifts, and seasonal workers.
Measure The Packed Height Carefully
The tallest product does not always determine the complete required height.
You may also need room for:
A base pad.
A raised insert.
Tissue paper.
Protective material.
Product lids or pumps.
A presentation card.
A folded message.
Decorative filler.
Lid construction.
Close the sample box naturally.
The lid should not press against the contents, push products sideways, or sit visibly raised. There should also not be so much unused vertical space that the products can leave their intended positions.
For delicate products, include the protection required above and below the contents in the height calculation.
Include Inserts And Dividers From The Start
An insert does not fit into leftover space. It creates the structure that holds and presents the products.
Its construction may reduce the usable internal dimensions through:
Side walls.
Dividers.
Folded supports.
Cut-outs.
Finger access.
Raised platforms.
Protective pads.
Product cavities.
Designing the arrangement first and adding the insert afterwards can result in a box that appears large enough but is too tight once the final structure is installed.
Whenever possible, test:
The empty box.
The insert.
The products inside the insert.
The fully closed hamper.
The packed hamper after normal handling.
The final sample should represent the packaging you intend to send, not an optimistic arrangement with the protective components removed.
Allow Room For Protective Packaging
The right amount of protective material depends on the product and delivery method.
Possible materials include:
Tissue paper.
Paper padding.
Corrugated inserts.
Board dividers.
Moulded fibre components.
Shredded paper.
Protective sleeves.
Corner supports.
Product-specific fittings.
Do not select an oversized hamper simply to hold large amounts of decorative filler.
Excess space can allow movement, increase material use, and make the gift look less considered. A better-sized box with a purposeful insert often creates a cleaner presentation.
Where protection is critical, complete appropriate handling and shipping tests before approving the packaging.
Consider Product Weight As Well As Size
A product arrangement can fit within the dimensions and still be unsuitable for the box.
Check the combined weight of:
Every product.
The insert.
Protective materials.
The box.
Printed materials or accessories.
Weight affects:
Base strength.
Side-wall stability.
Lid performance.
Carrying comfort.
Stacking.
Packing-station handling.
Outer shipping packaging.
Courier requirements.
The correct board grade and construction should be confirmed with the packaging supplier using the complete packed weight.
The brief does not provide universal load limits, so these should not be assumed from the appearance of the box alone.
Tray-Style Or Lidded Hamper?
The choice between a tray-style hamper and a lidded box affects both sizing and presentation.
Tray-Style Hampers
A tray can provide:
Open product visibility.
Quick packing access.
A display-led presentation.
Easy use with clear wrapping or a sleeve.
A lower overall structure.
However, it may require additional protection or outer packaging for delivery.
Lidded Hampers
A lidded hamper can provide:
A concealed reveal.
More complete product coverage.
Better stacking potential.
A surface for branding.
A more traditional gift-box experience.
The lid construction may reduce internal height or require extra clearance around the products.
Choose the format by considering retail display, gifting experience, transport, storage, and packing speed, not only appearance.
Window Hampers And Product Visibility
A window can display the contents while keeping them inside a structured box.
When sizing a window hamper, consider:
Which products need to remain visible.
The position of labels.
The distance between the product and window.
Whether products can move out of view.
How the window affects stacking.
Whether the window remains flat.
The material used for the window.
How the different components may be separated after use.
The insert should hold products in the intended viewing area.
A larger window does not automatically improve presentation. It should frame the products rather than reveal empty gaps or protective materials.
Test With A Simple Card Mock-Up
Before ordering samples, make a basic internal-space mock-up.
Use card, paper, or a reusable tray to represent the proposed length, width, and height. Place the actual products inside and assess:
Overall footprint.
Product spacing.
Label visibility.
Height differences.
Insert requirements.
Presentation balance.
Empty areas.
Potential movement.
Ease of removal.
This is not a replacement for a production sample, but it can quickly eliminate unsuitable sizes.
Photograph each arrangement from above and at the expected opening angle. The layout that looks efficient on a measurement sheet may feel very different when viewed as a gift.
How Much Empty Space Is Too Much?
Empty space is not automatically a problem. It can help create visual focus, allow finger access, and prevent products from appearing crowded.
It becomes a problem when it:
Allows products to move.
Requires excessive filler.
Makes the hamper look unfinished.
Increases the shipping size unnecessarily.
Weakens the presentation.
Creates inconsistent packing.
Makes the box difficult to store economically.
Each empty area should have a reason.
Space around a hero product may feel deliberate. A large unexplained gap beside a small jar usually does not.
Avoid Packing Products Too Tightly
A very close fit may seem efficient, but it can create problems during packing and use.
Products packed too tightly may:
Be difficult to insert.
Rub against one another.
Damage labels.
Put pressure on glass.
Distort the insert.
Make items difficult to remove.
Slow the packing process.
Perform inconsistently when product dimensions vary slightly.
Include realistic manufacturing variation in the product, label, insert, and box.
A sample built around one unusually small jar may not represent the next delivery.
Test The Unboxing Experience
Size affects the recipient’s experience from the moment the lid opens.
Check whether:
The products remain in their intended positions.
The main item is immediately visible.
Labels face the right direction.
The arrangement looks full but not crowded.
Each product can be removed comfortably.
Protective materials feel purposeful.
The gift can be repacked if required.
The box still looks neat after the first item is removed.
Packaging should make the gift easier to enjoy, not turn product removal into an escape-room challenge.
Shipping And Outer Packaging
A hamper gift box may still need an outer shipping box for courier delivery.
The combined packaging needs to account for:
Hamper external dimensions.
Protective space around the hamper.
Packed weight.
Movement inside the outer box.
Corner protection.
Courier handling.
Labels and documents.
Returns requirements.
Choosing a very large hamper can increase the size of the outer shipping packaging as well as the amount of internal protection required.
Test the complete shipping configuration, not only the presentation box.
For businesses managing recurring product deliveries, read Subscription box packaging explained.
Read The Blog →
Stacking Hampers Safely
Stacking can save warehouse and packing-station space, but it also places pressure on the lower boxes.
Before stacking packed hampers, assess:
Combined product weight.
Box construction.
Lid strength.
Stack height.
Storage duration.
Humidity and temperature.
Whether contents create uneven pressure.
Whether a window can deform.
Whether boxes slide against one another.
Do not assume that an empty hamper’s appearance predicts its packed stacking performance.
Agree suitable stacking and storage guidance with the supplier and test the actual packed format where required.
Improving Order Fulfilment With Fewer Box Sizes
A small product range does not always need a different hamper for every gift set.
Where possible, identify a controlled family of sizes that supports several arrangements.
For example:
A compact size for one or two small products.
A medium size for core gift sets.
A larger size for premium or seasonal collections.
The exact dimensions should reflect the actual products rather than generic size names.
A smaller packaging range can help with:
Stock control.
Reordering.
Storage.
Staff training.
Packing consistency.
Supplier management.
Photography.
Inventory forecasting.
Avoid reducing the range so far that every product is packed into an oversized box. Standardisation should support the product rather than weaken the presentation.
Packing Instructions For Repeatable Gift Sets
Once a box size and arrangement are approved, document the setup.
Include:
Box SKU.
Insert SKU.
Product list.
Product orientation.
Placement order.
Required protective materials.
Label direction.
Finished-box photograph.
Quality checks.
Outer shipping packaging.
Any weight or handling requirements.
For small teams, a clear photograph may be enough to prevent inconsistent arrangements.
For growing operations or a fulfilment company in the UK, structured packing instructions help ensure the presentation remains consistent when fulfilment moves beyond the founder’s own desk.
Managing Packaging Inventory
Hamper sizing affects how much packaging stock the business must store.
Before ordering, consider:
Minimum order quantity.
Flat or assembled storage format.
Carton size.
Reorder lead time.
Seasonal sales.
Product-launch timing.
Number of packaging SKUs.
Storage conditions.
Forecast variation.
Supplier reliability.
A premium box that is frequently unavailable is not a dependable packaging solution.
Test the core sizes first, keep the range understandable, and confirm restocking expectations with the supplier before building a product offer around a specific format.
Shipping Returns And Reuse
Where customers may return products, consider whether the hamper and its outer packaging can support the journey.
Ask:
Can the products be placed back into the insert?
Does the lid still close after opening?
Is the outer packaging reusable?
Are return instructions clear?
Does the decorative presentation interfere with secure repacking?
Can the box withstand the expected handling?
A gift hamper may not be intended as the sole returns package, but its size and construction can still affect how easy the process feels.
Cost-Effective Hamper Sizing
The lowest-priced box is not always the most cost-effective choice.
A poorly sized hamper may increase costs through:
Excess filler.
Larger outer shipping boxes.
Higher storage requirements.
Slower packing.
Product damage.
Rework.
Additional packaging SKUs.
Higher rejection rates.
Inconsistent presentation.
More complex stock management.
Compare the complete packed cost, including:
Hamper box.
Insert.
Protective materials.
Outer shipping packaging.
Labour.
Storage.
Delivery.
Damage or returns.
Packaging waste.
Any cost-saving claim should be based on the business’s own verified order and fulfilment data.
Sustainable Packaging Solutions
Sustainable packaging starts with choosing an appropriate size.
A right-sized hamper may help reduce unnecessary board, filler, outer packaging, and shipping volume. These benefits should still be described accurately and supported where claims are made.
Ask suppliers about:
Board and paper composition.
Recycled content percentages.
FSC-certified options.
Plastic-free material options where available.
Window materials.
Laminations and coatings.
Adhesives.
Component separation.
Production waste controls.
Packaging reduction opportunities.
Supplier documentation.
“Biodegradable packaging materials” and “eco-friendly packaging materials” are broad terms. Confirm the exact material, conditions, certification, and disposal route before using them in customer-facing claims.
Avoid unsupported terms such as “100% sustainable”, “zero-waste”, or “planet-saving”.
Common Hamper Box Sizing Mistakes
Choosing By External Dimensions
The usable internal space may be smaller than the headline box dimensions.
Measuring Products Separately
Measure the complete arrangement, including dividers and protection.
Forgetting Caps And Lids
The widest or tallest point may not be the main body of the product.
Ignoring Weight
Several compact jars can create a substantial combined load.
Adding The Insert Last
The insert reduces the available internal space and should be included from the start.
Using Filler To Correct An Oversized Box
Decorative material cannot always prevent movement or create a purposeful presentation.
Testing The Empty Box Only
The packed product may change the base, walls, lid, or stacking performance.
Ordering Too Many Sizes
A complicated packaging range increases storage and stock-management demands.
Standardising Too Aggressively
One large box for every gift set can increase waste and weaken presentation.
Approving Without A Shipping Test
A beautiful hamper may still need extra protection for courier handling.
Hamper Box Sizing Checklist
Check
What To Confirm
Product dimensions
Every item measured at its widest and tallest points
Arrangement
Final product layout agreed
Internal box size
Length, width, and height checked
Insert
Walls, dividers, and supports included
Protection
Required cushioning included
Packed height
Lid closes without pressure
Product movement
Items remain in their intended positions
Weight
Box and insert suit the combined load
Presentation
Labels and hero products remain visible
Removal
Products can be lifted out comfortably
Shipping
Outer packaging and handling assessed
Storage
Box format suits available stock space
Repeatability
Different packers can reproduce the layout
Sustainability
Claims supported by material evidence
Supplier approval
Final sample and specification retained
Explore Hamper Gift Boxes
The best hamper size makes packing simpler and the gift feel more considered.
Explore our range of hamper gift boxes and compare the internal dimensions against your complete product arrangement before placing a larger order.
Explore Our Range →
FAQs
How Do I Choose The Right Hamper Box Size For My Products?
Measure the complete arranged footprint of the products, then add the space required for the insert and protective packaging. Compare the result with the box’s internal length, width, and height.
What Should I Consider When Selecting A Hamper Box Size?
Consider product dimensions, weight, layout, insert construction, cushioning, lid clearance, shipping method, storage, packing speed, and presentation.
How Can I Fit Bottles, Jars, And Gift Sets Into A Hamper?
Start with the largest or most important item, then arrange the remaining products around it. Use suitable dividers or inserts to prevent movement and test the packed box before ordering stock.
What Are The Dimensions Of Common Hamper Box Sizes?
Hamper dimensions vary between products and suppliers, and labels such as small, medium, or large are not standard measurements. Compare the listed internal dimensions with your own product footprint.
How Does Product Size Affect Packaging Choice?
Product dimensions determine the minimum internal footprint and height. Shape, weight, fragility, and label orientation also affect the box and insert required.
What Are The Benefits Of Using The Right-Sized Hamper?
A suitable size can improve product stability, presentation, packing consistency, stock management, and shipping efficiency while reducing unnecessary filler and empty space.
How Can Hamper Packaging Be Cost-Effective And Sustainable?
Use a box that fits the complete arrangement without excess space, standardise a sensible range of sizes, and request clear evidence for materials, recycled content, and certifications.
Which Products Fit Well In Particular Hamper Sizes?
Compact hampers may suit one or two small jars or accessories, while larger boxes may suit bottle combinations or multi-product gift sets. Exact suitability depends on the internal dimensions and complete packed arrangement.
How Can Packaging Improve Product Presentation?
A considered layout keeps products facing the right direction, gives the main item visual focus, and prevents products from shifting before the box is opened.
How Can Packaging Improve Order Fulfilment And Inventory Management?
A controlled set of hamper sizes, clear packaging SKUs, photographed layouts, and documented packing instructions can simplify stock control and help different packers produce consistent results.
/* Blog only: prevents link/button/table/FAQ styles leaking across the website */
.hamper-box-sizing-blog a:not(.pill-outline){
color: #30acd9 !important;
font-weight: 700 !important;
text-decoration: underline !important;
text-underline-offset: 3px;
}
/* Pill outline button */
.hamper-box-sizing-blog .pill-outline,
.hamper-box-sizing-blog a.pill-outline{
display: inline-flex;
align-items: center;
justify-content: center;
gap: 10px;
padding: 12px 26px;
border: 2px solid #111;
border-radius: 9999px;
background: transparent;
color: #111 !important;
text-decoration: none !important;
font-family: inherit;
font-weight: 700;
font-size: 12px;
line-height: 1;
text-transform: uppercase;
letter-spacing: 0.08em;
cursor: pointer;
user-select: none;
transition: background-color 160ms ease, color 160ms ease, transform 120ms ease;
}
.hamper-box-sizing-blog .pill-outline__text{
color: inherit;
font-weight: 700;
text-decoration: none !important;
}
.hamper-box-sizing-blog .pill-outline__arrow{
color: inherit;
text-decoration: none !important;
font-size: 14px;
line-height: 1;
transform: translateY(-0.5px);
}
.hamper-box-sizing-blog .pill-outline:hover{
background: #111;
color: #fff !important;
text-decoration: none !important;
}
.hamper-box-sizing-blog .pill-outline:hover .pill-outline__text,
.hamper-box-sizing-blog .pill-outline:hover .pill-outline__arrow{
color: #fff !important;
text-decoration: none !important;
}
.hamper-box-sizing-blog .pill-outline:active{
transform: translateY(1px);
}
.hamper-box-sizing-blog .pill-outline:focus-visible{
outline: 2px solid #e9b448;
outline-offset: 3px;
}
/* Tables */
.hamper-box-sizing-blog .table-wrap{
width: 100%;
overflow-x: auto;
border: 1px solid rgb(234, 232, 230);
border-radius: 18px;
background: #fff;
margin: 14px 0 26px 0;
}
.hamper-box-sizing-blog .tb-table{
width: 100%;
border-collapse: collapse;
min-width: 780px;
font-family: Arial, sans-serif;
}
.hamper-box-sizing-blog .tb-table thead th{
text-align: left;
font-weight: 700;
font-size: 14px;
padding: 14px 14px;
border-bottom: 1px solid rgb(234, 232, 230);
background: #fafafa;
white-space: nowrap;
}
.hamper-box-sizing-blog .tb-table td{
font-size: 14px;
line-height: 1.5;
padding: 14px 14px;
border-bottom: 1px solid rgb(234, 232, 230);
vertical-align: top;
}
.hamper-box-sizing-blog .tb-table tbody tr:last-child td{
border-bottom: none;
}
/* FAQ */
.hamper-box-sizing-blog .faq{
width: 90%;
max-width: 900px;
margin: 0 auto 32px auto;
font-family: Arial, sans-serif;
}
.hamper-box-sizing-blog .faq-title{
text-align: center;
margin: 0 0 14px 0;
font-size: 24px;
line-height: 1.3;
}
.hamper-box-sizing-blog .faq-item{
border: 1px solid rgb(234, 232, 230);
border-radius: 25px;
background: #fff;
overflow: hidden;
margin: 10px 0;
}
.hamper-box-sizing-blog .faq-item summary{
position: relative;
list-style: none;
cursor: pointer;
padding: 16px 56px 16px 18px;
font-weight: 700;
font-size: 16px;
line-height: 1.4;
outline: none;
user-select: none;
}
.hamper-box-sizing-blog .faq-item summary::-webkit-details-marker{ display: none; }
.hamper-box-sizing-blog .faq-item summary::after{
content: "\25B8";
position: absolute;
right: 18px;
top: 50%;
transform: translateY(-50%);
transition: transform 160ms ease;
font-size: 18px;
line-height: 1;
opacity: 0.8;
}
.hamper-box-sizing-blog .faq-item[open] summary::after{
transform: translateY(-50%) rotate(90deg);
}
.hamper-box-sizing-blog .faq-content{
padding: 12px 18px 18px 18px;
margin-top: 6px;
font-size: 15px;
line-height: 1.6;
color: #333;
border-top: 1px solid rgb(234, 232, 230);
background-color: #fff;
}
.hamper-box-sizing-blog .faq-item summary:hover{ background: #fafafa; }
.hamper-box-sizing-blog .faq-item summary:focus-visible{
outline: 2px solid #e9b448;
outline-offset: 2px;
border-radius: 18px;
}
@media (max-width: 600px){
.hamper-box-sizing-blog .faq-title{ font-size: 22px; }
.hamper-box-sizing-blog .faq-item summary{ font-size: 15px; padding: 14px 48px 14px 16px; }
.hamper-box-sizing-blog .faq-content{ font-size: 14px; padding: 14px 16px 16px 16px; margin-top: 4px; }
.hamper-box-sizing-blog .tb-table{ min-width: 720px; }
}
